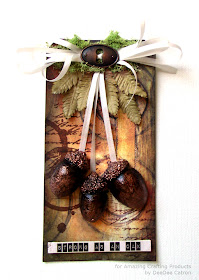
Hi hi hi friends! DeeDee here today, it's been a while but I'm excited to be back on the Amazing Crafting Products blog sharing some of my works with you.
Today I'm doing a start to finish photo tutorial in a super FALL HARVEST
theme. I'm so pumped for September right around the corner, and can't
wait for the weather here in Vegas to relax just a little bit more.
Let's get started shall we?
1) Start with a tag base. My tag is a sheet of 7 Dots Studio paper by
Finnabair cut using a Sizzix / Tim Holtz die.
2) Distress edges with Walnut Stain Distress Ink and water.
3) Mix equal parts of Amazing Mold Putty parts "A" and "B".
4) Form Amazing Mold Putty around acorns.
TIP: I like to have a nice flat back of my resin pieces to secure to the paper
or project that I'm working on. SO I only mold half way around the piece.
6) Build up base of tag with stamps, ribbons,
flowers, and embellishments.
7) I felt like my acorns needed some texture and color, so I embossed
them with some WOW copper embossing powder.
I love altering the Amazing Casting Resin AFTER it's cured (as opposed to before),
because I don't need to worry about altering my mold or changing the original piece.
8) Distress with black acrylic paint.
9) Finish by layering the acorns up and adhering a sentiment.
There really are .. a TON of ways to finish your resin pieces;
glass beads, adhesives, powders, flocking, inks, mists, paints, more resin!
What have you always wanted to try?
. . . . . . . . . . . . . . . .
Don't miss a single post!
Please subscribe to our blog on the right side bar:
Twitter at @AmazingCrafting | Facebook at AmazingMoldPutty | YouTube at AmazingMoldPutty


No comments:
Post a Comment