

Hello there, this is Maria and today I bring you a post about the Amazing Mold Rubber. It's a great product and so easy to use... and it is great at capturing every little detail from what ever items you use to make molds. I wanted to try something different, I wanted to make a mold I could use to stamp with and also to mold with. I decided to use some of my sketches – a rose and a heart with a little paw and I figured I could use these to create a couple of stamps.


So in order to create my images for molding I taped the copies of my sketches to the bottom of the plastic container. I would have used hot glue like I've done before, but I was afraid the heat would melt my plastic container – so I used my dimensional black paint to transfer the designs on the plastic container.

Since I had room for another image, I made a heart with the word MOM inside the heart... perfect to create something for Mother's Day. Once the paint dried I went over each image again, just to make sure I had enough dimension for my molds.
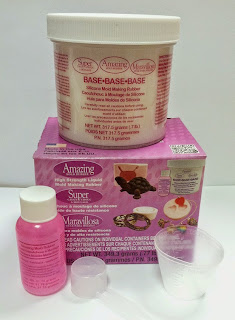
Amazing Mold Rubber is so easy to use. It cures in about 2-4 hours depending on the temperature and humidity. CLICK HERE to view mixing/preparation. I mixed up the entire Amazing Mold Rubber kit for this mold, because of the size of my box.


Now that everything is mixed, it's time to pour everything into my plastic container and wait for the rubber to set. It was late so I just left it alone until the next day.


Now the time to reveal my molds! I was worried I wouldn't have enough dimension on my molds for what I wanted to do and I was happy to see the final results. I love the details and now the fun begins!

I had a couple of projects in mind, but first I wanted to try these out as stamps. So I took out a canvas that had a bit of color added.

I used some Colorbox ink pads to color my stamps with and see how it would show on the canvas. I also took some pink tissue paper to test them on.

Rose stamped on canvas.

Rose stamped on pink tissue paper.
I loved how the image of the rose came out,
it was exactly what I was looking for!

Next it was time to use some resin to see if I could create some embellishments with these molds. I added some color to the mold using Alumidust and Alumilite Metallic Powders, and poured some Amazing Casting Resin for my first try. I liked how they came out. I used pink and green Alumidust on the rose and the metallic powders on the two hearts.

Here I've prepared some Amazing Casting Resin. I took a bit of the light pink Alumidust and added it to part "A", mixed it well and then added part "B" of the resin. Since this resin sets fast, I had to mix and pour before it began to feel warm – once the resin feels warm it's a sign that the resin is ready to cure. CLICK HERE to view mixing/preparation.

In the rose, you can see the resin going from clear to opaque. The heart in the center is a second pour... the first one set faster than the other two, so I mixed a little bit of resin with no color so I could make a plain casting.

Here are my resin pieces – they are pretty thin, but that is what I was going for, and these are just what I wanted. Next is to trim off the excess resin around each piece and they are ready to be used. While the resin is still soft it can be trimmed easily with scissors.
I'm really happy with my new molds! I will be able to stamp with them and use resin on them too, so these will get used a lot.

I've used my mold to stamp on canvas, tissue paper
and to cast some resin embellishments.


I made a simple Mother's Day card using the stamped pink tissue paper and the "MoM" heart resin piece. I used some tacky glue to add the stamped tissue paper to the card stock and to glue the heart on the card as well.

Here is my finished card – adding a little bit of glitter paint to finish it up.

The canvas I had used to test the rose stamp, well I decided to use the stamps and the rest of the tissue paper I had stamped on before, I figure I could use these to finish a background to my canvas.
What designs would you create
stamps using Amazing Mold Rubber?
Making your own molds is fun, but I love using my own designs to create molds that can have more than one use. I will be cutting this mold into three pieces – it will be a lot easier to use and store.
I recommend these products, give them a try if you haven't already... you will be hooked like me. Make sure to share your creations with us, we love to see what others create with these #AmazingCastingProducts.
Thanks for visiting! I invite you to stop over to my blog "What is Creativity"
at http://chuy-creativity.blogspot.com to see more of my creations. ~ Maria Soto
• • • • • • • • • • • • • • • • •
Don't forget to subscribe to our blog on the right side bar:
Twitter at AmazingCrafting | Facebook at AmazingMoldPutty | YouTube at AmazingMoldPutty


