Showing posts with label St. Patrick's Day. Show all posts

Wednesday, March 9

With a Bit of #Cre8time Luck! St. Patrick's Day Decor by Lyn Gill


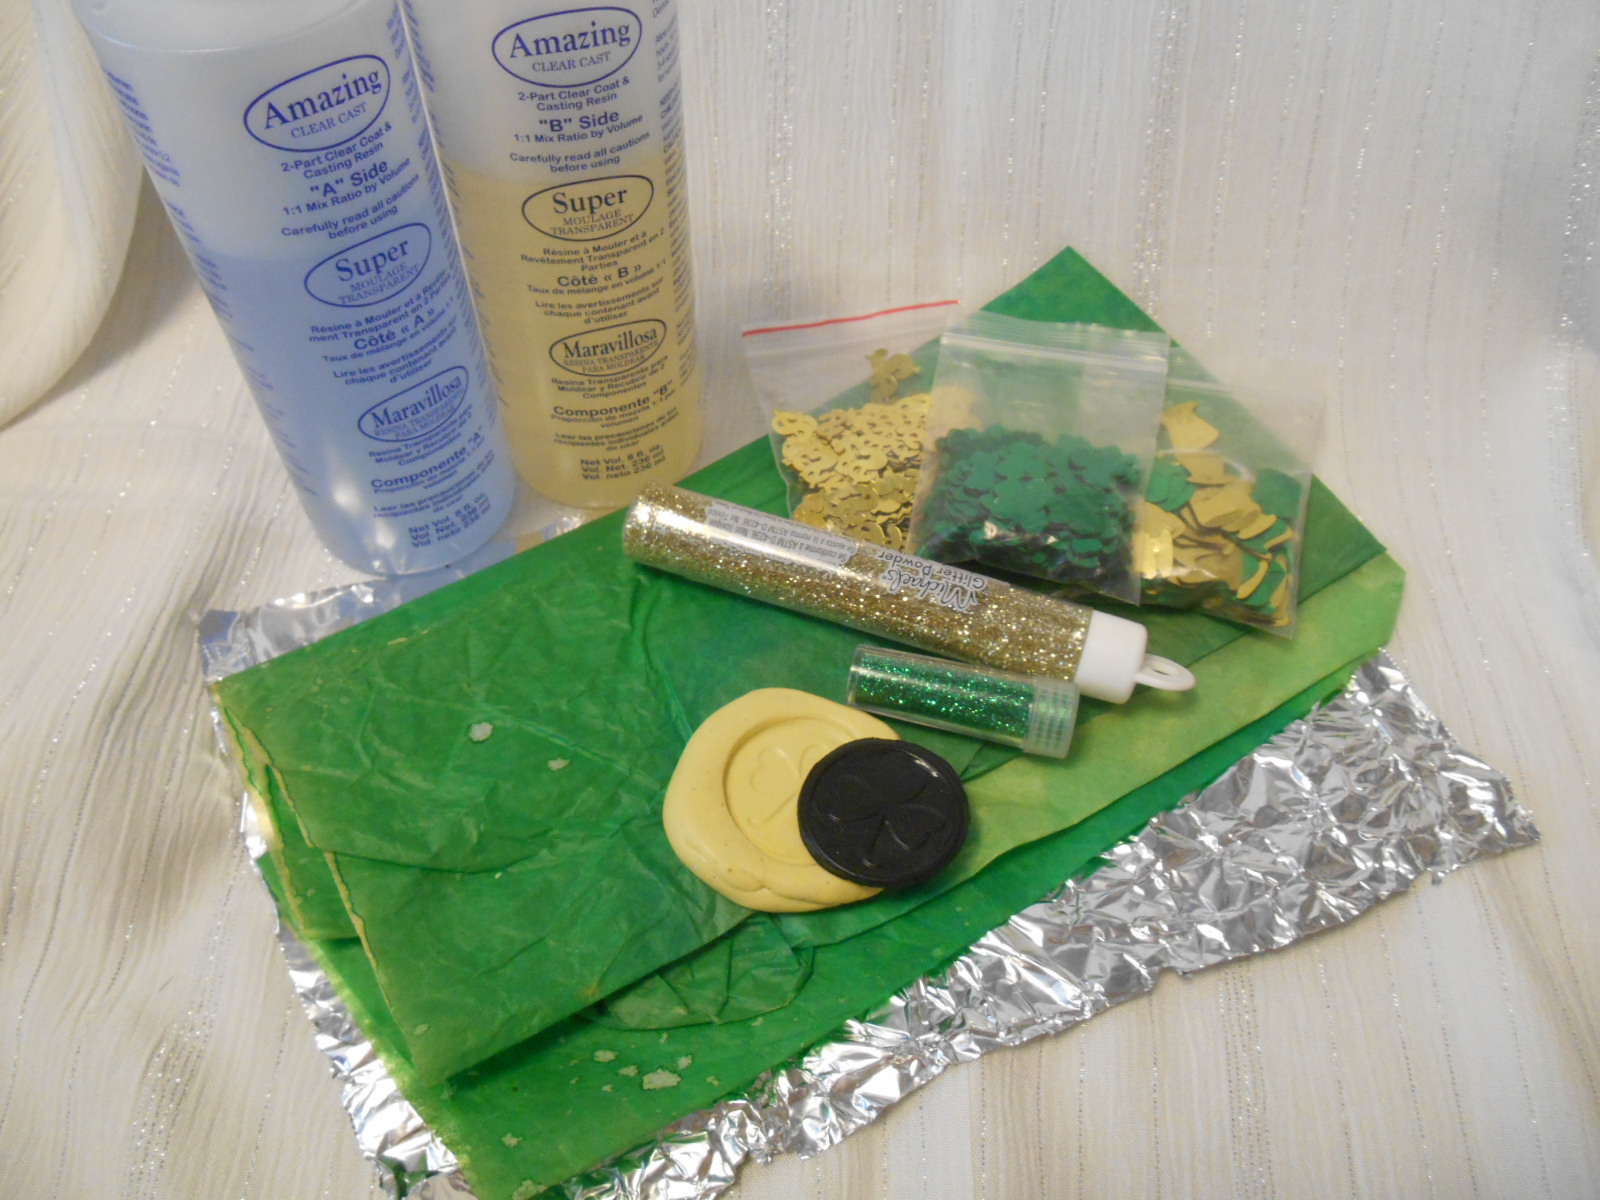
Hi everyone! Lyn here again with a fun and easy project just in time for St. Patrick's Day. This project makes a perfect table decoration or you can hang it on the wall. Just a garage sale frame, a few bits of table scatter, a couple of Amazing Casting Resin embellishments and you're ready to go!


First I made a mold of a plastic coin with Amazing Mold Putty and then filled it with Amazing Casting Resin with a bit of Alumilite Dye in black.


I then started with some left over tissue paper (from Christmas...LOL) that I sprinkled with a bit of alcohol to make the dots. Then I stamped and embossed it with some gold embossing powder.


Now for the good part – first off I did this on aluminum foil not only to protect my table, but also to give the piece another layer of Sparkle... I love Sparkle! Then I placed the tissue paper, onto which I drizzled some Amazing Clear Cast Resin and added some of the table scatter, glitter and then topped it with the picture frame glass – then let it cure.

What a great way to display your favorite piece of St. Patty's Day jewelry!

What type of party decorations
can you create with
Amazing Casting Products?
Give it a Try!

Thanks for joining us today here at Amazing Casting Products...
 Till Next Time! ~ Lyn

You can also find my work on my Blog at LynzCraftz,
on Facebook LynCraftz or on YouTube LynCraftz!
• • • • • • • • • • • • • • • • •

All month long we are celebrating our favorite
molding product in all its YELLOW glory...
Amazing Mold Putty!!


Tune in via Instagram and on our Facebook Page for games and giveaways for your chance to win some AMAZING Casting Products! The more you play along and share... the more chances you have to win!!! Use the hashtag #MoldPuttyMadness when sharing.

• • • • • • • • • • • • • • • • •

Don't forget to subscribe to our blog on the right side bar:
Twitter at AmazingCasting | Facebook at AmazingMoldPutty | YouTube at AmazingMoldPutty

Tuesday, March 8

How to Catch a #Cre8time Leprechaun... by Bridget Cordero


What does St. Patrick’s Day mean to you? Coming from an Irish family, it was a celebration with corned beef, potatoes, carrots and cabbage along with decorations of horseshoes, Leprechauns and shamrocks. It is said that Leprechauns were fairy sized shoemakers and if captured by a human they could grant that person 3 wishes for their freedom. 


For the upcoming holiday I’ve created a leprechaun hat and
used resin embellishments to decorate the piece.


First I created the hat with felt and cardboard. Knowing I needed a gold buckle, I found an old key ring that I took apart and molded. I used Amazing Mold Putty to create the mold of the buckle. It worked beautifully. CLICK HERE to view mixing and preparation. 


Then I grabbed a paint brush and brushed the Alumilite Gold Metallic Powder around the mold. I mixed up some Amazing Casting Resin and poured it into my mold. As this was curing I worked on creating the other embellishments I needed for my hat.


I did not have green dye... so I mixed Alumilite Yellow and
Blue dyes with the resin to get green shamrocks. 


I then poured the mixture into molds and waited for them to cure. The dye colors mixed together made the perfect green. CLICK HERE to view mixing/preparation of Amazing Casting Resin.

To make the horseshoe I molded an old Christmas ornament that I found (see mold picture above for the original). I brushed Alumilite Copper Metallic Powder into the mold as I did with the buckle, poured in some Amazing Casting Resin and waited for it to cure. I embellished the horseshoe with my handmade shamrock and also some small green resin leprechaun feet that I made (using same process as the shamrock). 


Once all my pieces were done I embellished the hat with them!!

How do you decorate using
Amazing Casting Products?

Thanks everyone for stopping by! Be sure to check out all the other designers on this blog.
If you’d like to see more of my creations, please stop by my YouTube Channel at https://www.youtube.com/user/BsAlteredDesigns 
Happy crafting! ~ Bridget

• • • • • • • • • • • • • • • • •

All month long we are celebrating our favorite
molding product in all its YELLOW glory...
Amazing Mold Putty!!


Tune in via Instagram and on our Facebook Page for games and giveaways for your chance to win some AMAZING Casting Products! The more you play along and share... the more chances you have  to win!!! Use the hashtag #MoldPuttyMadness when sharing.

• • • • • • • • • • • • • • • • •

Don't forget to subscribe to our blog on the right side bar:
Twitter at AmazingCasting | Facebook at AmazingMoldPutty | YouTube at AmazingMoldPutty

Friday, March 4

#Cre8time Transformations... Dishing Up a Shamrock Ring Holder by Brenda Burfeind


Good day friends! Brenda here from Creativity is a State of Mind and I'm going to show you how to use a failed project to dish up a shamrock...


It all started with a butterfly cutout I had. I really wanted to turn this beautiful butterfly into a stamp. I mixed up some Amazing Mold Putty and you can see mixing instructions HERE. I pressed my butterfly cutout into the mold putty and waited for about 10 minutes.


When I pulled the butterfly out I realized it didn't look perfect, so I cut around it anyway using regular scissors. There were definitely some imperfections and when I stamped it, it didn't give me a clean look (sorry no picture of the stamped image). I really didn't want to waste all that mold putty and so I thought and thought about what I could do with it.


I remembered a tutorial I made for this Valentine's day pendant.
You can go and view it HERE!


I used the same concept again. This time however, since the Amazing Mold Putty had already set up, I couldn't get my heart clay cutter to go through the putty. I could get a bit of an indentation of the shape and then I just used my scissors to cut the hearts out. Since the putty was so thin, it was very easy.


Here are my hearts and I even used an edge of the butterfly to create the stem for my shamrock. You can see that it had even been stained with the ink.


Now, the hoarder I am... I had these cute little ceramic
coasters that I purchased eons ago at a thrift store.


I tried hot gluing the putty pieces down, but they just popped right off. I sprayed some Krylon Spray Adhesive to the pieces and glued them onto the ceramic coaster. That worked like a charm!


Then I mixed up some Amazing Casting Resin and poured it into the dish, just enough to fill around the shamrock shape. There is a video HERE you can view on mixing instructions.


That set up to cure for about 10 minutes and then I gently pulled the pieces out.
Pretty cool huh?


Then I mixed up some more Amazing Casting Resin with the Fluorescent "FLO" Green Dye and filled in the open areas. That also set up in a matter of minutes.


And here you have an Amazing Shamrock ring dish!


I am so excited about my (failed) fabulous Shamrock ring dish!

Have you had a failed project
that you turned into a masterpiece?

Please leave me a comment and tell me about it.
Until next time, Brenda wishing you "luck" for no failed projects.

Visit my blog, Creativity is a State of Mind to see some more of my creations.

• • • • • • • • • • • • • • • • •

All month long we are celebrating our favorite
molding product in all its YELLOW glory...
Amazing Mold Putty!!


Tune in via Instagram and on our Facebook Page for games and giveaways for your chance to win some AMAZING Casting Products! The more you play along and share... the more chances you have to win!!! Use the hashtag #MoldPuttyMadness when sharing.

• • • • • • • • • • • • • • • • •

Don't forget to subscribe to our blog on the right side bar:
Twitter at AmazingCasting | Facebook at AmazingMoldPutty | YouTube at AmazingMoldPutty

Wednesday, March 5

Sliding Down the Rainbow into a Pot of Gold
with an AMAZING St. Patty's Day Ensemble by Brenda Burfeind

Hello everyone, Brenda here again to share an AMAZING handmade St. Patty's ensemble. Yes, I know, jewelry again, but I will tell you why!!!

1. I love making it

2. It's cheaper than buying it
(especially for something you might only wear once a year)

3. I can make it to my liking
(ie, color, design, etc.)

Reason enough? :)

I knew I wanted something for St. Patty's day. I'm not Irish, but that doesn't mean I don't want to show off some bling that day. I've been looking at all the cute stuff in the stores already and what they want for some of that stuff is RIDICULOUS. I mean come on, $8 for a plastic necklace? Especially for something I know I will only wear once a year. I decided I could probably make something far less expensive and to my own taste using my Amazing Crafting Products and items in my crafty stash! 

SO let's get started!

With my Cricut I cut 5 pieces of the top hat out of chipboard and layered them together to give me a thicker piece and created my mold using Amazing Mold Putty. (No cost since the chipboard was from a recycled cereal box). If you are new to our blog, you can find instructions in almost every post or use the search button on the top of the page and type "how to make a mold" (or CLICK HERE to view a video).


I then mixed up my Amazing Casting Resin with a teeny tiny amount (probably the size of a pin head) of the Alumilite Black Dye and and 3 drops of the Alumilite Fluorescent "Flo" Green Dye


Once the mold had set up I popped them out and now this is where the fun began. 

You can see that there is just a tiny hint of green to the hats. 

I'm rather pleased with combining the two colors.


I cut the "band" for the hats out of green scrapbook paper and these tiny clovers are left over confetti from last year and glued them onto the resin piece. 

YES, I keep everything. 

Added a rhinestone (also on hand) to the center of the "band" to replicate the buckle and drilled holes for the jump rings and earring wires (on hand). 

NO COST! 


I did the same exact thing for the hat. I lightened this picture up very much so you could see the "silver glitter" around the hat and band. It's a silver jelly pen and writes on the resin piece perfectly. 

I added a silver chain (on hand) and a flat back bezel (on hand) that I glued onto the back with E-6000® adhesive. 

NO COST! 


I also made a pin to wear on my jacket by gluing
a pin back (on hand) to my finished resin piece...

again at NO COST! 

Now I have the perfect ensemble for St. Patty's Day
and it DIDN'T COST ME A DIME! 

Now I have more "Green Beer" money.

I hope you've enjoyed my NO COST tutorial. 

Which holiday would you make
a jewelry ensemble for
and what would you make?

Thank you for stopping by and don't forget to check out all the designer's here and sign up to get email alerts... that's how you will always know what we're up to. To see more of my creations – I would love it if you came over to my blog Creativity is a State of Mind. ~ Brenda

• • • • • • • • • •

Don't miss a single post!
Please subscribe to our blog on the right side bar:
Twitter at @AmazingCrafting | Facebook at AmazingMoldPutty | YouTube at AmazingMoldPutty

Thursday, March 1

Shamrock Door Chime


St. Patrick's Day is right around the corner and I really wanted to do a St.Patrick's Day Project this year.

A couple of years ago I bought dollies on Clearance at Michael's I paid $0.25 for a pack.  Last Year I glued the dollie to a cereal box  and made decorations.  I decided I wanted to mold the shamrocks and cast them in resin.

Materials:
Dollies
Smaller Shamrock (mine was an old cereal box painted)
Amazing Mold Putty
Amazing Casting Resin
Allumilite Gold Metallic Powder
Ribbon
Bells
Paint (Apple Barrel® Foliage Green and Folk Art® Metallic Christmas Green)

The shamrock dollie

Molding the shamrock in Amazing Mold Putty

Resin setting in the molds - I used wax paper as a base because I had a huch I would make a mess.

Painted stringing them together and adding bells to ribbon.

Finished hanging on the door.
Related Posts Plugin for WordPress, Blogger...