Showing posts with label fall. Show all posts

Monday, October 16

#Cre8time Candlemaking... DIY SpOoKy Skulls and Pumpkins with Amazing Mold Rubber


Hello Amazing Makers! Today begins a countdown 'Thirteen Days of Halloween" with Amazing Casting Products. If you haven't subscribed to receive posts via email, please do so in the sidebar on the right so you don't miss a thing!


Did you know you can make DIY custom soap and candles made with Amazing Mold Rubber and Amazing Mold Putty?! Today we are sharing a couple of Cre8time projects to customize your Fall/Halloween decor. Imagine accenting your home with handmade pumpkin or skull candles and soaps – or any shapes you desire.


Amazing Mold Rubber is easy to use and captures amazing detail for casting items in resin, wax, plaster, soap and more. CLICK HERE to see more pumpkin inspired projects for Halloween and the fall season using Amazing Casting Products.

Watch to see how to make pumpkin and skull soap and candles...


If you have trouble viewing video, please CLICK HERE.


Amazing Mold Rubber captures amazing detail making it perfect for molding fun things for your Cre8time seasonal decor – with one mold you can cast duplicates in soap, wax, resin... and so much more!

How do you create for Halloween?

Thanks for visiting and join us tomorrow as our "Thirteen Days of Halloween" continues! CLICK HERE to view more videos on how you can utilize Amazing Casting Products in your creations.


• • • • • • • • • • • • • • • • •

Don't forget to subscribe to our blog on the right side bar:
Twitter at AmazingCasting | Facebook at AmazingMoldPutty | YouTube at AmazingMoldPutty

Monday, November 28

#Cre8time Greetings... DIY Natural Stamped Cards by Tracy Alden


Hello! Tracy here with another Amazing Casting Products tutorial! Large stamps can end up costing an artist a lot of money. Since relief print plates, otherwise known as a stamps, are basically plates with protruding details and images that are inked, leaving the recessed areas ink free, I thought why not make my own with fallen leaves? With the help of Amazing Mold Rubber I was able to create my own print plate, with leaves, to create handmade holiday cards. 

Supplies: 


Using a pasta machine (devoted to craft use only) set on the thickest setting I conditioned some polymer clay. I placed my now smooth clay on a ceramic tile, trimming the uneven edges. I used a ruler as a cutting guide, making sure that the clay just under 4 1/4" x 5 1/2". 


The uncured clay acted as a base to place the freshly collected fallen leaves, I was sure to pick leaves still pliable and with raised veins. I pushed them into the clay, careful to press them flat as possible.

*Any plant material can be used for this, just make sure to pick ones that can lay flat enough to get a good impression.


The leaves being still fresh meant they were inclined to raise up a bit so I placed another ceramic tile on top of the tile with the clay and leaves. I put a large jug of water on top of the second tile and let the bottle act as a leaf press for 6 hours (you might have to press the leaves longer if you live in a high humidity area).


I conditioned more polymer clay and created a clay wall around the edges of the uncured clay and leaf piece. To make sure I was creating a tight seal with the clay edges I pressed the clay in place with a metal stylus. I noticed some of the pressed leaves lifting and glued them down with Beacon Gem-Tac Adhesive.

*At no point in the process of this project did I cure the clay in the oven. I wanted to keep it in a raw and soft state to create a temporary mold box that would not be affected by the Amazing Mold Rubber.


Carefully following the instructions, I mixed up Amazing Mold Rubber and slowly poured it into my mold box {CLICK HERE to view mixing/preparation}. Once the Mold Rubber was cured I carefully removed the soft clay and leaves. Since there was a bit of seepage of Amazing Mold Rubber, I carefully trimmed the excess with sharp craft scissors. 


After trimming the now finished print plate I scrubbed it clean to remove any bits of leaves still stuck in the Mold Rubber. I just loved the amount of detail the Amazing Mold Rubber was able to capture from the leaves!


I inked my print plate to do a test print on some copy paper to see how it would work. I found that depending on how heavily I applied the ink and on what portions of the plate I could create many different styled inked impressions. 


The print plate being made from Amazing Mold Rubber would shift slightly if pressed unevenly, so when I would place the inked plate on a blank greeting card I was careful to press firmly and evenly to get a good ink transfer.


The nature of making prints from a reprintable block is that while the image on the block is permanent, the inking process is different for each print, making them unique. With the additions of paper crafting embellishments and sentiment every card inked is a one of a kind piece of mini artwork! 


What AMAZING arts and crafts can you create?

Visit my blog Art Resurrected for more craft tutorials!

Until next time, safe travels! ~ Tracy

• • • • • • • • • • • • • • • • •

Don't forget to subscribe to our blog on the right side bar:
Twitter at AmazingCasting | Facebook at AmazingMoldPutty | YouTube at AmazingMoldPutty

Thursday, October 27

Make a #Cre8time Statement for Halloween... "WereWolf Moon" pendant by Lyn Gill


Hello everyone! Lyn Gill here again and I've got a fun project just in time for Halloween! So enjoy that party in style and be the talk of the town... with a handmade resin and polymer pendant.


First I started by grabbing my Amazing Mold Putty Moon mold (an oldie but a goodie) and Wolf head molds. I prepared a batch of Amazing Clear Cast Resin with Alumilite Dye and filled the Moon mold; and while I waited for resin to cure I used polymer clay for the Wolf head.

When both cured, I used silver metal leaf under the moon to make it really shine, then added a bit of brown acrylic paint to give a little definition. For the wolf I used various metal paints and patinas, then glued in some glass rhinestones for the eyes. I used some glue on style bales to attach it and bring it all together... ready to wear!

"WereWolf Moon" 


What a great result! This was such a fun project, perfect for Halloween! As a jewelry artist I'm always trying to mix it up a bit and combining elements is a must – combining these two molds was a natural.

What Halloween projects did you make?

Well, thank you all so much for stopping by today...
Till Next Time! Lyn

You can also find my work on my own blog LynzCraftz
or on YouTube LynzCraftz , or my Facebook page LynzCraftz.

• • • • • • • • • • • • • • • • •

Don't forget to subscribe to our blog on the right side bar:
Twitter at AmazingCasting | Facebook at AmazingMoldPutty | YouTube at AmazingMoldPutty

Thursday, October 20

#Cre8time in the #Polymer Pumkin Patch... by Lyn Gill

Hi everyone! Lyn Gill here again, are you ready for a Scavenger Hunt? Today I'll share with you my inspirational project for the month and a revisit a project from last fall. 

I created this pumpkin from polymer clay, but I decided I needed more of them... so out came the Amazing Mold Putty to the rescue! I molded the base pumpkin then I used the Amazing Casting Resin tinted with some of the Alumilite dyes for the perfect orange color. This really turned out well. I added some acrylic paint to antique it just a bit, then I added the leaf and stem detail out of clay. Finished off with a glue-on bail and it's ready to go! A beautiful pendant for the season.


Now for a twist! This time using the same mold I used Amazing Clear Cast Resin with some Alumilite Dyes and glitter I created this fun Pumpkin Brooch... with a totally different look and ready to wear to a party!


What new ideas will you find
for molds you already created?

Thanks so much for stopping by today...Till Next Time! Lyn

you can always find my work on my own blog LynzCraftz
or on YouTube LynzCraftz , or my Facebook page LynzCraftz.

• • • • • • • • • • • • • • • • •

Today we are hopping along with the artists of the Designer Crafts Connection who has taken on the challenge of creating with Amazing Casting Products.


For this challenge, Amazing Casting Products provided each of the Designer Craft Connection designers with Amazing Mold Putty and Amazing Clear Cast Resin. You want to pop over to the beginning of the bloghop HERE where you can enter to win what you see in the photo above... an Amazing Clear Cast Resin and a 3lb. kit of Amazing Mold Putty {which is 1 1/2 lbs of each part of this magical goodness}. An artist's dream PRIZE!!!

• • • • • • • • • • • • • • • • •

Don't forget to subscribe to our blog on the right side bar:
Twitter at AmazingCasting | Facebook at AmazingMoldPutty | YouTube at AmazingMoldPutty

Thursday, September 1

Hello September...


Hello friends! It's a new month and a change of seasons is fast approaching. What are you molding and shaping??? Stay tuned here for new makes from our team of Amazing Creatives as they INSPIRE and share projects and techniques using Amazing Casting Products


What special project have you been wanting to create? The ease of use and versatility of these AMAZING products have molding, and casting your creative ideas in no time! The possibilities are endless... jewelry making, DIY projects, home decor, cake decorating and chocolates, candle making, custom figurines, R/C vehicles and more!

WARNING...
these products are
ADDICTIVE!
once you start - you can't stop at just one creation.

Amazing Casting Products is a family of cutting edge, molding and resin products that enable you to create anything you can possibly imagine in minutes – consisting of Amazing Mold Putty, Amazing Mold Rubber, Amazing Remelt, Amazing Casting Resin and Amazing Clear Cast Resin from the Alumilite Corporation.

• • • • • • • • • • • • • • • • •

Don't forget to subscribe to our blog on the right side bar:
Twitter at AmazingCasting | Facebook at AmazingMoldPutty | YouTube at AmazingMoldPutty

Friday, November 13

In All Things Give #Cre8time Thanks... Organic Leaf Magnets by Aimée Wheaton


I had grand ideas for this little project of mine,
except today had other ideas.
 
OK – so I wanted to create some pretty organic Fall leaves and petals and use them as magnets on my epic magnetic chalk board in my front hall. This is the story of how I created them, accidents and all.


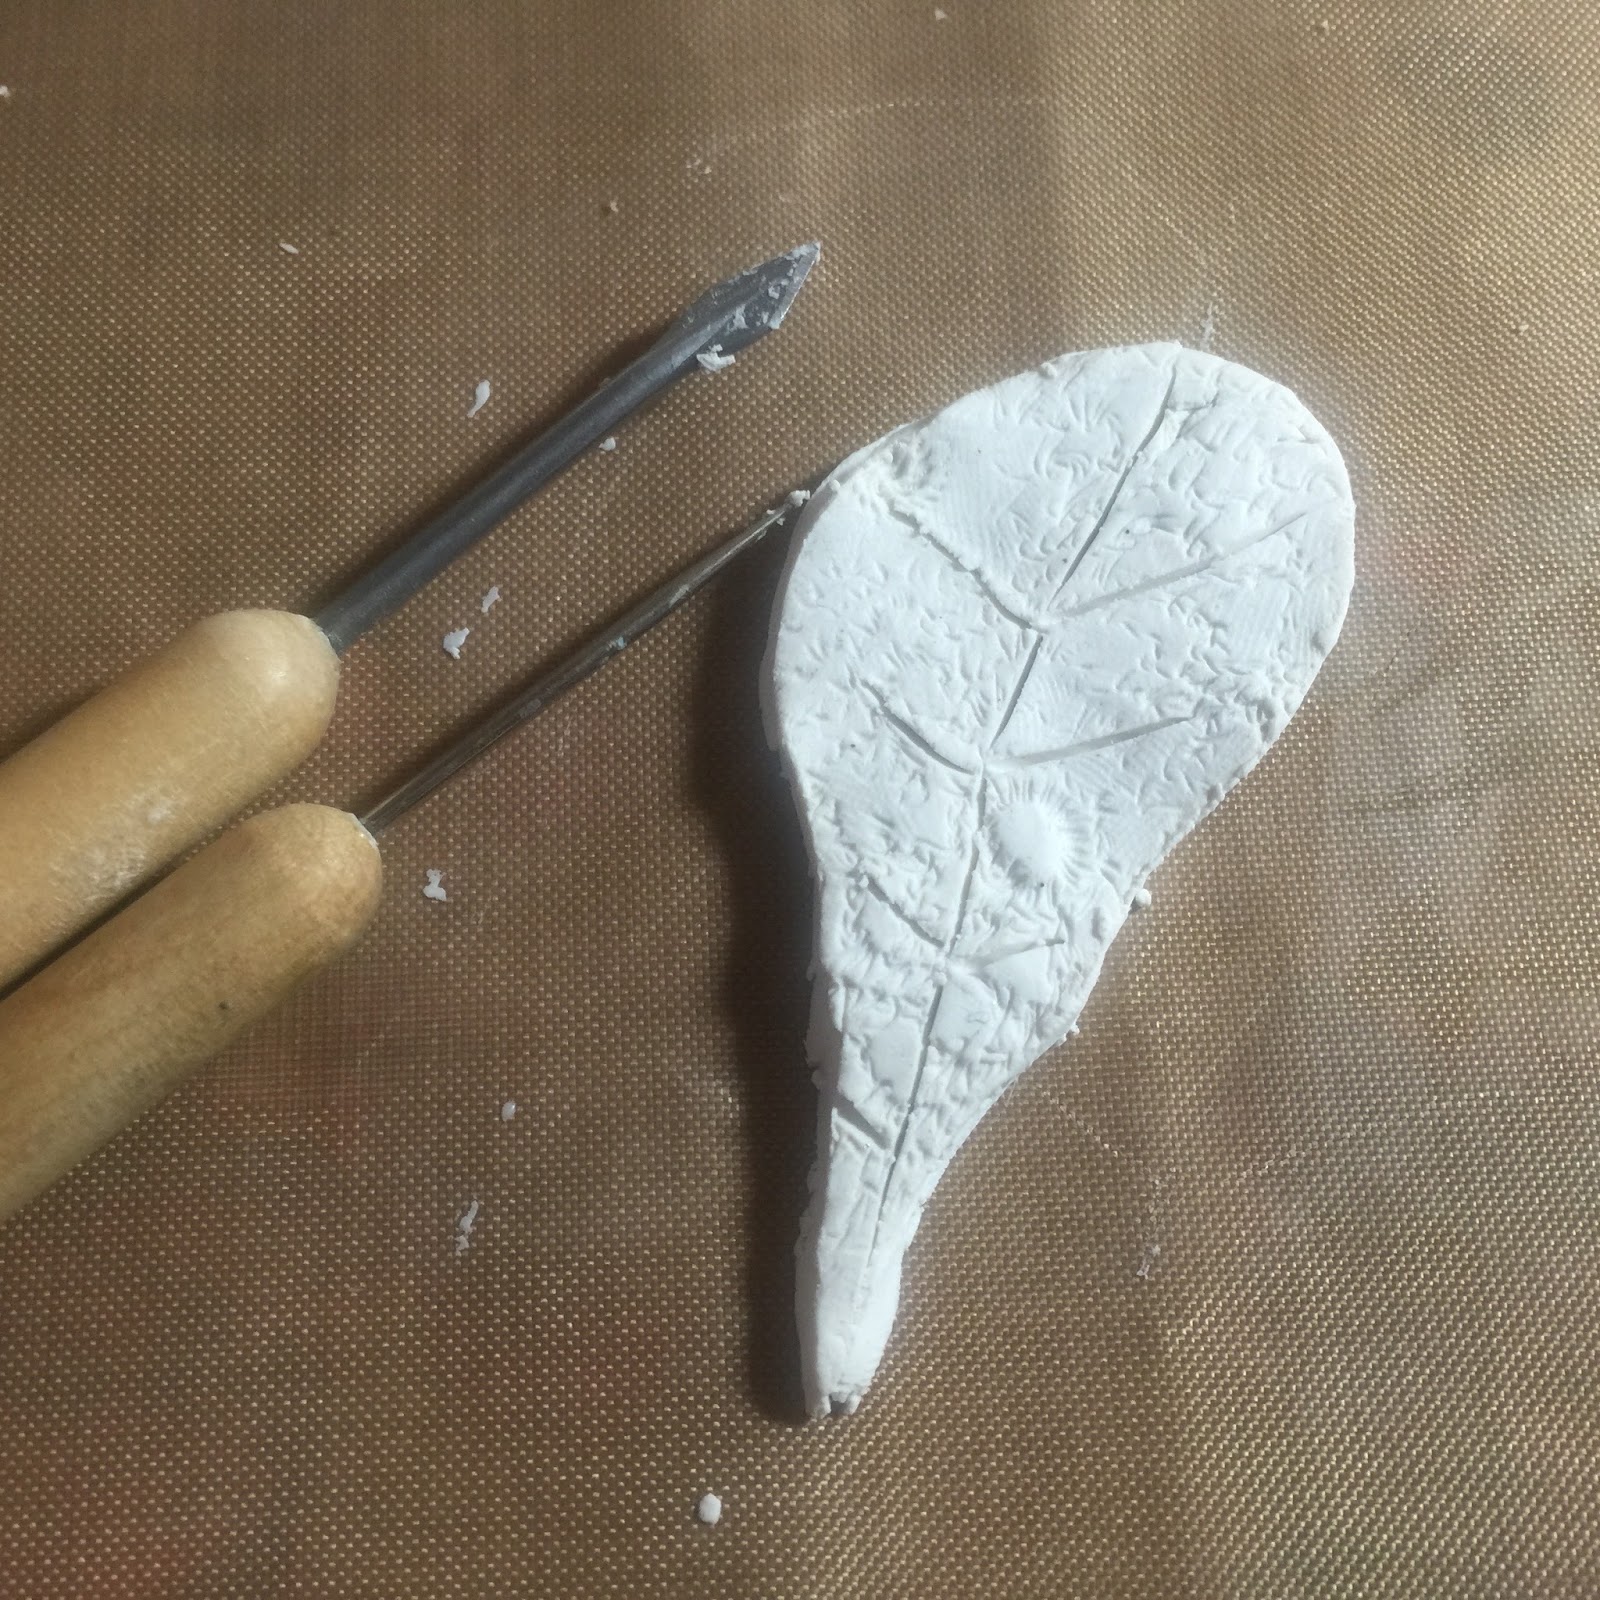
I started by taking this mound of Sculpey clay and smoothed and flattened it all out. Then started creating the leaves and petals. Sculpey is awesome because you can bake it for 15 minutes and it's done!


I used various items to give it texture.
Texture plates, vintage buttons and a lace doily :)


Love this one!


Lace texture


Next I cut out the shapes using clay tools
and made the veins in the leaves.


This is what I ended up with.


Fun textures!


I preheated the oven to 275º and put the clay
in a pie plate. Bake for 15 minutes.


When the leaves were cool to the touch I grabbed my Amazing Mold Putty and created molds for each one. You take equal parts of Part "A" and Part "B" and knead together with your hands, then form around the objects you want to mold.


Next time I'm making individual molds.


You can see it picked up all the texture.


My favorite part was painting in these gorgeous
Alumidust powders in the Autumn colors.


They were so pretty and glistening and I knew
they would turn out amazing!!


So pretty!!


...and then THIS HAPPENED! I'm going to use this a lesson, yes accidents happen and they happen to me a lot but you fix it and move on...

OK – so I had just poured Part "A" of Amazing Casting Resin into that little cup you see on the left. I was attempting to drop in some yellow Alumilite dye. It wasn't coming out so I squeezed harder and the entire cap blew off the top spilling yellow die and resin all over me, the wall and my supplies. :( All that gorgeous painting of the Alumidust ruined, I had to back track and clean it all up. Parts of the molds that got stuff spilled on it were messed up so some of the finer details disappeared. I was so upset but I moved on quickly. Thank God for baby wipes!!! I showed all of this to say that you should use a pin or something to make the hole a bit bigger if you're using the dye, I wouldn't want this to happen to you. Crafting is messy!! OK... moving on.


After I cleaned up my mess, I repainted the molds with the Alumidust, I poured more resin, poked a bigger hole in the red dye and mixed up Part "A" of Amazing Casting Resin, then mixed it into Part "B". CLICK HERE to view mixing/preparation.


Poured resin into the molds ... let it cure.


Taken out of the molds. It wasn't as bright as I had hoped because of the accident above, so I pulled out some acrylic craft paints and made it pop a bit more letting some of the shimmer still show from the dust.


After painting.


Next I took this StazOn ink pad and rubbed the leaves
onto it to help bring out the texture a bit more.


Makes some fun patterns.


I added on sticky back magnets which I will be taking off.
I need to glue a stronger magnet on for these.


I figured this saying was appropriate for the kind of day I'd been having. This chalkboard is about 8 ft. tall and in my foyer. See the leaves on there?


They are super pretty! All in all I'm pretty
happy with the way they turned out.


What are you thankful for? 
I'm thankful I got all the yellow dye off of me!! :)

Let's see what you can mold using clay

Feel free to stop by my FB page to see the latest with me.
To see more of my work please visit my new blog "Life Glitter Makeup"
and also at the Aimée Wheaton Art and Design website.

Till next time! Xoxo Aimée

• • • • • • • • • • • • • •

Don't forget to subscribe to our blog on the right side bar:
Twitter at AmazingCasting | Facebook at AmazingMoldPutty | YouTube at AmazingMoldPutty
Related Posts Plugin for WordPress, Blogger...