Showing posts with label Art Resurrected. Show all posts

Tuesday, February 13

#Cre8time with a Little Heart... DIY Resin Hearts by Tracy Alden


Hello! Tracy here with a fun tutorial using Amazing Casting Products! Sometimes I find myself making art at the spur of the moment, with a shape or color being my inspiration. This tutorial was a result of wanting a bright and cheerful Valentine's Day decoration for display in the Amazing Casting Products booth at Creativation.


If you were able to attend Creativation in Phoenix (January 20-22, 2018) and happened to drop by the Alumilite/Amazing Casting Products Booth #2214, you would have seen a wonderful selection of art from our Creative Team. You might have seen on display a bowl full of decorative resin hearts I had created. 

There was such a positive response to these quick and easy hearts – people loved picking them up and looking at the play of light. So I decided to share how quick and easy it is to make them!

Supplies: 


The hearts in this project were made using this ice cube tray I bought from IKEA. The cube shapes are very smooth, small, and perfect shape to pour resin. This particular ice cube tray is make from a synthetic rubber, so it did not need a mold release. 

**A TIP** If you are not sure what your ice cube tray is made from, test by applying a small amount of resin the the backside of the mold and let it cure completely. If it peels off easily when cured, you don't need a mold release... though if it sticks, then I recommend using Alumilite's UMR as a mold release.


To create the different color hearts I made several different color recipes. First we have Alumilite Violet Dye with Amazing Clear Cast Resin and glitter (on left); and a variation of this is including the addition of Pearl Alumidust (on right).


I repeated this process this time adding Alumilite Red Dye to the Amazing Clear Cast Resin, then glitter, and again the variation of this (seen on right) with the addition of Pearl Alumidust.


Getting a bright glittery or shimmery white is just as easy with Amazing Clear Cast Resin. Alumilite White Dye is opaque and not clear/transluscent like the other dyes – so to get a bit more of a pop of color and shimmer I added glitter and Pearl Alumidust. On the left I used Interference Red Alumidust which gives the resin a brighter, slightly pink shimmer; and the variation on the right uses Pearl Alumidust, which resulted in a softer white and less intense shimmer.


To fill this entire ice cube tray with resin hearts, I mixed up 4 fluid ounces of Amazing Clear Cast Resin – making sure to slowly stir to reduce air bubbles and let it sit for 5 minutes (CLICK HERE to view mixing and preparation). I used just *ONE* drop of Alumilite dye for that much resin to get the vivid red you see in the photo. I added some micro fine glitter and slowly stirred.

REMEMBER... Alumilite Dye is super concentrated and a little goes a long way!
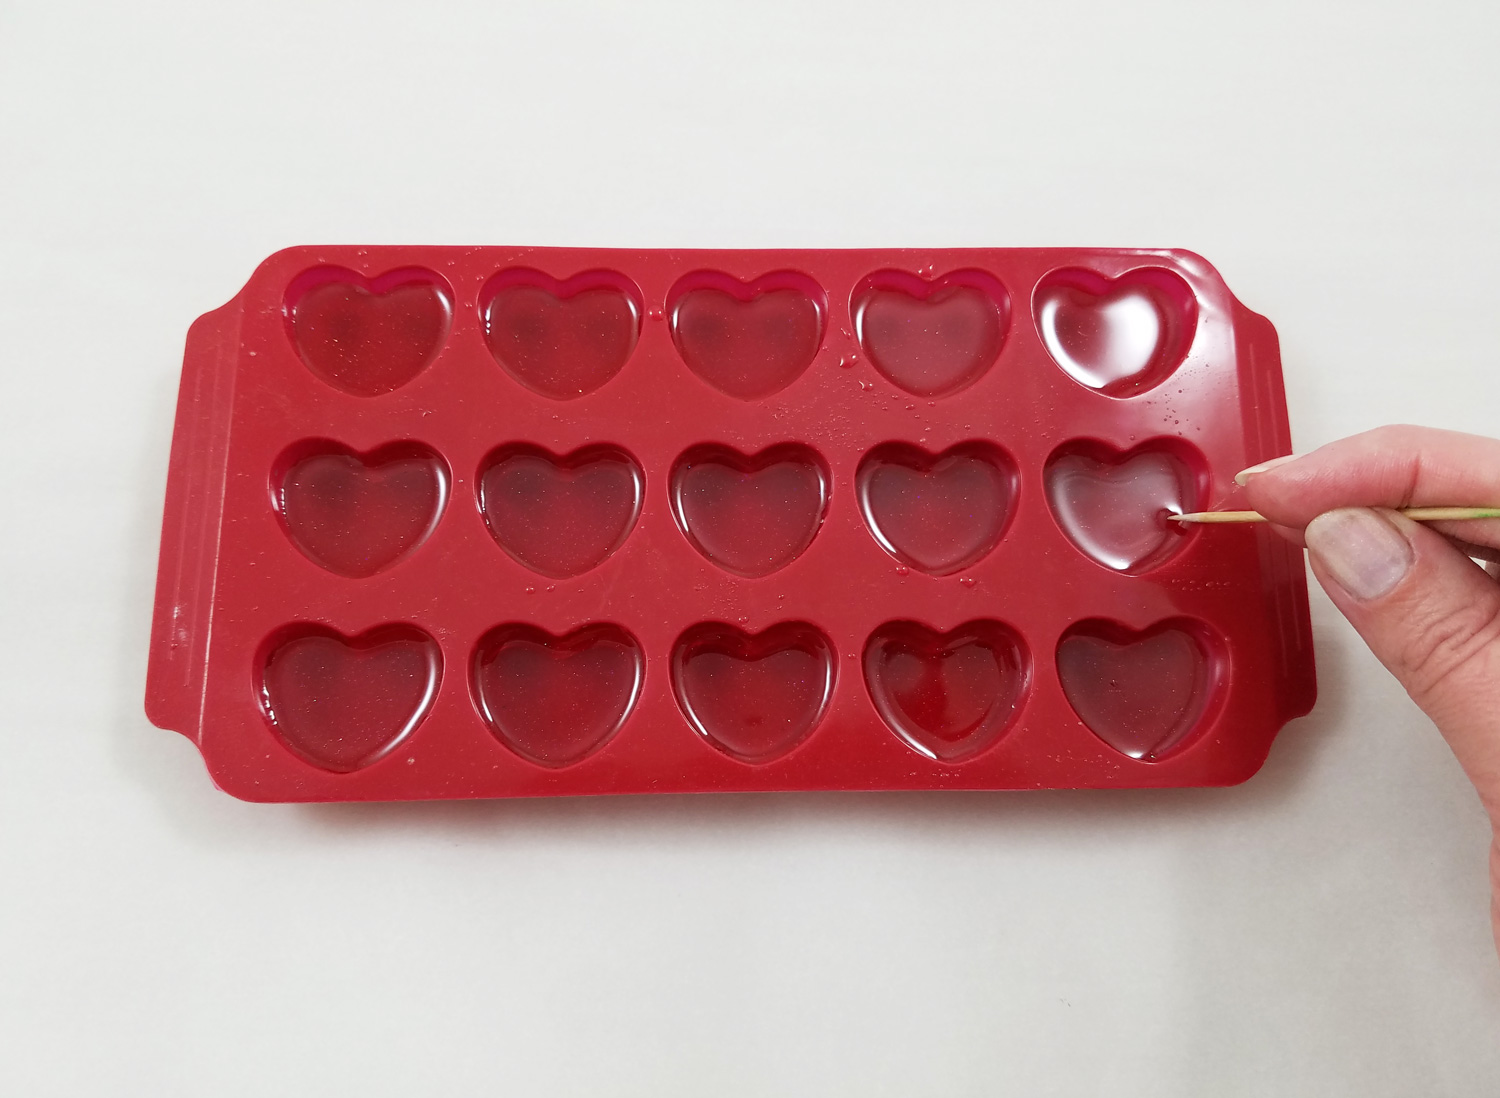

Carefully, I poured the tinted Amazing Clear Cast Resin into the ice cube mold. Bubbles that formed in the pouring process that don't pop on their own can be removed with a simple pass of a heat gun or can be popped using a toothpick. I let the resin cure fully before removing them from the mold.


I repeated filling and casting the ice cube mold several times until I had a bowl full of bright and cheerful hearts. Being that Amazing Clear Cast Resin is FDA compliant, you can put them in a vase with flowers with no worry of the resin causing issues with the flowers. 

Now don't think they are only decor... by drilling a hole into each heart you can create beads for jewelry or small charms for gifts!

What AMAZING Valentine
jewels will you create?

Visit my blog Art Resurrected for more craft tutorials!

Happy Valentine's Day! Until next time, safe travels! ~ Tracy

• • • • • • • • • • • • • • • • •

Don't forget to subscribe to our blog on the right side bar:
Twitter at AmazingCasting | Facebook at AmazingMoldPutty | YouTube at AmazingMoldPutty

Saturday, December 23

#Cre8time Peace on Earth... Polymer Clay Dove Ornaments by Tracy Alden


Hello! Tracy here with another tutorial using Amazing Casting Products! Around the holidays I often find myself making last minute gifts to complete a package or basket... and this year was no exception. Harking back to the traditional theme of doves as a symbol of peace and goodwill, I decided to create "Peace on Earth" Dove ornaments. 

Supplies: 


Using a pasta machine (devoted to craft use only) set on the thickest setting, I conditioned some polymer clay. I stacked two pieces of the now smooth clay on a ceramic tile and rolled an acrylic roller over the stack to make them stick to each other. 

I drew a simple dove outline on a piece of parchment paper, then placed the paper on top of the clay. I traced the dove outline with a stylus to transfer the image.


Using a craft knife I cut out the dove shape, being careful around the edges to not tear the clay. I then smoothed out any uneven cuts in the clay with a stylus. 


Instead of stamping images into the clay (like I have done with these tag ornaments), I create a free form pattern of swirls and dots as a decorative element on the clay dove. Using a small diameter stylus I gently press into the clay – drawing on the clay, not going too deep but just enough to get a visible pattern. 


I bake the clay dove on the tile as per the manufacturers instructions. Using an emory board, I carefully sand any uneven raised surfaces created in the drawing process, without removing the dove from the tile.

Now the fun begins... 


I condition more polymer clay and create a clay wall around the cured clay dove piece. To make sure I was creating a tight seal with the clay to the tile, I press the clay in place with a metal stylus. I don't need to bake this clay – it is just serving as a wall to contain mold-making material, Amazing Remelt.


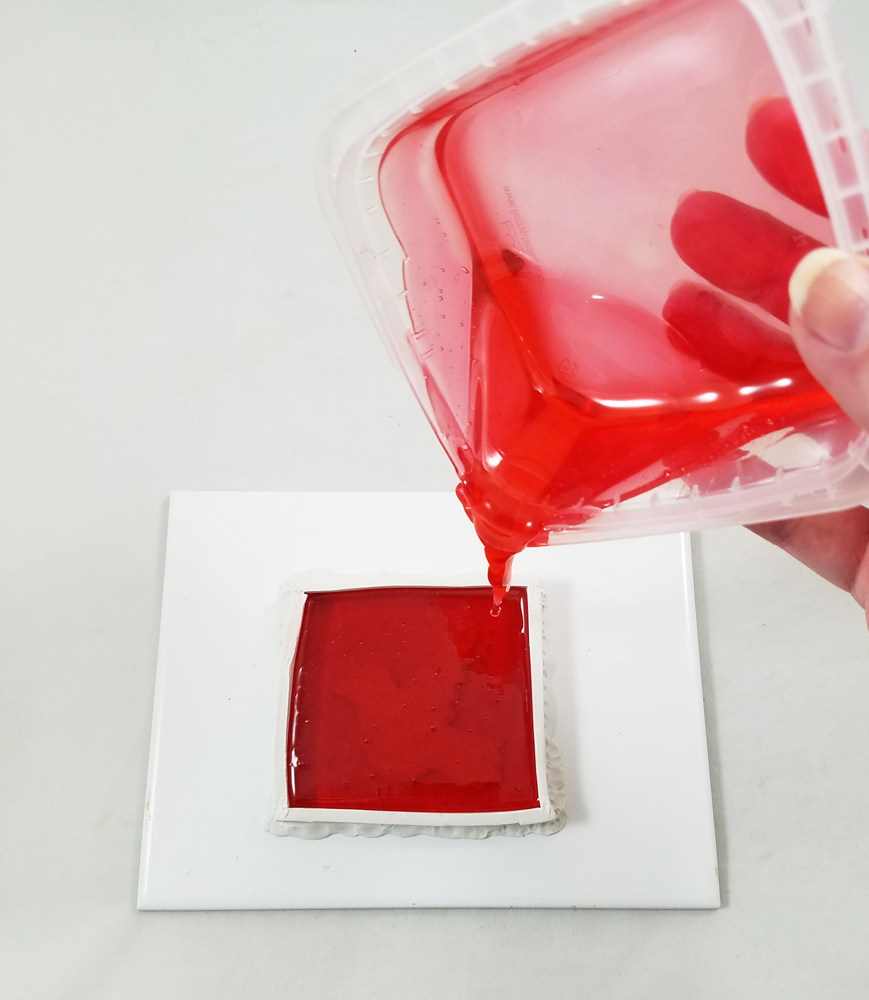
I sprayed the piece lightly with cooking spray to act as a mold release. I heat the Amazing Remelt in the microwave, in the container it comes in (click here to view preparation). I pour the heated Remelt into prepared piece on the tile from a 12 -15 inch distance – this distance gives the Remelt a chance to release more bubbles before cooling.


I let the Amazing Remelt cool until no longer tacky or warm. When completely hardened, I carefully remove the tape, clay and the original from the Remelt mold.

Now to make more...


I condition the polymer clay, making sure the clay was soft and warm enough to be pushed into the mold. I push the clay into the mold tight, using an acrylic roller to push the clay further into the mold – making sure the clay gets into the tiny embossed details.


I carefully place the mold, with the polymer clay still inside, face down on a ceramic tile, then gently peel back the mold leaving polymer clay piece stuck to the tile. I refill the mold with more polymer clay and repeat this process again and again until I have plenty of doves. 


I made holes in the clay doves with a stylus which will be for adding ribbon hangers later. I applied two to three shades of Alumidust to each clay dove and then baked the polymer pieces to cure.


These shimmering clay doves are ready to hang
on the tree or put a finishing touch on gift baskets. 

What AMAZING arts and crafts can you create?

Visit my blog Art Resurrected for more craft tutorials!

Happy Holidays and until next time, safe travels! ~ Tracy

• • • • • • • • • • • • • • • • •

Don't forget to subscribe to our blog on the right side bar:
Twitter at AmazingCasting | Facebook at AmazingMoldPutty | YouTube at AmazingMoldPutty

Tuesday, October 17

Casting a #Cre8time Spell... DIY Halloween Jewels by Tracy Alden


Hello! Tracy here with another Amazing Casting Products tutorial! My favorite month and time of year is here! October is going by so quickly and it is already getting close to Halloween! 

I need to make a selection of necklaces to give as gifts... and I am running out of time. I decide to revisit an earring project using Nail Art Stickers. I knew with the right mix of Amazing Casting Products and jewelry supplies I could make easy and stylish Halloween accessories!

Supplies: 
  • Amazing Clear Cast Resin
  • Alumidust in Deep Red, Deep Purple and Black 
  • Amazing Remelt (*Optional) 
  • Nail Art Stickers (found anywhere that sells nail polish) 
  • Toothpicks 
  • Stir Sticks 
  • Resin Measuring Cups 
  • Small metal frames (easily found at your local craft store in the jewelry or scrapbooking isle) 
  • Jewelry Bails, jump-rings 
  • Gold and Silver tone chain 
  • Glitter, Acrylic Paint, and Paint Brush (*Optional) 


I found a nice set of Halloween nail art stickers at my local pharmacy. All the stickers are the perfect size to fit in a selection of frames that have shallow basins. I sorted through the frames, picking the ones that went well with the stickers.


I am not sure what color the base layer of resin to be placed in the frames needs to be. Since the stickers are on a clear backing it is easy to lay the entire sheets of stickers over craft paper to get an idea what colors would help visually pop or complement the stickers. The majority looked the best on red, purple and black backgrounds.


I mix up a small portion of Amazing Clear Cast Resin, making sure to slowly stir to reduce air bubbles and let it sit for 5 minutes. CLICK HERE to view mixing and preparation. I add small pinches of Alumidust powder to three separate cups, then slowly add the pre-mixed liquid resin to each cup and stir until the powder is combined.


With these pieces being small and delicate, I like to place them on a small platform to keep them in place and level for resin application. I pulled two blocks of Amazing Remelt from their containers and place all of the frames on top of the Remelt block. You do not have to use Amazing Remelt – though Remelt is naturally a bit sticky and it holds the pieces perfectly in place. Once I am done with my project I can reuse the Remelt for any future non-food related molding projects. 

Using toothpicks, I put tiny drops of Alumidust saturated resin in to the bottom of each frame. The tinted resin acts as a canvas for the nail art stickers, helping them become more visible. The Alumidust makes the resin have a lovely metallic shimmer that shifts in the light. I let this layer cure about 5 hours. 


I carefully peel off the nail art stickers from their plastic backing and place them into the thin resin coated frames with a toothpick. I burnish the stickers a little with a toothpick or a stir stick to make sure the stickers are firmly in place so there will be no trapped air bubbles. Nail art stickers are originally intended for use in nail polish, so they do not need to be sealed before moving onto the next step.


I add glitter to a few of the frames for a extra bit of sparkle while the resin not quite cured – the glitter sticks to the resin when a tiny bit of pressure is applied. I use acrylic paint to highlight any of the stickers that are a bit too transparent, and let the paint dry fully before moving on to the next step.


I mix up another small portion of Amazing Clear Cast Resin, this time leaving it clear, then applied it to the frames with a toothpick. By using a toothpick I am able to control the amount of resin flowing into the frames, and to make sure I add just enough resin to create a dome which naturally magnifies the nail art stickers. I let this resin layer cure completely. 


With the addition of some jewelry bails, jump rings and chain I quickly made a Halloween jewelry assortment that any ghoul would be happy to have! With other frames and stickers imagine the variety of fashion styles that can be created! 

What AMAZING Halloween
jewels will you create?

Visit my blog Art Resurrected for more craft tutorials!

Until next time, safe travels! ~ Tracy

• • • • • • • • • • • • • • • • •


• • • • • • • • • • • • • • • • •

Don't forget to subscribe to our blog on the right side bar:
Twitter at AmazingCasting | Facebook at AmazingMoldPutty | YouTube at AmazingMoldPutty

Monday, October 9

Resin Painting with Dried Orchids... #Cre8time Explorations by Tracy Alden


Hello! Tracy here with another Amazing Casting Products inspiration post! I will let you in on a secret: sometimes I have no clue what direction some of my art projects will end up going. I can collect supplies, start working on something, maybe even get a basic idea of what I would like to do... then end up making something completely different – this project was one of those. 

I have a small collection of orchid blooms that I had dried and wanted to try to preserve in Amazing Clear Cast Resin. I had never worked with dried orchid blooms as they are very delicate, and can easily crumble if mishandled. I decided a frame was the best choice to display the dried orchids and also be able to hold the resin in place... so I got to work.


I found that with the first layer of Amazing Clear Cast Resin the orchid blooms had a tendency to shift in the resin. So the first layer of resin had to be a thin pour and I let that cure to a tacky set. I added a second clear layer of resin to cover and protect the orchids. After this cured, I followed with two more layers of resin mixed with Alumidust or Alumilite Dye in different spots, using a toothpick to drag the colors through each other. This created a lovely ebb and flow of color to the resin.

I honestly lost track of time doing this and found it rather relaxing and meditative in nature. I let this layer of resin cure. The frame looks complicated but it is just four layers of resin poured. No waste of resin – just a few stir sticks, toothpicks and clean up with babywipes.


Please CLICK HERE to see the full tutorial on how I created this mixed media resin frame on my blog Art Resurrected.

What AMAZING arts and crafts can you create?

Visit my blog Art Resurrected for more craft tutorials!

Until next time, safe travels! ~ Tracy

• • • • • • • • • • • • • • • • •

Don't forget to subscribe to our blog on the right side bar:
Twitter at AmazingCasting | Facebook at AmazingMoldPutty | YouTube at AmazingMoldPutty

Thursday, April 6

#Cre8time by the Sea... DIY Seaside Miniatures by Tracy Alden


Hello! Tracy here to share another tutorial with you! My continued obsession with miniatures is often a driving force behind my polymer clay projects and today's project is no exception. While the process of finding new miniatures to add to scenes or settings is fun, sometimes one can only find only a few pieces, not enough to complete a diorama. I wanted to have a wide variety of sea-side elements to use without damaging my originals, and this is were Amazing Mold Putty came to the rescue! 

Supplies: 
  • Amazing Mold Putty
  • Small shells, sea life charms or any small enough object to pass for a miniature 
  • Small pieces of colored polymer clay 
  • Stylus, small 
  • Ceramic Tile 
  • Craft Knife 
  • Paint Brush 
  • Acrylic Paint 


I collected as many vintage small metal charms, shells and even a tiny pair of antique sand dollar earrings to mold. Since the metal pieces had sentimental value I didn't want to use them in my miniature scene but they could make wonderful molds to create miniatures out of polymer clay!


I mixed up some Amazing Mold Putty{CLICK HERE to view mixing/preparation}, and molded it around the pieces. I was careful not to press the mold putty too much into the tiny crevices of the shells to make it easier to remove them later.


Once the Amazing Mold Putty cured I removed the original pieces. To close up any molded loops created by the metal charms I mixed up and pressed tiny little wads of Mold Putty into the open portion of the mold as seen in the above photo.


I conditioned the polymer clay, making sure the clay was soft and warm enough to be pushed into the molds. I pushed little wads of clay into each mold and made sure the clay was filling the molds by pushing down the clay with a small stylus. I then put the molds filled with clay on a ceramic tile into a toaster oven, per manufacturer instructions, to bake. Amazing Mold Putty can easily tolerate the oven temperatures required to cure polymer clay.


Once the polymer pieces were cured and cool to the touch, I popped them out of the molds and trimmed any uneven edges on the miniatures with a craft knife. I applied acrylic paint to detailed portions of the clay, rubbing off excess paint with a paper towel. 


With so many charms and small objects perfect to mold and use for miniature art, the creative possibilities are endless!

What AMAZING arts and crafts can you create?

Visit my blog Art Resurrected for more craft tutorials!

Until next time, safe travels! ~ Tracy

• • • • • • • • • • • • • • • • •

Don't forget to subscribe to our blog on the right side bar:
Twitter at AmazingCasting | Facebook at AmazingMoldPutty | YouTube at AmazingMoldPutty

Monday, February 13

For the Love of #Cre8time Recycling... DIY Art Molds by Tracy Alden


Hello! Tracy here to share some inspiration using Amazing Casting Products! Notice the interesting resin tiles and the Amazing Mold Rubber molds? Curious on how I made them? Let me introduce one of my favorite sources for inspiration... my recycling bin. Seriously, some of my best pieces of artwork gets inspiration from objects many people think has no value!


Here is a small selection from my recycling bin from this past month. What these objects all have in common is the potential to become a mold, texture or embellishment for a piece of art. I could mold the side of the light bulb to create a dome pendant, those trays can be bases for printing plates, the bottom of bottles and lids make great molds for embellishments, many pieces can be cut up or glued together to make mixed media projects! 


Grabbing just one type of recyclables, in this case a plastic spacer most likely from some sort of packaging, I noticed it had a great shape. Smooth on three sides, even in shape and thick enough to create a mold with depth for layers.


I glued the spacers into a plastic sushi tray {also from my recycling bin}, which made the perfect mold box! Carefully following the instructions, I mixed up a kit of Amazing Mold Rubber and slowly poured it into my mold box. CLICK HERE to view mixing/preparation. In the process of mixing, the Amazing Mold Rubber had formed bubbles. To quickly pop the bubbles I used a heat gun to slowly heat the uncured mold rubber to pop the bubbles.
**You can use either Amazing Mold Rubber or Amazing Mold Putty for creating molds from recyclables. Mold Putty will create a matte to satin finish (food safe!) mold and Mold Rubber will create high gloss and detail (non food safe) mold.

Once the Amazing Mold Rubber was completely cured I removed the plastic pieces from the tray. When I gently removed the pieces from the Mold Rubber they came out rather cleanly, requiring very little trimming of the mold rubber with craft scissors. Now don't think I threw away that tray or bits of plastic! They get saved for a future project or at the very least go back into the recycling bin!


I went ahead tested out my molds and used Amazing Clear Cast Resin mixed with pressed flowers, glitters, alcohol inks, beads, Alumidust powder and Alumilite Dye. Happy with my results I can use these molds for things besides resin such as clay, paper mache, embossing powder and more. 


So many objects normally only thought of as recycling can be repurposed to create molds for your art... and the creative possibilities are endless!

What AMAZING arts and crafts can you create?

Visit my blog Art Resurrected for more craft tutorials!

Until next time, safe travels! ~ Tracy

• • • • • • • • • • • • • • • • •

Don't forget to subscribe to our blog on the right side bar:
Twitter at AmazingCasting | Facebook at AmazingMoldPutty | YouTube at AmazingMoldPutty

Friday, January 6

Travel through #Cre8time with #Resin filled Talismans... by Tracy Alden


Hello! Tracy here to share another tutorial with you! The art and history of body adornment of early humans has always been an interest and inspiration to me. Tiny bits of bone, stones and shells were the most common items to be made into talismans, symbols of status and importance by our early ancestors. Harking back to a bygone time I created a small collection of faux pebbles talismans with a modern spin with the help of Amazing Casting Products

Supplies: 


Using a pasta machine (devoted to craft use only) set on the thickest setting, I conditioned some translucent polymer clay. I added small amounts of different colored polymer clay and a tiny bit of ground pepper to each ball of translucent clay. I mixed each ball of clay just enough to tint the clay and encapsulate the black pepper. The swirls of not completely blended clay and black pepper will help create the illusion of natural stone. 


I carefully pressed each ball of clay into a rough pebble shape and poked a hole through the top of each faux pebble. Using a stylus, toothbrush, dotting tools and more I textured each pebble pendant front, back and edges, which creates the effect of raw unpolished stone.

* If you rather have the look of smooth river stones skip this step of adding surface texture.


Using the 4 Piece Carver Set, I carefully carved and pressed into each clay pendant a rustic art design. I was careful to cup the uncured clay pendants in my hand while carving as to not loose my surface texture I created in the previous step. I wasn't worried about making the designs super detailed or clean as these were intended to look ancient.


Using small soft paint brushes I added Alumilite Metallic Powder and Alumidust into the carved elements on the pendants. The metallic powder bonds to the uncured polymer clay without the addition of a glue or sealant. By placing the polymer clay pieces on a paper towel I would make sure the pieces in the curing process would not lose their textured surface on the side laying flat against the tile. I then put the tile with the pendants and clay into a toaster oven, per manufacturer instructions, to cure.


Once the polymer pieces were cured and cool to the touch, I used the 1500 sanding pad from the Alumilite Polishing Kit. I sanded the front, sides and back of the polymer clay pebbles pendant just enough to remove any uneven edges created in the texture process. To remove any sanding dust I gently washed the pieces in water using my fingers to remove the sanding dust and let them dry. 


I mixed up a small portion of Amazing Clear Cast Resin, making sure to slowly stir to reduce air bubbles and let it sit for 5 minutes. Using a toothpick, I put a tiny drops of Yellow, Purple and Ocean Blue Alumilite Dye each into a small mixing cup and poured a portion of the pre-mixed resin in it. I used a toothpick to carefully drop tiny amounts of tinted resin into the carved designs on the pedant surfaces. The metallic powders acted as a lovely reflective element magnified by the resin. I let the resin cure completely. 

* Any drips made outside of the carved elements I cleaned up with a baby wipe. 


I strung the pendants onto hemp and linen jewelry cording and secured them in place with a Lark's Head knot. I added a few beads and my talisman necklaces were finished! So many symbols can be quickly carved into the polymer clay to later be filled with resin... so your creative possibilities are endless!

What AMAZING arts and crafts can you create?

Visit my blog Art Resurrected for more craft tutorials!

Until next time, safe travels! ~ Tracy

• • • • • • • • • • • • • • • • •


Visit us at Booth #2813 Alumilite Corporation
{a.k.a. Amazing Casting Products}

See all five flagship products in action, try them out, and learn something totally fun and AMAZING! Stay tuned here at Amazing Casting Products for more details and sneak peeks as we approach Creativation at CHA 2017!

• • • • • • • • • • • • • • • • •

Don't forget to subscribe to our blog on the right side bar:
Twitter at AmazingCasting | Facebook at AmazingMoldPutty | YouTube at AmazingMoldPutty
Related Posts Plugin for WordPress, Blogger...