I am a jewelry maker. And I sell quite a bit of jewelry, too. Show season is coming up and I need to get cracking on some inexpensive pieces for my booth...I'm pretty well stocked up on the $25.00 and up stuff- but I need some on the lower end of the scale.
Since resin is such a big thing right now, I thought I'd make some resin rings.
These little cuties will sell for $5.00. Little girls and tweens LOVE these!
For this little cutie, you'll need the following:
Quick Cast resin
Mixing cups
Mold putty
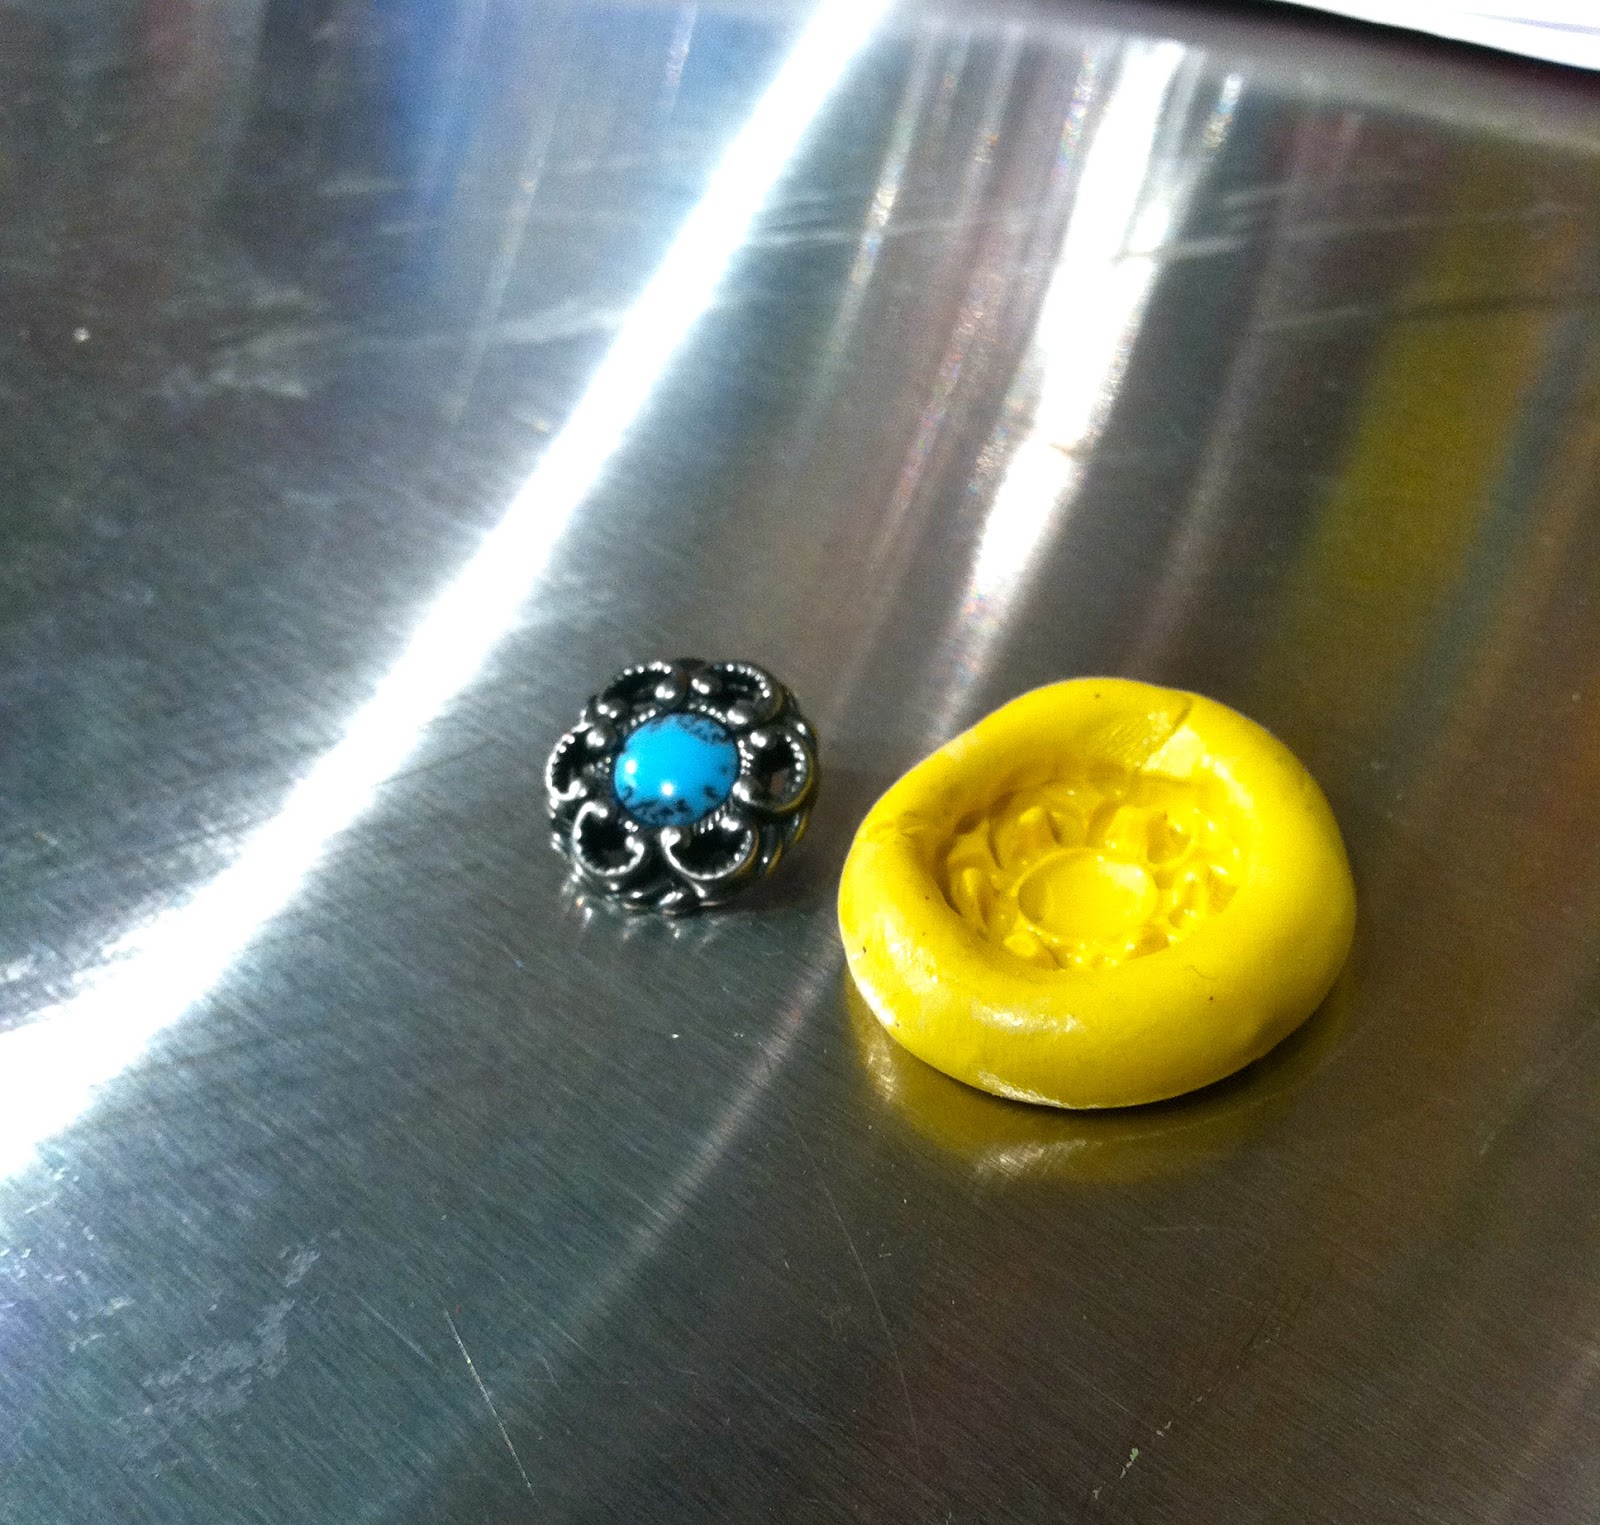
Something small to mold- I used a button from Tim Holtz
Ranger's Alcohol Ink (Raspberry)
Ranger's Alcohol Ink Mixative (Copper)
Copper ring blank (mine is Plaid brand, and adjustable)
Beacon's Quick Grab glue
Spray sealer
1. Mix your parts A & B to make some mold putty. Roll it into a ball, and press onto your work surface to flatten the bottom some. Press your button/charm/whatever into the mold putty. Let set about 10 minutes. Once the mold putty is set, pull your button/charm/whatever out.
2. Put a few drops of Raspberry Alcohol Ink into a mixing cup. Measure your A & B parts of the Quick Cast resin out into 2 separate cups.
Pour both cups into the cup with alcohol ink and mix according to the package.
3. Pour the resin into the mold you just made. If you have some left over, pout it into another mold. I have a large heart mold that I made from a rubber stamp, and I keep it handy for this purpose. The thin little patterned pieces I get from pouring my left overs into it make awesome embellishments on mixed-media work!
5. Once the resin is cured, pop it out of the mold. Check for rough spots. If there are any, sand them smooth with an emery board. Gently sand the back of the resin piece, too.
6. Sand the disk on the ring blank to rough it up a bit. Wipe the dust from both the ring blank and the resin piece. Use the Quick Grab to adhere the resin piece to the ring. Let it set a couple of minutes.
7. Put a little Copper Mixative on your finger, and gently rub onto the resin piece, hitting the high spots.
8. Spray resin part of the ring with a glossy sealer.
9. Let ring set 24 hrs for glue to set really well. Now you have a SUPER cute little ring!!
Now, if you have messy areas of your mixative, just put some Alcohol Ink Blending Solution onto a cotton swab, and clean it up (before you seal the piece). I did, but I see a spot I missed, so I will clean that up a little better before I spray the sealer on it tomorrow (can't spray that stuff in the house, and today was too windy to spray outside!).