Friday, January 24

Join US for an AMAZING Recap from #CHA2014

Greetings Everyone! Susan dropping by today to bring you all an roundup of the happenings at the Amazing Crafting Products Booth from Winter CHA in Anaheim, CA and our Amazing Creatives that joined us in sharing their creative talents at CHA. If you missed the previous recap... CLICK HERE.

Our team began to arrive in sunny California very early Friday AM {more like really late Thursday} and merged on the Anaheim Convention Center for setup day.


The weather couldn't have been more beautiful
as most of the country has been buried in snow and ice.


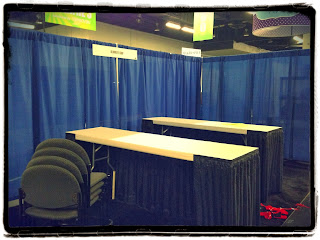
Our booth began as this...


and was completely transformed by the end of the day!


After setting up all day, then presenting our Amazing products at a sneak peek event, it was time to enjoy the Friday Night Block Party event outside with live music and food trucks. The band was fantastic... they could have kept the party going all night!


DeeDee Catron, Carolyn Daly, Mike Faupel and myself {Susan},
enjoying a little down-time before the 4 convention days ahead.


Bright and early Saturday Morning we put the finishing touches on the display and set out all of our AMAZING Creatives work for the world to see and enjoy! A complete transformation... showcasing an array of works of various application and creative styles. Guests who visited our booth truly enjoyed all the work to be seen and trying out Amazing Crafting Products for themselves.


The real attention grabbers were these four giant banners – one for each product: Amazing Mold Putty, Amazing Mold Rubber, Amazing Casting Resin, and Amazing Clear Cast Resin paired with colorful boxes of each product stacked little tables... total EYE CANDY. The show attendees that visited our booth enjoyed seeing many of the pieces from the banners in person. This was my third time attending this show as part of this booth and I was amazed by how all the fabulous work we had on display captured every creatives delight!


Tanya Ruffin shows how to create personalized pendants for mold-making.


I showed how to turn a variety of vintage buttons into a box of AMAZING chocolates...


and had a little midnite crafting madness
with Amazing Clear Cast Resin back in the hotel room!


DeeDee Catron working her creative magic while demonstrating.

  
Jessica Baker's hot white stunning jewels
complimented Carolyn Daly's ensemble perfectly!


Tracy Alden inspired and showed attendees how to create
fun cast resin pieces from items in your crafty stash...


pinning stunning art to decorate your badge holder!


Tanya Ruffin demos making a faux red wine glass using Amazing Clear Cast Resin like her Vlad Dracula candle holder project... this made for some fun conversation.


With another CHA Winter in the books – we off on another creative adventure! :) Sb

Thanks for stopping by and have a great evening!

• • • • • • • • • • • • • •

Don't forget to subscribe to our blog on the right side bar:
Twitter at AmazingCrafting | Facebook at AmazingMoldPutty | YouTube at AmazingMoldPutty

Thursday, January 23

Bright Sunshine and AMAZING Heartfelt Inspiration from Brenda Burfeind

Good Day! Brenda here once again to hopefully inspire you with some Heartfelt Creations. I don't know how many times I've said it, but I truly LOVE the Amazing Crafting Products we get to play with here. I've been so lucky to have gotten to be a part of such a great team leader and fellow designers. Daily I become more inspired and cannot wait to see what's next. 

So with that I've been thinking quite a bit about Valentine's Day. I love decorating and celebrating that day. This year I decided on creating a suncatcher and a magnet to symbolize that day.

I started out with some Amazing Clear Cast Resin and both Alumilite Fluorescent "Flo" Red Dye and Alumilite Black Dye. Once I poured my mold I let it set up a little bit. Using a wooden skewer I dipped it into the red dye and gently dragged it through the resin in the mold. I did this a few times. Cleaning the skewer each time I dipped it back into the dye. I repeated the process with the black dye dragging it through the red and let it cure for 24 hours.


I love how some of the areas became almost feathery looking. Once it set up, I added a bit more of the  Amazing Clear Cast Resin the front of the "suncatcher" and let that dry. I added a ribbon and there it is...


For my second project I started with the Amazing Casting Resin,
which doesn't take but 5 to 10 minutes to set up. 


I painted it red right away. I've found if you paint your molded piece immediately, it takes the paint better. I just used regular red acrylic paint. 


Once the paint was completely dry I used my StazOn Jet Black ink pad
and inked up one of my favorite stamps and stamped the image directly onto the heart. 


Because I used StazOn I was able to add some Amazing Clear Cast Resin
to the top immediately to make it all nice and shiny. 


I added a magnet to the back and now I will always have
a beautiful remembrance of when Valentine's day is.


What kind of handmade crafts
are you making for Valentine's Day?

I hope I've inspired you to use some of these wonderful products and create your own suncatcher or magnet, or both. If you have any questions please leave a comment below and I will get them answered as soon as possible.

Thank you for stopping by and don't forget to check out all the designer's here and sign up to get email alerts... that's how you will always know what we're up to. To see more of my creations – I would love it if you came over to my blog Creativity is a State of Mind. ~ Brenda


• • • • • • • • • • • • • •

Don't forget to subscribe to our blog on the right side bar:
Twitter at AmazingCrafting | Facebook at AmazingMoldPutty | YouTube at AmazingMoldPutty

Wednesday, January 22

Turning Valentine's Day Candy into AMAZING Wearable Fun! A Tutorial by Tracy Alden


Hello! Tracy here with another Amazing Crafting Products tutorial! This week's tutorial I was inspired by some little goodies Susan M. Brown {sbartist}, our Amazing Crafting Products Creative Team Leader, gave me when we met at the Craft and Hobby Association show last week! She had found some fun things while in California, perfect to try molding and turning into art. One of the items was a little box of Valentine's Day candy hearts. I knew they could be turned into something fun with the help of Amazing Mold Putty!

Supplies:


While I love the look of the candy hearts, coating them with sealer or resin would still not last for long if used as jewelry. So the next best thing was to mold their shape and texture to cast in Amazing Casting Resin. I started by picking the best looking candies from the box.


I mixed up some Amazing Mold Putty and squished the putty around the candies. Making sure to not leave any gaps or air bubbles. With just a few of the candies I was able to make several molds with Amazing Mold Putty.


Once the molds were fully cured I poured Amazing Casting Resin. At first I poured the resin without any dye, creating the white candies. Then by adding very tiny drops of Alumilite Dyes in Red and Violet to Amazing Casting Resin I was able to create the look of the other candy colors.


Once the Amazing Casting Resin candy hearts were fully cured, I very carefully drilled a hole through the top of each heart, going all the way through, to make them into beads.

* I left a few resin hearts undrilled, these I will turn into earrings later.


Then using a sanding drill bit I sanded the back and odd edges to make all the sides of each bead appear matte, like the candy. Dust was easily rinsed off and the pieces dried.


Using the Glu6 Glue intended for non-porous surfaces I glued on sticker gems to the front of each heart. While not necessary I felt the sticker gems added a nice touch of sparkle to the beads. 


Using the Glu6 Glue once again I attached earring posts to the backs of Amazing Casting Resin hearts without holes drilled into them. I let the glue dry overnight to ensure a good bond with the resin.


I threaded on a heart bead onto a jewelry eyepin. Carefully I snipped off the excess wire, and using round nose pliers I rolled the end of the wire into a loop. I repeated this with all of the drilled resin beads.


Threading 4 glass beads onto a eyepin again I carefully I snipped off the excess wire, and using round nose pliers I rolled the end of the wire into a loop. I repeated this with a second eyepin. These pieces became the ends of the bracelet.


I opened up a 5mm jumpring with the flat nose pliers and put the jumpring through two of the resin links. When I closed the jumpring with the pliers I created a two part link. I repeated this for the rest of the bead links and added a jewelry clasp at the end to finish off the bracelet.


With the glue dry and the bracelet finished –
I now have a festive Valentine's Day earring and bracelet set.


I found out these little resin hearts looked so nice I even made a fabric bracelet by gluing the resin hearts to a ribbon and once again attaching resin hearts to earring posts. With so many candies to mold, the possibilities of resin candy art or jewelry is endless!

What AMAZING arts and crafts
are you inspired to create???

Please share them on the NEW user GALLERY on the Amazing Mold Putty Website!

Visit my blog Art Resurrected for more craft tutorials!
Until next time, safe travels! ~ Tracy


• • • • • • • • • • • • • •

Don't forget to subscribe to our blog on the right side bar:
Twitter at AmazingCrafting | Facebook at AmazingMoldPutty | YouTube at AmazingMoldPutty
Related Posts Plugin for WordPress, Blogger...