Showing posts with label thanksgiving. Show all posts

Thursday, November 23

Happy Thanksgiving... and a little #Cre8time Surprise!


Hello Amazing Makers! Today we would like to wish everyone a Happy Thanksgiving... one that's filled with love and laughter with family and friends - and of course, wonderful eats! :)


We have a special coupon for you to shop on the MoldPutty.com website for Friday, November 24, 2017! Grab gifts for your favorite maker, stock up on your favorite Amazing Casting Products or treat yourself to some fun new mixed-media goodness...

Please use coupon code TAKE15OFF at checkout.
ALSO enjoy $7.50 flat rate shipping!


Follow Amazing Casting Products
on your favorite Social Media channels: 


• • • • • • • • • • • • • • • • •

Don't forget to subscribe to our blog on the right side bar:
Twitter at AmazingCasting | Facebook at AmazingMoldPutty | YouTube at AmazingMoldPutty

Thursday, November 26

Thankful for #Cre8time... by Melissa Johnson


Hi everyone! In honor of Thanksgiving, I wanted to create some cute fall leaves to use in my table decor for the holiday. 


I created the leaf using Super Sculpey Clay and my set of carving tools. Once the clay was baked, I used my Amazing Mold Putty to mold the leaf shape.


I cast the leaf with Amazing Clear Cast Resin, and colored it with a combination of gold Alumidust and Alumilite red dye


I finished by adding some orange paint and a little vintage brown ink to give it a little more depth, and added some stamping and twine. This would be great on a table setting laid on top of a plate with a pretty cloth napkin under it, as place cards, or maybe several strung along some branches for a centerpiece. 


Have a Happy Thanksgiving!

Make something that makes you happy :) ~ Melissa Johnson
For more of my mixed media projects, please visit my blog.

• • • • • • • • • • • • • •

Don't forget to subscribe to our blog on the right side bar:
Twitter at AmazingCasting | Facebook at AmazingMoldPutty | YouTube at AmazingMoldPutty

Monday, November 9

Cool #Cre8time Breezes bring Falling Leaves... #DIY Cheese Board by Tracy Alden


Hello! Tracy with a special Amazing Mold Rubber Monday project! My inspiration for this project came from the somewhat quicker than normal drop in temperatures in our area and the seasonal falling of the leaves. I noticed some dried leaves covered in frost and wondered if I could replicate the look of fall leaves in icy water. Along with wanting to have some new table decor for the upcoming holidays, the idea of making a cheese board with fall leaves and resin replicating ice wandered into my mind. Since Amazing Clear Cast Resin is FDA approved **food safe** – I knew it would work perfect for this project!

Supplies: 


I collected some dried leaves and painted them with Liquitex Gloss Varnish on the front and back of the leaves. Before the varnish dried I dusted on a variety of colors of Alumidust to the leaves. I set the leaves to the side to dry.


I found a cutting board perfect to mold the shape for my cheese board, in this case a bamboo cutting board. It had an unusual shape but I realized I had a piece of plastic from a toy box that was the perfect size to be the mold box for my cutting board.


Carefully following the instructions, I mixed up one kit of Amazing Mold Rubber and slowly poured it into the mold box. CLICK HERE to view mixing/preparation. In the process of mixing, the Amazing Mold Rubber had formed bubbles. To quickly pop the bubbles I used a heat gun to slowly heat the uncured mold rubber to pop the bubbles.


Once cured I had a perfectly smooth layer of Amazing Mold Rubber at the bottom of the mold box. Now you might be asking me why not mold the entire cutting board in one step like in one of my previous Blog Posts? I wanted to mold a smooth top surface for my cheese board but with textures sides on the cutting board. To do that I need to create the mold in two steps.


To prepare the cutting board for molding, I wrapped it tight with clear plastic wrap and taped it shut. The thin lines of the plastic wrap would be picked up by the Amazing Mold Rubber, giving the illusion of ice.


Once I placed the cutting board on the bottom layer of Amazing Mold Rubber, I put soda and juice bottles on top of the cutting board to press it down onto the first layer. I poured another layer of Amazing Mold Rubber, just enough to cover the sides of the cutting board. With the bottles pressing the cutting board down the first layer of mold rubber would stay smooth with only a minor about of seepage from the second layer. 


Once the mold was cured I carefully removed the cutting board and trimmed all the dried spillage of Amazing Mold Rubber.


Using the technique I used in this Blog Post, I coated all of the dried leaves in Amazing Clear Cast Resin and carefully placed them into the Amazing Mold Rubber mold (with a thin layer of Amazing Clear Cast already poured into the mold) face side down. I moved the leaves around in the resin to pop any large air bubbles. I wasn't overly concerned about air bubbles forming because air bubbles naturally form in ice and any small ones in the resin would add to the effect.


I let the first layer of resin cure to tacky firm and poured another layer of Amazing Clear Cast Resin, almost to the top of the mold. While the resin was still liquid I tore up pieces of mulberry paper and placed it gently on top of the resin. The paper was not sealed so it soaked up resin creating a gauzy background layer, mimicking the look of frozen water and plant debris. 


Once the second layer of resin was cured to a tacky firm stage I poured one last layer of Amazing Clear Cast Resin to the top of mold. I sprinkled a bit of frost colored glitter and mylar flakes and let the resin cure completely.


Once the cheese board was removed from the mold, I carefully removed any resin spills and edges with a sharp craft knife. To give a smooth but frosted finish to the edges and sides of the cheese board I used a small hand drill with a felt buffing tip. I cleaned the cheese board with warm soap and water to remove any dust. 


Now I have a one of kind cheese board perfect for upcoming holiday appetizers! 


When not in use it works perfect for a Fall decoration in the kitchen!

What AMAZING arts and crafts can you create?


Visit my blog Art Resurrected for more craft tutorials!

Until next time, safe travels! ~ Tracy

• • • • • • • • • • • • • • • • •

Don't forget to subscribe to our blog on the right side bar:
Twitter at AmazingCasting | Facebook at AmazingMoldPutty | YouTube at AmazingMoldPutty

#Cre8time Pumpkin Favors filled with Thanksgiving Treats...


Greetings Amazing – welcome to our final day of PUMPKIN WEEK! Susan here to share some DIY treats for the Thanksgiving table settings. Not only did I mold my real mini pumpkins using Amazing Mold Rubber – I made a few molds for molding chocolates and other sweet treats using Amazing Remelt, and Amazing Mold Putty. If you missed my faux iced birthday pumpkin, CLICK HERE and to jump over to view my faux gilded pumpkins HERE.


Amazing Remelt and Wilton Candy Melts both melt down in minutes in the microwave making custom sweet treats like a pro quick and easy.

First I selected a tapered glass bowl deep enough to fully cover my pumpkin, then melted down a container of Amazing Remelt using the lowest setting on my microwave in thirty second increments until it was completely liquified.


**A TIP** I poured a small amount into my bowl and let cool a bit before placing pumpkin in it. ALSO, I dipped the top of the pumpkin into the liquid remelt to coat the stem and let any air bubbles release before fully covering with Amazing Remelt.


After cooling in the refrigerator for a while {it was all day since I had to go to work}, I removed the mold from the bowl. I gently cut the mold in half using a sharp Xacto knife and released the pumpkin. Now I'm ready to make some chocolate mini pumpkins.


I melt down the Wilton Candy Melts following the directions for microwave in a pourable pyrex measuring cup. I scooped the melted chocolate in the Amazing Mold Putty mini pumpkin, on both sides of mold, filling completely. I placed the top half of the mold aligned to my marks and placed in refrigerator to chill and harden. 


I repeated by filling the Amazing Remelt mold and spread chocolate to evenly coat edges and leave center open – this pumpkin I will fill with an assortment of roasted seeds/nuts and mini dark chocolate chips... a perfect edible favor for the table settings.


The chocolate hardens very quickly – then I can remove, set aside on a tray in the fridge and make another set. These are fun to make and can made well in advance of the Thanksgiving Day feast!

What will you transform
into edible art with
Amazing Casting Products??

Please leave a comment below to share! If you would like to see more of my creations, please visit my blog sbartist : painting in the dark by clicking here. ~ Susan
. . . . . . . . . . . . . .

Want to Socialize with Amazing Casting Products?
Twitter at @AmazingCasting | Facebook at AmazingMoldPutty | YouTube at AmazingMoldPutty

Monday, November 25

Happy Thanksgivukkah!!! Make an Autumn Themed Menorah with Isabel Villarreal


I look forward to any occasion that allows me to break out the crafting supplies and whip up some hand made decor deliciousness. When my boyfriend informed me that this year Hanukkah would be falling on the same day as Thanksgiving I almost fainted. How often do I get a chance to combine 2 holidays...it's a dream come true! I immediately broke out the Amazing Mold Rubber and got to work on an Autumn inspired Menorah that would begin as a part of a centerpiece for our Thanksgiving meal table setting and then he would later light in observance of Hanukkah.


To start my project I went out and bought a simple inexpensive metal menorah. Simple works fine for this project since I would be covering a lot of the surface. I had a few random buttons and wood findings that I thought I might be able to use so I glued them onto a small plastic plate with a dot of hot glue to keep them from moving around as the Amazing Mold Rubber set. Amazing Mold Rubber is mixed 1 part catalyst to 10 parts base (10:1). CLICK HERE to view a video of how to mix Amazing Mold Rubber. For me it's usually easiest to mix a large batch and create as many molds as possible at once, so I prepared a few other objects to mold at the same time. After mixing I poured the Amazing Mold Rubber into each of my containers and left them all to set overnight. 


I woke early the next morning, but the molds were still not solid enough so went about my morning routine and left them for a bit longer. It took about 12 hours for the molds to set completely. When I turned the clear plastic plate over, I could see that Amazing Mold Rubber had cured perfectly.


I took a few minutes to trim away any excess rubber and the end result was a beautiful mold with amazing detail that I could use again and again in my crafting adventures.


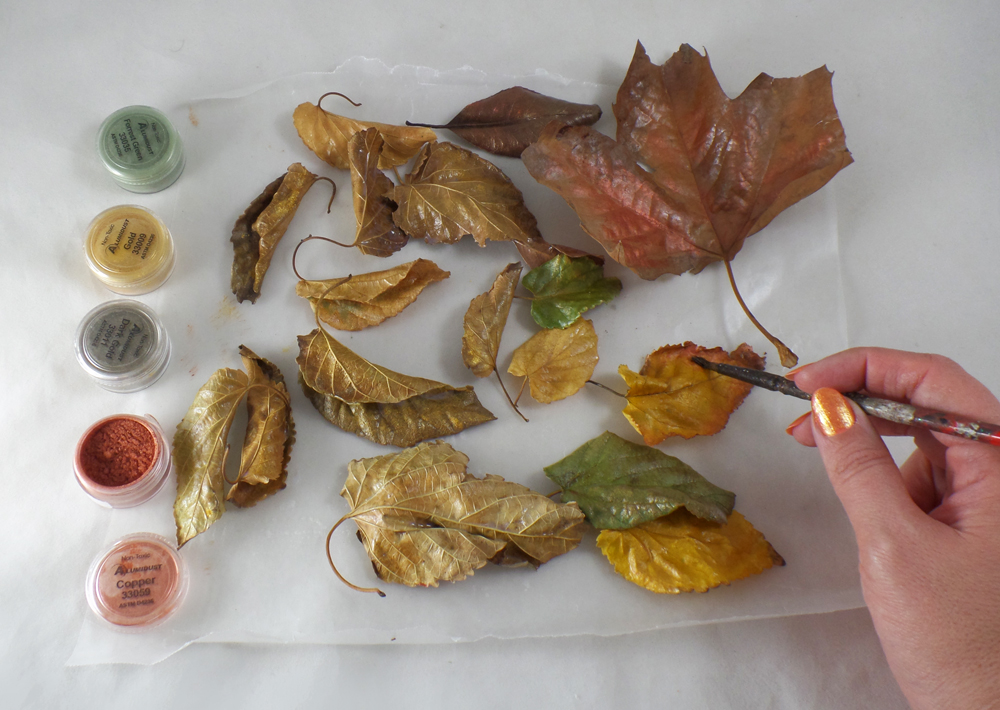
I wanted my molded pieces to have earthy colors so my next step was to color my molds using Alumilite Metallic Powders. These powders are great – a small amount goes a very long way! Using various sized brushed I dusted my molds with Bronze, Pearlescent, Gunmetal, Copper and Gold and did a little blending for different variations of color. When I fished the coloring I mixed up some Amazing Casting Resin by combining equal parts of "A" and "B" and stirring until the mixture is clear.


Amazing Casting Resin sets in about 10 minutes. You can see here that as the Amazing Casting Resin sets it begins to turn a solid white color. The finished pieces will have the metallic color on the front and solid white on the back.


While my resin pieces were setting I cut some strips of satin fabric with a Green and Brown floral pattern. First I used some Chocolate Brown binding to go around the width of the Menorah. This would create a solid base of color and also provide a place for me to anchor the fabric strips once I started to wind them around the metal frame.


My molded Autumn pieces turned out beautifully! I arranged my cast resin pieces around the fabric wrapped metal frame and attached them to the fabric with some hot glue. The Menorah you see is only 8" tall, so each decorative piece is about an inch tall or less. Thank you, Amazing Mold Rubber for making it super easy to get incredible detail in even the smallest cast pieces. My boyfriend and I are looking forward to making this a gorgeous part of our Thanksgivukkah celebration.

What holiday creations will you make


I'd love to see what you create! Please upload and share your creations to our
user GALLERY on the Amazing Mold Putty Website for all the world to see.
...........................................

Don't miss a single post!
Please subscribe to our blog on the right side bar:
Twitter at @AmazingCrafting | Facebook at AmazingMoldPutty | YouTube at AmazingMoldPutty
Related Posts Plugin for WordPress, Blogger...