

Hello! Tracy here with another tutorial using Amazing Casting Products! Around the holidays I often find myself making last minute gifts to complete a package or basket... and this year was no exception. Harking back to the traditional theme of doves as a symbol of peace and goodwill, I decided to create "Peace on Earth" Dove ornaments.
Supplies:
- Amazing Remelt
- Alumidust
- Original Sculpey Polymer Clay
- Stylus (small sizes)
- Pasta Machine (optional but helpful)
- Ceramic Tiles
- Craft Knife
- Emery Board
- Small Paint or Makeup Brush
- Thin Width Ribbon

Using a pasta machine (devoted to craft use only) set on the thickest setting, I conditioned some polymer clay. I stacked two pieces of the now smooth clay on a ceramic tile and rolled an acrylic roller over the stack to make them stick to each other.
I drew a simple dove outline on a piece of parchment paper, then placed the paper on top of the clay. I traced the dove outline with a stylus to transfer the image.

Using a craft knife I cut out the dove shape, being careful around the edges to not tear the clay. I then smoothed out any uneven cuts in the clay with a stylus.

Instead of stamping images into the clay (like I have done with these tag ornaments), I create a free form pattern of swirls and dots as a decorative element on the clay dove. Using a small diameter stylus I gently press into the clay – drawing on the clay, not going too deep but just enough to get a visible pattern.

I bake the clay dove on the tile as per the manufacturers instructions. Using an emory board, I carefully sand any uneven raised surfaces created in the drawing process, without removing the dove from the tile.
Now the fun begins...

I condition more polymer clay and create a clay wall around the cured clay dove piece. To make sure I was creating a tight seal with the clay to the tile, I press the clay in place with a metal stylus. I don't need to bake this clay – it is just serving as a wall to contain mold-making material, Amazing Remelt.
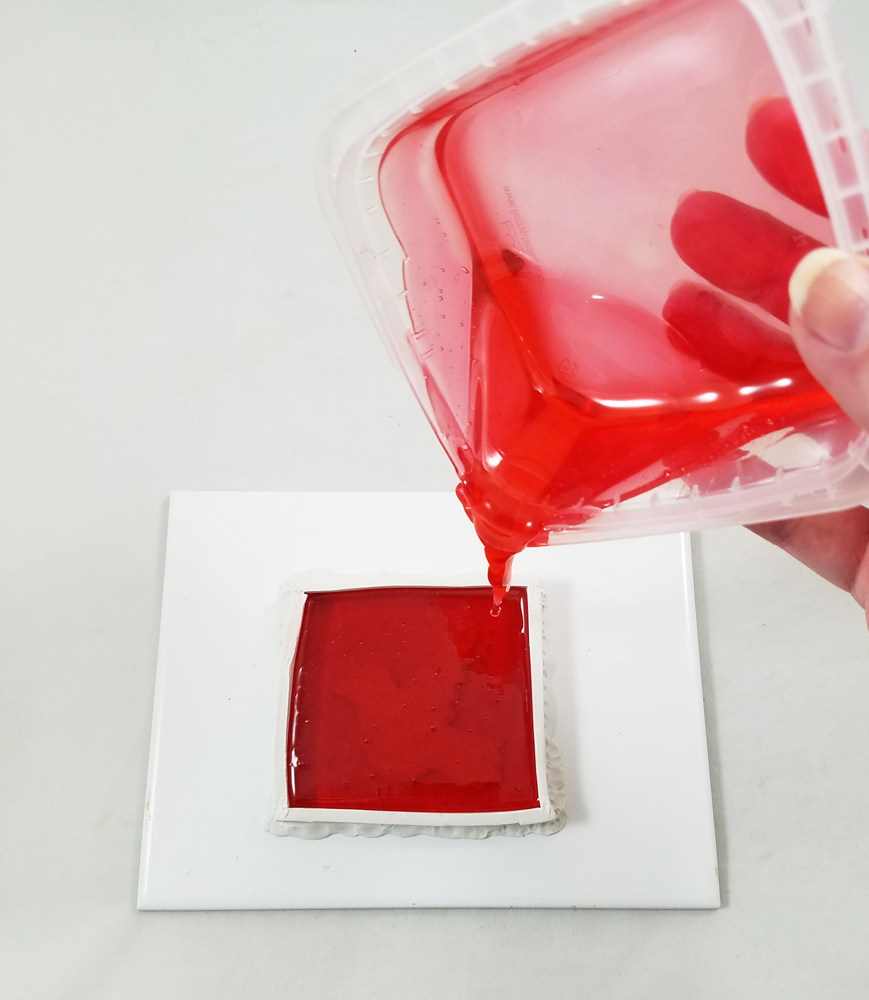
I sprayed the piece lightly with cooking spray to act as a mold release. I heat the Amazing Remelt in the microwave, in the container it comes in (click here to view preparation). I pour the heated Remelt into prepared piece on the tile from a 12 -15 inch distance – this distance gives the Remelt a chance to release more bubbles before cooling.

I let the Amazing Remelt cool until no longer tacky or warm. When completely hardened, I carefully remove the tape, clay and the original from the Remelt mold.
Now to make more...

I condition the polymer clay, making sure the clay was soft and warm enough to be pushed into the mold. I push the clay into the mold tight, using an acrylic roller to push the clay further into the mold – making sure the clay gets into the tiny embossed details.

I carefully place the mold, with the polymer clay still inside, face down on a ceramic tile, then gently peel back the mold leaving polymer clay piece stuck to the tile. I refill the mold with more polymer clay and repeat this process again and again until I have plenty of doves.

I made holes in the clay doves with a stylus which will be for adding ribbon hangers later. I applied two to three shades of Alumidust to each clay dove and then baked the polymer pieces to cure.

These shimmering clay doves are ready to hang
on the tree or put a finishing touch on gift baskets.
What AMAZING arts and crafts can you create?
Visit my blog Art Resurrected for more craft tutorials!
Happy Holidays and until next time, safe travels! ~ Tracy
• • • • • • • • • • • • • • • • •
Don't forget to subscribe to our blog on the right side bar:
Twitter at AmazingCasting | Facebook at AmazingMoldPutty | YouTube at AmazingMoldPutty

No comments:
Post a Comment