Showing posts with label Recycle. Show all posts

Monday, February 13

For the Love of #Cre8time Recycling... DIY Art Molds by Tracy Alden


Hello! Tracy here to share some inspiration using Amazing Casting Products! Notice the interesting resin tiles and the Amazing Mold Rubber molds? Curious on how I made them? Let me introduce one of my favorite sources for inspiration... my recycling bin. Seriously, some of my best pieces of artwork gets inspiration from objects many people think has no value!


Here is a small selection from my recycling bin from this past month. What these objects all have in common is the potential to become a mold, texture or embellishment for a piece of art. I could mold the side of the light bulb to create a dome pendant, those trays can be bases for printing plates, the bottom of bottles and lids make great molds for embellishments, many pieces can be cut up or glued together to make mixed media projects! 


Grabbing just one type of recyclables, in this case a plastic spacer most likely from some sort of packaging, I noticed it had a great shape. Smooth on three sides, even in shape and thick enough to create a mold with depth for layers.


I glued the spacers into a plastic sushi tray {also from my recycling bin}, which made the perfect mold box! Carefully following the instructions, I mixed up a kit of Amazing Mold Rubber and slowly poured it into my mold box. CLICK HERE to view mixing/preparation. In the process of mixing, the Amazing Mold Rubber had formed bubbles. To quickly pop the bubbles I used a heat gun to slowly heat the uncured mold rubber to pop the bubbles.
**You can use either Amazing Mold Rubber or Amazing Mold Putty for creating molds from recyclables. Mold Putty will create a matte to satin finish (food safe!) mold and Mold Rubber will create high gloss and detail (non food safe) mold.

Once the Amazing Mold Rubber was completely cured I removed the plastic pieces from the tray. When I gently removed the pieces from the Mold Rubber they came out rather cleanly, requiring very little trimming of the mold rubber with craft scissors. Now don't think I threw away that tray or bits of plastic! They get saved for a future project or at the very least go back into the recycling bin!


I went ahead tested out my molds and used Amazing Clear Cast Resin mixed with pressed flowers, glitters, alcohol inks, beads, Alumidust powder and Alumilite Dye. Happy with my results I can use these molds for things besides resin such as clay, paper mache, embossing powder and more. 


So many objects normally only thought of as recycling can be repurposed to create molds for your art... and the creative possibilities are endless!

What AMAZING arts and crafts can you create?

Visit my blog Art Resurrected for more craft tutorials!

Until next time, safe travels! ~ Tracy

• • • • • • • • • • • • • • • • •

Don't forget to subscribe to our blog on the right side bar:
Twitter at AmazingCasting | Facebook at AmazingMoldPutty | YouTube at AmazingMoldPutty

Tuesday, February 23

It's Wine o'Clock and Time for #Cre8time... AMAZING Inspiration by Brenda Burfiend


Good day! Brenda here from Creativity is a State of Mind again hoping to inspire you to create coasters using an everyday household object. I have an obsession with coasters and wine! And since I work in a wine store I really obsess about it... Wine that is!


I love trying to figure out things are not costly and I think I'll be making a bunch of these fun coasters for my wino friends. All you need is some lids from a container, some Amazing Clear Cast Resin, printed paper, glitter (optional) and some patience. You can see the full tutorial HERE!

What would you create if you had a tight budget
and what common item would you use as a mold?

Thanks for stopping by and I hope to see you soon. Wine on! ~ Brenda

Visit my blog, Creativity is a State of Mind to see some more of my creations.

• • • • • • • • • • • • • •

Don't forget to subscribe to our blog on the right side bar:
Twitter at AmazingCasting | Facebook at AmazingMoldPutty | YouTube at AmazingMoldPutty

Friday, February 19

#Cre8time for a Swim in an Upcycled Sea... AMAZING Inspiration by Tracy Alden


Hello! Tracy here with another Amazing Casting Products inspiration post! Recently I have been inspired by community clean-up projects and how to upcycle plastic. Having already seen many beautiful upcycled plastic soda bottle jellyfish sculptures, I wanted to try a version with water bottles.

My first learning curve was finding out using a candle isn't always the best; it can cause the plastic to light on fire, uneven melting and of course make the project not very child friendly.

I found out using a heat gun was a better way to control the melting of the plastic and older children can join in with the crafting with adult supervision. However even with using a heat gun the plastic would curl, fold over and make all kinds of lumpy and rather un-jellyfish shapes.

I realized when using a heat gun I needed to create a base for the plastic bottles to mold to while being shaped. This is where Amazing Mold Putty came to my rescue!


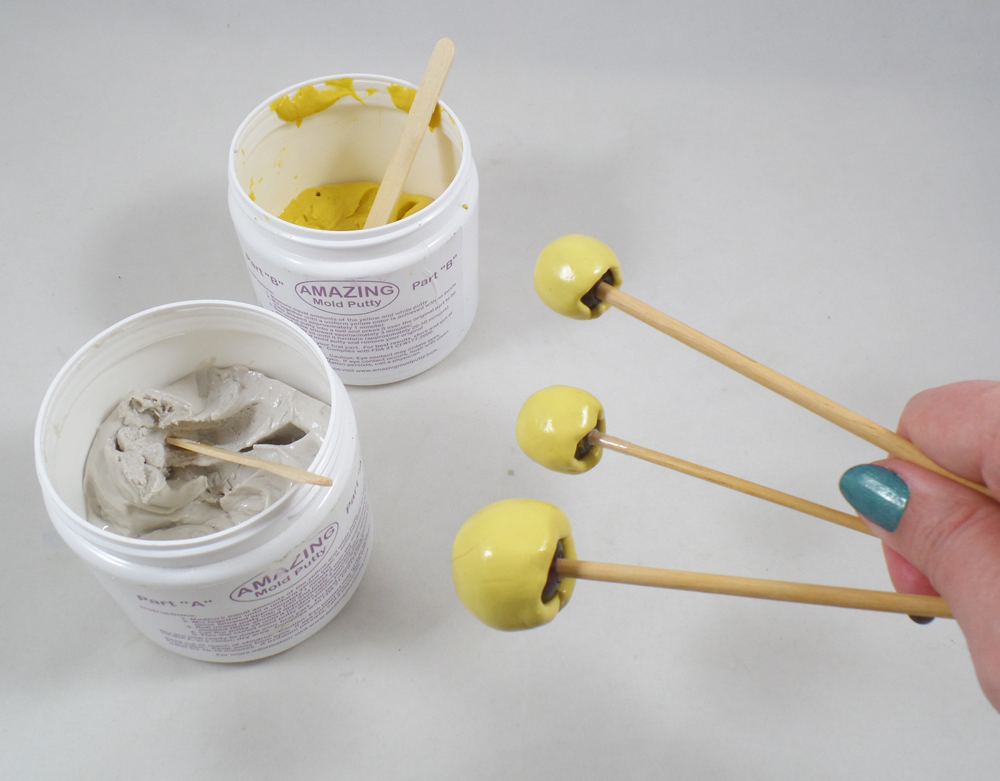
I started off with 3 over-sized glass beads, small, medium and large. I pushed the beads on wood dowels cut to 12 inches.


While I could heat and mold the plastic water bottles over the beads I would risk the plastic shrinking to the glass so tight it couldn't be removed and the glass beads overheating from the heatgun. I needed to make a heat tolerant base that was flexible and would retain the round shape. I mixed up some Amazing Mold Putty and applied a small amount to each bead, covering the majority of the bead.


Once cured I placed each Amazing Mold Putty coated bead into a heat tolerant cup and filled it with glass pebbles. The cup with pebbles would act as a temporary base, to stick the now finished round molds in, that would not shift while the plastic bottles were being heated.


With a sharp pair of scissors I cut off the top nozzle of each bottle, and then cut each bottle bottom off; they will become the bell top of the jellyfish and the sides, cut like fringe, would become the tentacles. I tinted the plastic with alcohol inks but there are many different pigments and paints you can use to tint the plastic.
*Depending on the shape of the plastic bottles you might find you will need to cut them in a different manner; there is no right or wrong way, it is all about having fun!


Using a pair of tweezers I placed one of the plastic bottle bottoms on the largest of the round molds and heated it with a heat gun. I was careful to rotate the plastic to make sure all of the plastic was heated and would shrink down into jellyfish bell shape.


Using a pair of tweezers I placed one of the plastic bottle sides on the medium size round mold and heated it with a heat gun. I heated the top first, shrinking the plastic and making it snug around the Amazing Mold Putty. I then grasped each cut piece of plastic with the tweezers, twisting to create tentacles.


I then placed both the tentacle and bell shaped plastic pieces together on the small round mold and heated them one final time to create the final shape.


The bell and tentacle pieces can be attached together with glue or eye-pins, as I did to create tropical party ornaments. If you drilled a large enough hole through the bell of each jellyfish, then thread on the tentacles, you can make them into string light covers!

What AMAZING arts and crafts can you create?

Please share them on the user GALLERY on the Amazing Crafting Products Website!

Visit my blog Art Resurrected for more craft tutorials!

Until next time, safe travels! ~ Tracy

• • • • • • • • • • • • • • • • •

Don't forget to subscribe to our blog on the right side bar:
Twitter at AmazingCasting | Facebook at AmazingMoldPutty | YouTube at AmazingMoldPutty

Thursday, December 31

Ring in the New Year with #Cre8time Recycling... by Maria Soto


Hi there! I decided to make a new bracelet to wear for the New Year's party. I had these empty duck tape rolls and decided to use one to make a quick and easy resin bangle. 


Now sometimes when I paint, I keep napkins handy to clean the brushes or spills. I'm very clumsy so it happens a lot. As I was working, I noticed all the pretty colors so I decided to use these decoupage a bangle... but instead of using glue, I used the Amazing Clear Cast Resin to add the napkins I used to clean up my paints.


It was so easy, I cut the empty roll in half. I gathered my supplies and went on to mix a small amount of Amazing Clear Cast Resin. 


Amazing Clear Cast Resin has easy to follow instructions on the box or CLICK HERE to view mixing/preparation. I mixed a small amount of resin and applied it to the outside of the empty roll a little bit at a time using the mixing stick, then applied sections of painted paper towels.


Once I was done covering the outside with the colored paper towel, I added a bit more Amazing Clear Cast Resin over all the tissue and let it dry overnight. I used a mold to hold the resin covered bangle and to make sure it would catch any excess resin.


It's all done and ready to wear! Now you can either do the same process to the inside of the bangle –or just paint it and then seal it with more resin.


I'm so ready to wear this for our New Year's party. Amazing Clear Cast Resin is one of my favorite crafting products... it can be used in so many different ways – not only to be used in mold making.

How do you use resin?
Any fun and creative ways?
Please do share with us by leaving a comment below.

Looking forwards to creating outside the box
in the coming year... Happy New Year to all!

Thanks for visiting! I invite you to stop over to my blog, "What is Creativity" at http://chuy-creativity.blogspot.com to see more of my creations. ~ Maria Soto

• • • • • • • • • • • • • • • • •

Don't forget to subscribe to our blog on the right side bar:
Twitter at AmazingCasting | Facebook at AmazingMoldPutty | YouTube at AmazingMoldPutty

Friday, December 4

Dress the Walls with a little #Cre8time Recycling... by Melissa Johnson #12daysofHomeDecor


Hi everyone! Today I wanted to share with you a mixed media wall hanging I've created as a gift for my sister in law (shh... don't tell her!)


To begin, I started with an old piece of barnwood that a friend passed along to me. I lightly painted it with turquoise acrylic paint, then sanded it a bit to smooth it out and distress the paint.


I set the board aside and began working with some bottle caps and vintage images. I placed the images inside of the bottlecaps, and poured Amazing Clear Cast Resin inside of each one.


I dug through my stash and found a picture of a vintage girl and added her to the board, along with the bottlecaps.


I finished off the entire project by adding a fun little phrase to the girl, a vintage style button, and some twine. Here it is all finished and ready to be gifted!


How do you dress up your walls?

Make something that makes you happy :) ~ Melissa Johnson
For more of my mixed media projects, please visit my blog.

• • • • • • • • • • • • • •

Don't forget to subscribe to our blog on the right side bar:
Twitter at AmazingCasting | Facebook at AmazingMoldPutty | YouTube at AmazingMoldPutty

Wednesday, October 14

#Cre8time Upcyling Transformations... Ice Pack to #Sugarskull Blank by Brenda Burfeind


Hello crafties! Brenda here from Creativity is a State of Mind and I'm excited to show you something cute with today's post. I've been trying to get ready for Halloween and while digging through my Halloween stash, I found this ice pack I had received last year! I have no need for ice packs, so in my Halloween crafty stash is went. Well, when I found it this year I had a little lightbulb moment.


I had to freeze the ice pack because if I tried molding it while it was jelly I wasn't sure how it would form. After it was frozen, I created a mold of it by pressing it into a prepared batch of Amazing Mold Putty {CLICK HERE to view mixing/preparation}.


I created the piece using Amazing Casting Resin
{CLICK HERE to see mixing instructions}.


After about 5 minutes the piece was cured and I drew my design with a pencil right onto the resin. That's what I so love about these resin pieces also... you can draw and color directly onto them!


Then I had fun coloring it in with my markers of all sorts.

I think I will put a magnet on the backside and have a new embellishment for my refrigerator! I know I'm not that good on coloring but I plan to make a couple more of these blanks and giving them out on Halloween to the neighborhood trick-or-treaters with some candy of course!

I hope you've enjoyed my post today and I can't wait to show you something I have in the works for next time.
Thanks for stopping by and until next time, Brenda saying "see you soon"!

Visit my blog, Creativity is a State of Mind to see some more of my creations.

• • • • • • • • • • • • • •

Don't forget to subscribe to our blog on the right side bar:
Twitter at AmazingCasting | Facebook at AmazingMoldPutty | YouTube at AmazingMoldPutty

Wednesday, September 23

Set your #MixedMedia table for a #Cre8time Buffet... by Melissa Johnson


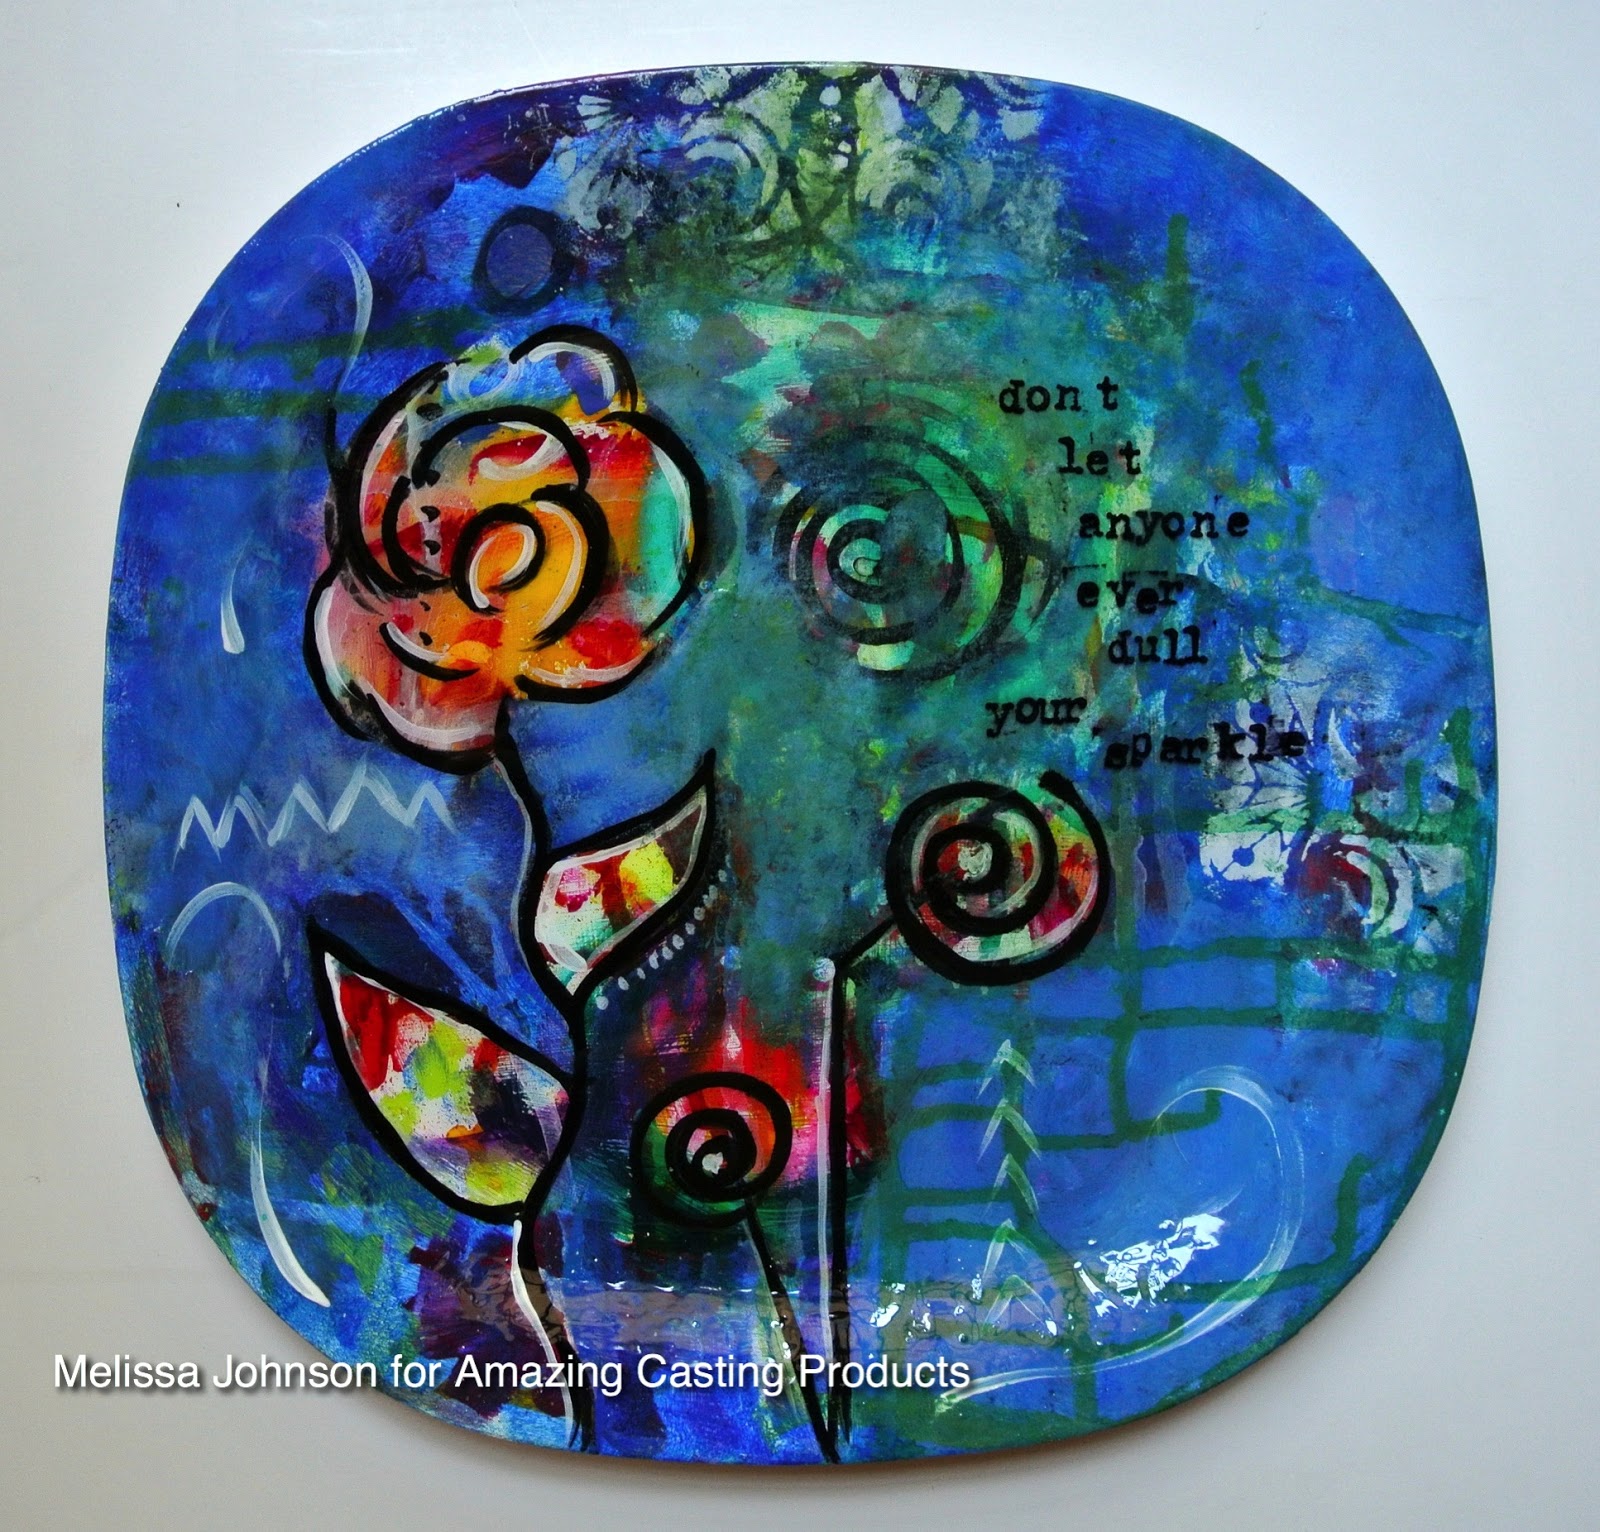
Good afternoon everyone! Today I am sharing one of my favorite projects to date – a set of custom mixed media plates!
Did you know that
Amazing Clear Cast Resin 
is food safe?

So it's perfect for creating some fun custom pieces! Just remember to hand wash these treasures, as they are not dishwasher safe.


To begin, I purchased some melamine plates from the Dollar Tree and covered them with two coats of gesso. Allow gesso to dry completely.


For the next step, I gathered my acrylic paints (any brand is fine, I mixed up Golden with cheaper craft paints) and began randomly finger-painting on the plates. Start with your warm colors first, and allow to dry. Then go in with your cool colors. This way they don't all blend together and turn muddy.


Continue to build the layers of paint until you are happy with the colors.


When everything is dry, go in with your black and white and begin drawing in designs and making marks with a fine brush. After you have your design painted in, take a foam brush and gently begin to work in a solid color around your design. I like to mix some lighter shades of the same color along with some white to create a variance in the color. You can also add some stenciling in at this point in a bold color like black. To give my plates a consistent look, I used the same stencil on all of the plates.


When your design is complete, mix up some of the Amazing Clear Cast Resin and coat the plate. Please CLICK HERE to view mixing/preparation. Allow to dry overnight. I added two coats to mine for extra gloss and durability. You want to make sure every bit of the plate is covered.

And here are the finished plates! 


How will you create custom plates
with Amazing Clear Cast Resin?

For more of my mixed media projects, please visit my blog.
Make something that makes you happy :) ~ Melissa Johnson

• • • • • • • • • • • • • •

Don't forget to subscribe to our blog on the right side bar:
Twitter at AmazingCasting | Facebook at AmazingMoldPutty | YouTube at AmazingMoldPutty
Related Posts Plugin for WordPress, Blogger...