Sunday, May 6

White Rabbit's Pocket Watch

One of my favorite things about Alumilite products is their versatility for use with other products. As a doll maker, I see the versatility as a window of opportunity to create things that I might not have been able to for my dolls. Talk about customized!! One of those items, is Creative Paperclay®. I use Creative Paperclay® pretty heavily in my doll making, and recently, I started work on an Alice in Wonderland White Rabbit doll.
While I was making him, I knew I wanted to create a Pocket Watch for his "costume".  I started with a watch face I got at a thrift store. It was just the face, with the hands still attached, but no backing.
Using Creative Paperclay®, I began layering paperclay to the back of my watch face.
I let the first layer dry, and then added a second layer to bring around the edges of the watch.
Once those layers were dry, I used a fine grit sand paper to bring out the edges and lines that made the "frame" of my watch. Then I added a small eye screw to the top for future hanging of the watch.
Next, I painted the clay to be metallic.
After the metalic paint was dry, I aged it by adding some black paint over the top, and wiping it all off except for the crevice areas of the watch. Once I had the watch ready and clean, I mixed equal parts of Amazing Clear Cast and poured the liquid into the watch.
Of course, I'm a sucker for details, so I Googled "tea time" and found that it's usually between 2-5pm... and since the White Rabbit is LATE... I set the watch hands to just past 5:00 before I poured the resin in. Clear Cast resin takes longer to cure than the white casting resin by Amazing Mold Putty, so I set the watch on the windowsill to cure overnight.
Once it was cured, I hung the watch just out of Rabbit's pocket!!
Be sure to share any projects you make using ideas like this on the Amazing Mold Putty® Facebook Page!!
I'd also love it if you visit me at "my house"!!

Monday, April 30

An Unusual Paperweight Made Using Amazing Mold Putty and Amazing Casting Resin!!

Sometime ago I picked up a liquid soap dispenser in a thrift store that was shaped like a lady’s shoe. I thought it looked awesome and had the idea that it would also look good as a paperweight! Now wouldn’t that be unusual and quirky perched on your desk at work?


And so the fun begins! First off I mixed equal amounts of Parts "A" and "B" of the Amazing Mold Putty. After kneading the putty until it was completely blended, I molded the putty around the shoe as far as it would go. I then repeated the process with more putty and finished molding the shoe.


Looks pretty bad at this point doesn’t it?


I then mixed up equal parts of the Amazing Casting Resin and added some Alumilite Blue Dye to it. Because the mold is slanted, it took several pours to get the mold completely filled.


Once the mold was set up I popped it out of the mold and here it is:


How cool is that???? The main reason for the blue is to give the project a colored background. I trimmed up the Amazing Casting Resin piece and then sprayed it with some Krylon Glitter Blast. Once that was dry I added a few embellishments and here’s the finished project:


The pictures don’t even begin to show just how glittery the Krylon glitter blast is. I was really pleasantly surprised at what an easy job it was to make the mold and pour the resin. I thought I would have resin everywhere because I had to do four small pours to fill the shoe but it was a breeze because the resin sets up so quickly. Here’s some other shots:


This paperweight would make a sweet gift for someone but I think I’ll keep this one and now I have a mold to make others! You need to try this stuff, because I know you’ll like it!

~ Barbara

Friday, April 27

Frame Fragments

Hello! I'm Rachel Whetzel. I'm so excited to be sharing for the first time here on the Amazing Mold Putty® blog!! Let me introduce myself a bit before I share my project with you...
I am a mixed media artist and doll maker. (Among a billionty other things! lol)
When I first saw Amazing Mold Putty®, I just KNEW that it would fit into my mixed media art and doll making. All of my pieces contain some form of thrifted, vintage treasure from my vast collection of collections.
You know. Because when you find something you like, you need to collect more than one of them... right?
For the piece I'm sharing today, I used one of my very favorite metal frames from my metal frame collection.
My favorite metal frame
The problem is... I love this frame. I used to have two. I used one of them in a piece of art, which I love. So now, I have one left. You see where this is going? I've been avoiding using the second frame, because I didn't want to NOT have it to use any more. If you're an artist or a collector, I don't need to explain how THAT works in a person's mind.
ENTER
Amazing Mold Putty®!! 
Can you hear the angels singing?

 Supplies you'll need:
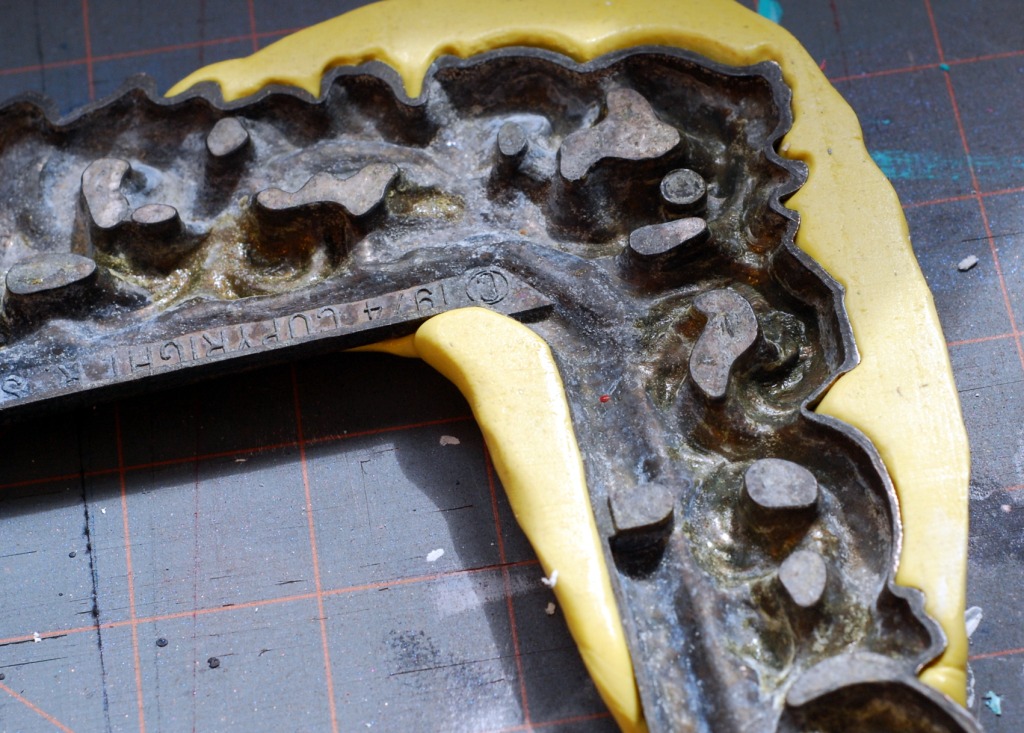
First, I used equal parts mold putty A and B and mixed them together in my hands until they were a uniform color yellow. (no white/yellow stripes)  Then I molded the putty over the corner of the frame I was going to use. My frame is large, and my art piece was not going to be, so I only molded a portion of the frame, and created a frame "fragment" of sorts for my art piece.
 Here's the backside of the frame with putty around it.
 Once I allowed the putty time to cure, I pulled it off of my frame.
 Because I was only making a fragment of the frame, and since that made the edges of the mold too shallow for resin to stay in, I added a small lip to the ends of the fragment to help hold in the resin when I poured it. That's actually one of the neat things about Amazing Mold Putty. You can go in and add to previously cured parts of a mold!! That's what I did here.
 Next, I used equal parts of the Amazing Casting Resin, mixed them together, and poured that into the mold. Here's a photo of the resin in mid cure. It's pretty neat to watch it turn white as it cures.
 Once the resin was hard, but not totally cured, I pulled it from the mold and trimmed sharp edges. I also sanded out the holes in the frame piece. I'm sure this can be done on a fully cured piece, but doing it on an only slightly cured piece seems to be easier.
 Next, I painted my piece with a metallic paint. I painted a few coats to make sure I covered the resin thoroughly. After that paint was dry, I added dimension and age by painting a dark paint over the whole piece, and wiping off the top layer. I left the dark paint in the crevices of the piece.
 Next, I got to work on my background piece. The base is an oval piece of glass I've had just waiting for a new life for a while now. I painted stripes on the back, glued map pages to it, and then spray painted lace and doilies on it.
 Dribbled paint, and splatters added. I glued the frame fragment and other bits and pieces to the glass, and added a line from one of my son's favorite songs to it.
 Close up of the frame fragment and all it's finery... Now I can use and use and RE USE my favorite frame without having to worry about not having it to use anymore!!
Thanks so much for coming along with me on this project!! Be sure to share any projects you make using ideas like this on the Amazing Mold Putty® Facebook Page!!
I'd also love it if you visit me at "my house"!!
Related Posts Plugin for WordPress, Blogger...