Thursday, September 8

Tis the Season for #Cre8time... Christmas Tree Ornament REDUX by Lyn Gill


Hi All! Lyn Gill here again with an Amazing Mold Rubber project for you. First of all I know it's not quite time to start Christmas projects, but I always wait till the last minute to think about how I'm going to decorate my tree. This year I decided to start early... LOL! 

I started with an old hollow decoration from a wreath I had dismantled. He's cute but I wasn't too wild about the color. I needed to make many of them so Amazing Mold Rubber was the answer. 


In a disposable plastic cup I molded the little cherub with the Amazing Mold Rubber and let it set up. CLICK HERE to view mixing/preparation.
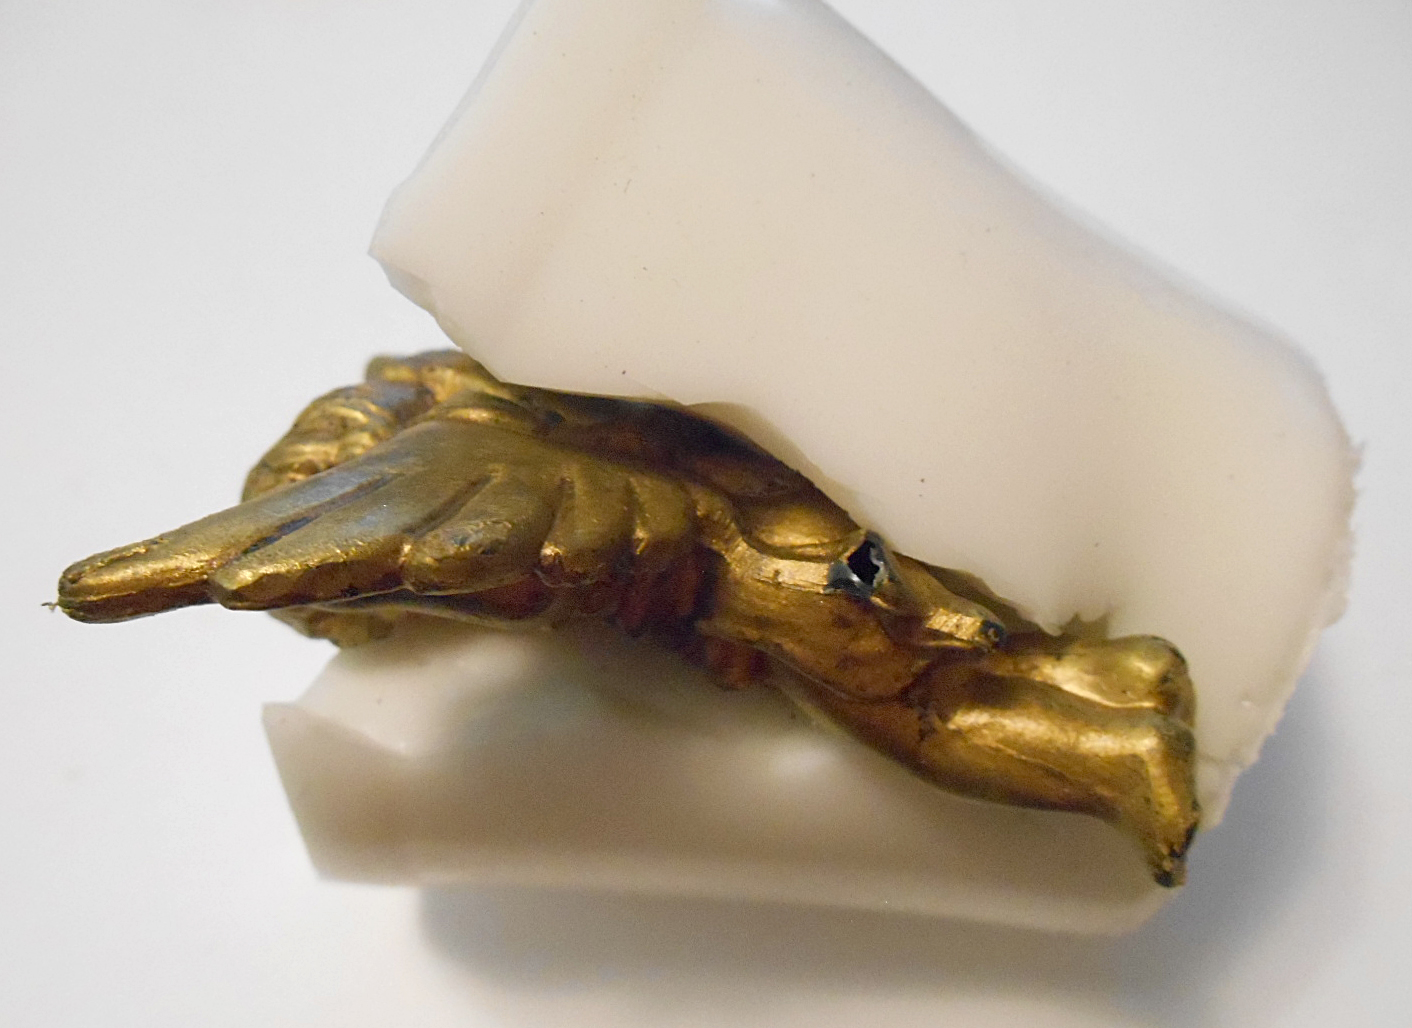

As you can see I sliced the side of the mold to aid in release. Before pouring resin, I wrapped a rubber band around outside of mold to keep mold closed tight. I filled the mold with Amazing Casting Resin and let it set up. He turned out so cute! I was actually shocked when I de-molded him!


Original...


Amazing!

Now he's adorable isn't he?! I painted him a lovely Turquoise color then added some crackle glaze and a bit of clear glitter on the wings. 

What will you mold with
The possibilities are endless!

Well thanks so much for stopping by today... 
Till Next Time! ~ Lyn

You can also find me on my Blog LynzCraftz, 
on my  Facebook page LynzCraftz, 
or on my YouTube channel LynzCraftz.

• • • • • • • • • • • • • • • • •

Don't forget to subscribe to our blog on the right side bar:
Twitter at AmazingCasting | Facebook at AmazingMoldPutty | YouTube at AmazingMoldPutty

Wednesday, September 7

Beneath the Waves are #Cre8time Jewels...
by Cindi McGee


Hello Amazing Crafters! Are you still daydreaming about summer days on the shore? "Beneath the waves", mixed-media artist Cindi McGee reveals a lovely coral pendant that features an amazing way to transform your beach treasures into fashionable jewelry.

Cindi McGee shares two techniques for molding Makin's Clay® to create this quick and easy pendant using Amazing Mold Putty, JudiKins Diamond Glaze™ and an Octopus mold from CreateAlong.com.


If you are having trouble viewing video, please click HERE.

Want to learn more from Cindi McGee?

To see more of Cindi's work please visit her blog
and see what other amazing things she is up to. 
ALSO... don't forget to leave her a comment!

Cindi is also one of the Creative minds at When Creativity Knocks


• • • • • • • • • • • • • • • • •

Don't forget to subscribe to our blog on the right side bar:
Twitter at AmazingCasting | Facebook at AmazingMoldPutty | YouTube at AmazingMoldPutty

Friday, September 2

#Cre8time Explorations... Amazing Resin Painted Galaxies by Lara Hjorthoy


Hi Friends! Lara here with a "How-To" project this week – something a wee bit different! I decided with all these great frames I've been collecting... I needed to put some of them to use!

I love skies, and galaxies and stars! I often paint these scenes and they're beautiful when I do. To my delight Amazing Casting Products has all these beautiful colored dyes and one of my favourite products, the Alumilite Pearlescent Powder. So, I decided this week to try CASTING my own galaxies!


I first started out with a small 5" x 7" frame that I spray painted in a lovely semi-flat black. Then attached the piece of glass to the inside of the frame with superglue. That I allowed to set overnight just to make sure there would be no weird reaction with the resin.


I added to 6 different cups a tiny amount of black, blue, violet, yellow, green and white dyes as well as a tiny amount of the pearlescent powder to each cup.

I mixed up a batch of Amazing Clear Cast Resin and after allowing the bubbles to settle for a bit, I poured a small amount of the resin to each cup – mixing each again, very thoroughly! The Pearlescent is so-o-o-o-o beautiful in all the colors! It adds just the right amount of sparkle, or in this case, STARS!!!


Upside down, right after pouring!

I poured each color separately into the frame, allowing them to mix together a bit. I used a popsicle stick to push around the resin colors that I wanted to shape a bit more. Then sat back and allowed this to cure! Here in Vancouver, the curing time wasn't long, and I was able to see the results within 4 hours.

I flipped the piece over and boy was I surprised! The pearlescent powder had settled ever so on the glass that the resin was poured onto, and I ended up achieving a crazy sparkly effect! It's gorgeous!


Since this was so reflective and hard to capture in a photo, here's a little video capturing the full sparkly effect! If you have trouble viewing video, please CLICK HERE.

Now to do larger galaxies!!!! I can't wait to make more of these... as it was so easy to make. What a dramatic piece of art to add to your wall!


Hope you enjoyed this little How-To this week!

What out of this world resin
paintings would you create???

Stay Inspired ~ Lara

Check out my website at www.larahjorthoy.com and YourToyCreation.etsy.com. You can follow my day to day creations at Facebook and Instagram, look for YourToy Creations!

• • • • • • • • • • • • • •

Don't forget to subscribe to our blog on the right side bar:
Twitter at AmazingCasting | Facebook at AmazingMoldPutty | YouTube at AmazingMoldPutty
Related Posts Plugin for WordPress, Blogger...