Showing posts with label 7 Dots studio. Show all posts

Friday, September 12

AMAZING Casting Resin Lion Head... HOWTO by DeeDee Catron

hi hi HI!! :)

I'm excited to be back on the Amazing Crafting Products blog. Though my small break was needed, I'm ready to be back and start inspiring again.


You may have seen this tag around recently by me. It was made for a blog hop a week or so ago, and the lion head is Amazing Casting Resin! WELL >>> there happened to be a little bit of buzz about him, and I took the opportunity to share a how-to with everyone :) .

For the tutorial and a new tag, I opted to make my lion a bit of a grungy metal dude and am super excited to share my video with you, BUT first let me show you the tag:


Now onto the video and then some details :) :

If you have trouble viewing the video please CLICK HERE to view.


The top is made of some UmWowStudio gears distressed with ink, moss, Prima Marketing flowers, goggles, nest, leaves and wings, and my Lion Casting. It's all been layered up and adhered down with a heavy thick glue.


The tag base is paper from 7 Dots Studio cut with a Sizzix #8 die. It's been colored with Lindy's Stamp Gang magicals and stamped with a VLVS! rubber stamp. Two final pieces of embellishment consist of a miniature door handle and my message which reads "We All Stem From Nature." It's sort of a stab at the Steampunk genre and reminding ourselves that regardless of how many gears, how much metal, how many rivets... we're all just animals :)

Thanks for visiting me here today.
. . . . . . . . . . . . . . . .

Don't miss a single post!
Please subscribe to our blog on the right side bar:
Twitter at @AmazingCrafting | Facebook at AmazingMoldPutty | YouTube at AmazingMoldPutty

Wednesday, August 27

A #Cre8time Gathering for an AMAZING Fall Harvest {How To by DeeDee Catron}

Hi hi hi friends! DeeDee here today, it's been a while but I'm excited to be back on the Amazing Crafting Products blog sharing some of my works with you. 


Today I'm doing a start to finish photo tutorial in a super FALL HARVEST theme. I'm so pumped for September right around the corner, and can't wait for the weather here in Vegas to relax just a little bit more. Let's get started shall we? 


1) Start with a tag base. My tag is a sheet of 7 Dots Studio paper by 
Finnabair cut using a Sizzix / Tim Holtz die.


 2) Distress edges with Walnut Stain Distress Ink and water.


3) Mix equal parts of Amazing Mold Putty parts "A" and "B".


4) Form Amazing Mold Putty around acorns. 

TIP: I like to have a nice flat back of my resin pieces to secure to the paper
or project that I'm working on. SO I only mold half way around the piece.


5) Mix equal parts of Amazing Casting Resin and pour acorns.
Allow to cure, demold.


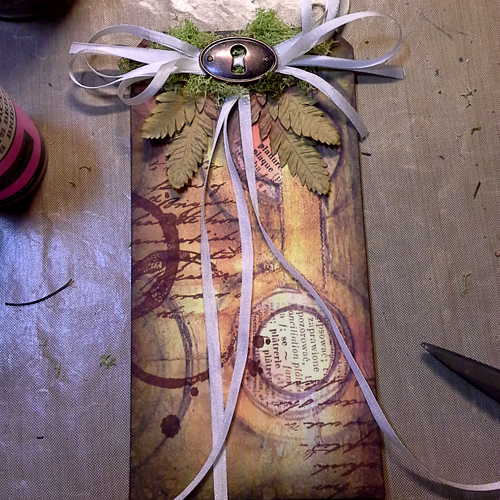
6) Build up base of tag with stamps, ribbons, 
flowers, and embellishments.


7) I felt like my acorns needed some texture and color, so I embossed
them with some WOW copper embossing powder.

I love altering the Amazing Casting Resin AFTER it's cured (as opposed to before),
because I don't need to worry about altering my mold or changing the original piece.


8) Distress with black acrylic paint.


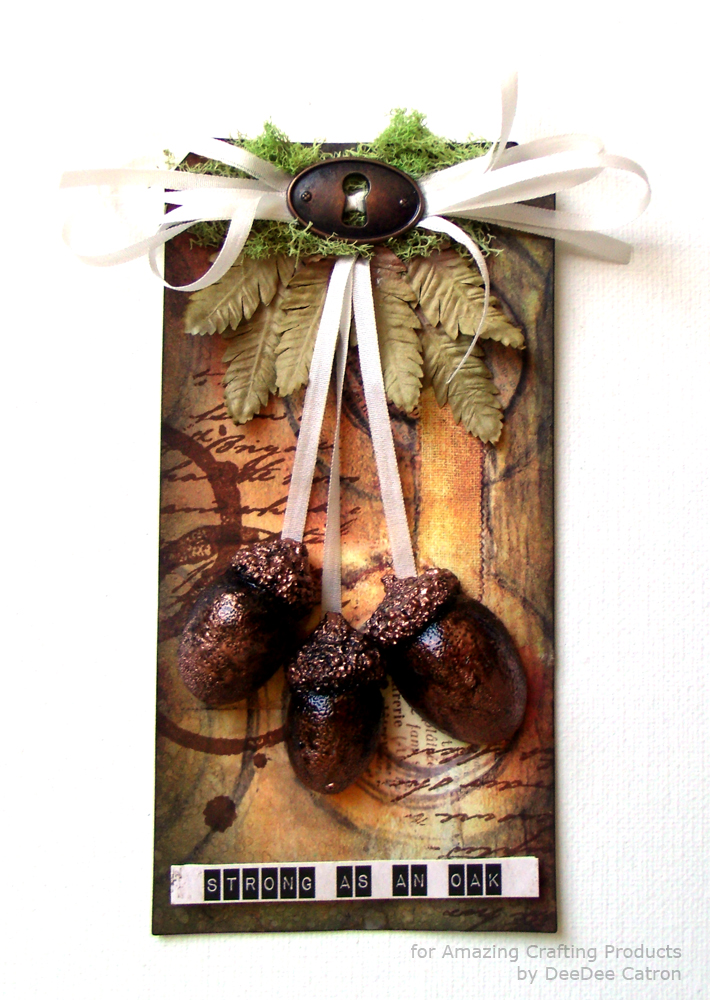
9) Finish by layering the acorns up and adhering a sentiment.

There really are .. a TON of ways to finish your resin pieces;
glass beads, adhesives, powders, flocking, inks, mists, paints, more resin!
What have you always wanted to try? 


. . . . . . . . . . . . . . . .

Don't miss a single post!
Please subscribe to our blog on the right side bar:
Twitter at @AmazingCrafting | Facebook at AmazingMoldPutty | YouTube at AmazingMoldPutty
Tuesday, March 4

Forget the RULES! AMAZING Inspiration by DeeDee Catron

Hey Folks! DeeDee here today to INSPIRE you! First of all... remember last month when I used a No-Gelatin AMAZING MOLD RUBBER plate to create my background? I did it again this month! The background on my project was inked, misted, splattered, and gessoed all on the Amazing Mold Rubber plate, and then transferred to patterned paper. 

But really today is more about me telling you to forget the rules, baby! Now don't get me wrong, when it comes to resin and specifically calculated measurements and components, let's stick with the correct #s; 1:1 ratio for Amazing Casting Resin and Amazing Clear Casting Resin, etc. What I'm talking about is when it comes to making and filling a mold. 

Today specifically I'm demonstrating on only partially filling a mold. Not a double pour, or triple pour, or anything like that, but a single PARTIAL pour. Check out this tag in a trio I recently did: 


I really specifically wanted my vintage frame to look... well... VINTAGE. I wanted it to be distressed and weathered metal, sure, but I also REALLY wanted it to be BROKEN. So I dusted my mold with Alumilite Gunmetal Metallic Powder (incidentally this is an Amazing Mold Putty mold)  and mixed up my Amazing Casting Resin. As soon as my resin was completely mixed, I lightly coated the mold by pouring super slowly, while avoiding the spot that you can see missing. As the resin stared to cure in my cup I poured more, because it was thicker and flashing already, I was able to control exactly where it went. 

Hope this broadens your resin horizons! Join me on my own 
blog to see more projects of my own! ♥DeeDee

.................................

Don't miss a single post!
Please subscribe to our blog on the right side bar:
Twitter at @AmazingCrafting | Facebook at AmazingMoldPutty | YouTube at AmazingMoldPutty
Related Posts Plugin for WordPress, Blogger...