Showing posts with label Golden Acrylics. Show all posts

Wednesday, December 31

An Amazing Bucketful of Brushes... by Sandra Strait

Hi! Sandra, here today to share my new amazing brush drying system!


Up until now, I've just been laying my paint brushes flat to dry, which is better than setting them with the bristles upward, but not best. Brushes should really be allowed to dry with the bristles facing down, so all the moisture drips out. But if you leave them with the weight resting on the bristles they'll get bent out of shape.

So I was excited when I saw a DIY Brush Drying System at Woodcarving Illustrated, using clothespins that holds brushes upside down, so they can drip-dry.

'I can do that' I says. I didn't have the pieces of wood required in the tutorial, but I had an idea to work around that by using more clothespins and some Amazing Casting Resin.  

Supplies:
  • Amazing Casting Resin 
  • Lt. Green Alumidust
  • Golden Fluid Acrylics: Hansa Yellow Medium, Nickel Azo Gold, Green Oxide, Phthalo Green 
  • Pack of 36 clothespins from Dollar Tree
  • Small bucket from Dollar Tree
  • E6000® adhesive
  • 7 Sheet Metal Screws - size 6x3/4
  • Styrofoam ring from Dollar Tree
  • Duct Tape
  • 2 Jumbo Paper clips
I visited the Dollar Store and bought a package of wooden clothespins, a small bucket, a Styrofoam ring with a center slightly smaller than the bucket, and some E6000® glue. I already had everything else I needed.

Using acrylic paint, I painted twelve of the clothespins in various shades of green. With the E6000®, I glued them shut, so they wouldn't accidentally open, and then glued them together, one-by-one, to form an arch on one side.

Following the picture of the DIY I'd seen, I glued down a jumbo paper clip, and glued my stack of green clothespins to the top of the clip.  I repeated this for the other side of the bucket.


I painted three of the clothespins with Quinacridone Nickel Azo Gold.  I was pleased--the color is usually a bit more yellow, but on the wood it came out almost exactly the same color as the bucket.  It was meant to be!


Since I knew that the hollow center of my Styrofoam ring was just a little smaller than the inside of the bucket, I decided to use it to create a mold for my Amazing Casting Resin.  I overlapped pieces of duct tape on the bottom to start.  Then I flipped it over and layered more duct tape, so all the sticky was covered.  Then I placed a layer of duct tape all along the interior sides of the ring.  I knew much of this resin piece would be covered over, and I wanted lots of texture, so I didn't worry about smoothing out ridges.


I dusted the tape with Lt. Green Alumilite dust, and then started preparing the resin.


Amazing Casting Resin comes in two parts. I poured out equal amounts of each, and then poured them together, stirring until the mix was a solid color. I poured this into my mold and waited about 10 minutes.

For more thorough instructions and tips on using Amazing Casting Resin, check out the Amazing Crafting Products website.


Within the 8 minutes the resin had solidified so it was hard enough to remove from the mold, but was still soft enough that I could easily get screws into it. It had a nice spider-web look to it.


I painted eight of the remaining clothespins with yellow, and screwed them down to the resin. Let me note, that I sort of chose form over function here. All the clothespins can be opened, but some have limited opening, and none will open enough for my largest brushes, because of the way I've got the tips intermingling. Functionally, it would have been better to use four or six pins, but I thought it looked nicer with eight pins. If I decide that it really doesn't work, I always have the option of making a new pad, removing this one, and going with fewer pins.
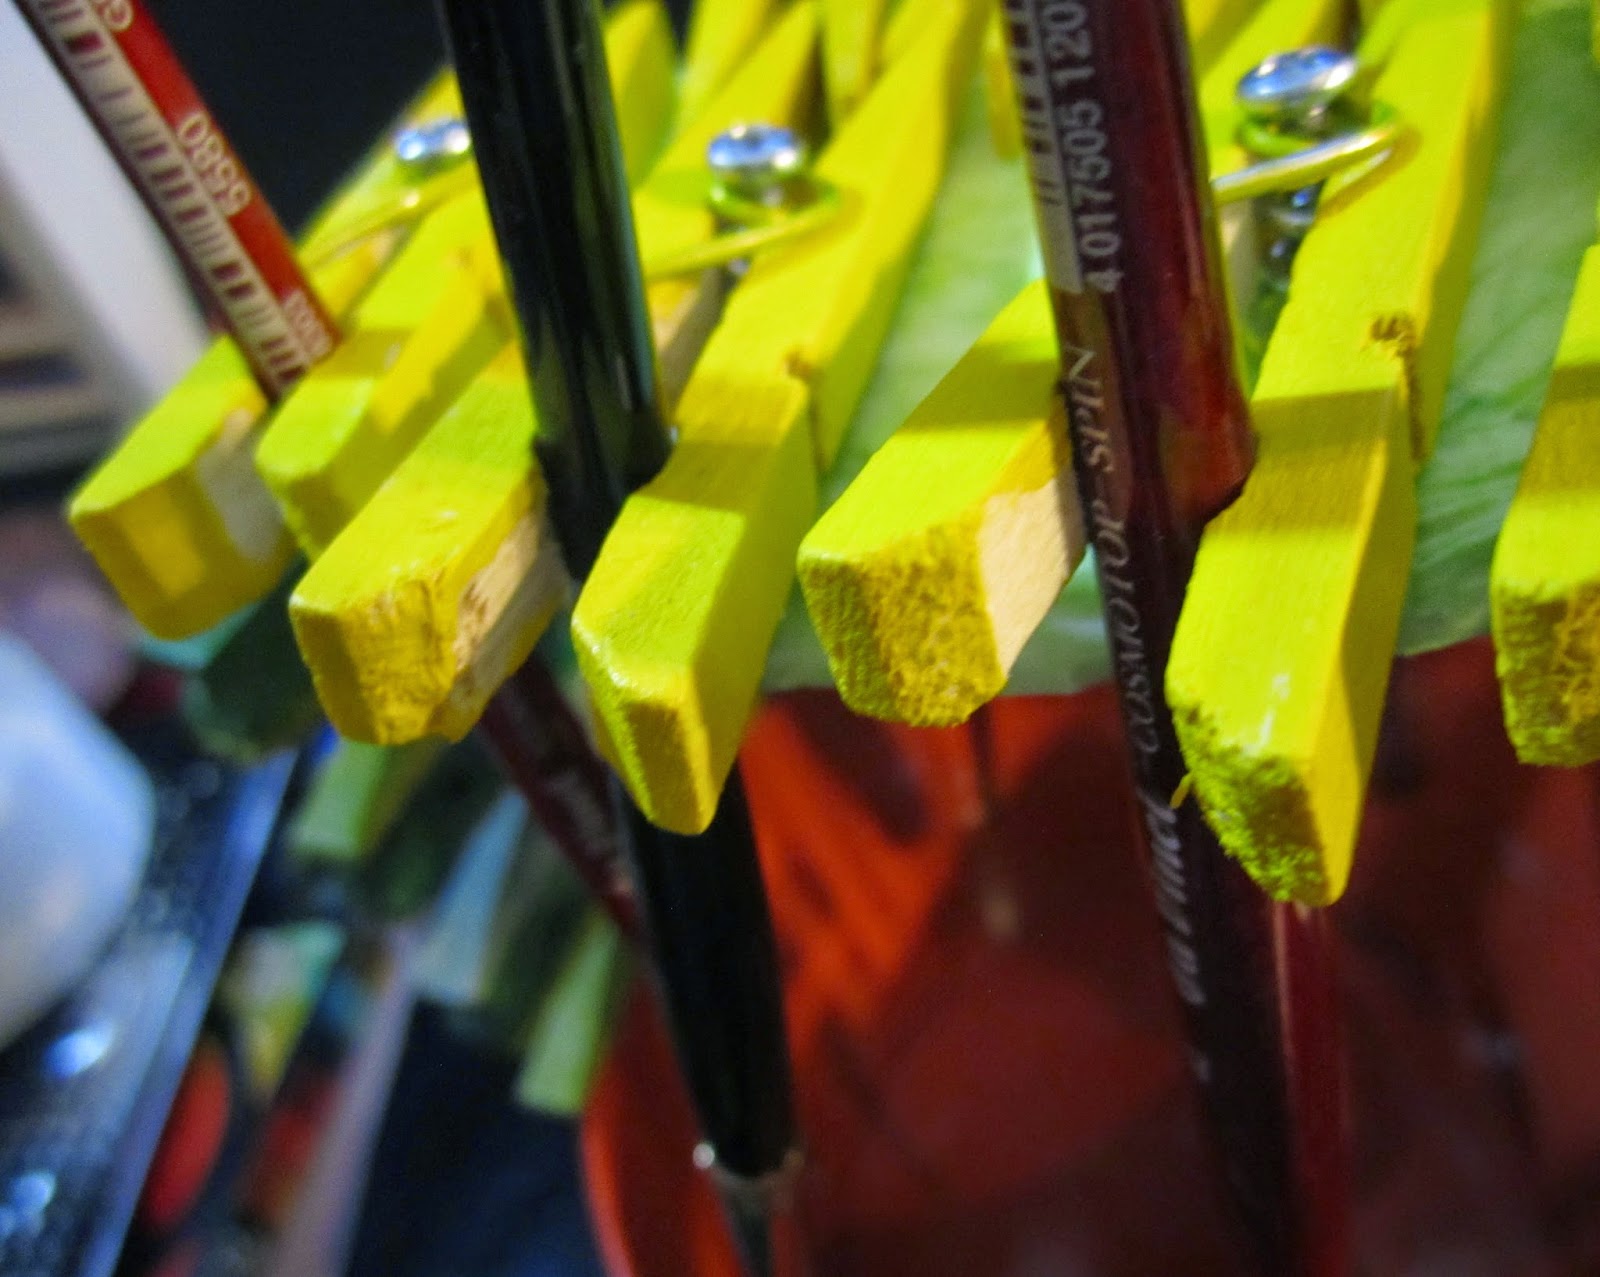

I like my brush holder and intend to make another, so I'll have one for my watercolor brushes and one for my acrylic brushes. This is a project that you could easily vary to your own tastes, so be sure to check out the original version, and get even more ideas.


For the next one, I think I'll try using resin clothespins, that I make with Amazing Casting Resin. That would be...well... AMAZING!

What handy tool gadget
would you create using

Please upload and share your creations to the

For more of my work in Amazing Mold Putty, zentangle-inspired art, and daily links to tangles, tutorials, and giveaways please visit my "Life Imitates Doodles" blog. ~ Sandra Strait

 • • • • • • • • • • • • • •

Don't forget to subscribe to our blog on the right side bar:
Twitter at AmazingCrafting | Facebook at AmazingMoldPutty | YouTube at AmazingMoldPutty

Thursday, November 20

#Godzilla 3D... The King of Monster Paintings!!! A #Cre8time Adventure with Sandra Strait

Hi! Sandra, here today to share my version of Godzilla in 3D!

My hubby is a Godzilla fan, and we both loved the 2014 movie. I've been playing around with the idea of doing a 3D resin painting and decided hubby would get one for Christmas.


Supplies:
  • Amazing Clear Cast Resin 
  • Amazing Mold Putty
  • Alumilite UMR Mold Release Spray
  • 6x6 Shadow Box
  • #4 Round Paint Brush
  • #2 Liner Paint Brush
  • 1" Flat Paint Brush
  • Golden Fluid Acrylics: Micaceous Iron Oxide, Ultramarine Blue, Phthalo Blue, Hansa Yellow Medium, Naphthol Red Light, Green Gold, Teal, Indigo Titanium White, Zinc White
  • Golden Hi-Flow Acrylics: Indigo, Shading Grey
  • E6000 Glue
  • Godzilla Reference Photos

This project consisted of two phases: 
  • Molding & Casting two resin sheets--one for background and one for Godzilla
  • Painting the background and Godzilla
Creating the Resin Sheets

My first thought was to just pour a layer of resin directly into the box, paint the background and then pour a second layer over it, and paint Godzilla. Now that I have experience, I may try that for my next resin painting. However, I've learned to give myself options when I'm experimenting.  Some of the options were very helpful, and some I decided not to use.

With this in mind, I decided to make a mold of the inside of the box, and cast two sheets of clear resin. This gave me several options.  I could:
  • paint outside the box (made life so much easier)
  • make changes to both layers as needed (I did this---a lot!)
  • increase the distance between layers if I desired (I did)
  • recast a resin sheet if I really screwed up (didn't need to)
  • add lights (this didn't work out because the lights made everything streaky)
I had this shadow box, and I cut out a base background from something that I'd had around for a while.  Little to none of this base was meant to show, but if there were any gaps in the resin paintings, this would even things out.


Since I did have that extra background, I decided to make my mold smaller than the box. This gave me two more options:
  • adjusting the two sheets of resin, as needed (I was glad for this)
  • make this a free-standing painting without using the box at all (still haven't decided which way to go)
  • making the edges rough for a more interesting free-standing painting 
I rolled out equal amounts of Amazing Mold Putty, parts "A" and "B" and smooshed them together until the putty was a uniform yellow. For more instruction about using Amazing Mold Putty, check out this video.


I spread out the Amazing Mold Putty, and thought "Hey! I could get double use from this mold!" So stuck some items in to create various mold shapes that can be used later.


Once this Amazing Mold Putty had set, I pulled all the objects out, and flipped the putty to the flat side. I mixed up more putty and created a ridge around the edges. Then, I mixed up my first batch of Amazing Clear Cast Resin, parts "A" and "B".  It's best to pour small amounts of the resin, to reduce bubbles, so I mixed several batches, pouring each one and letting it sit for about an hour before mixing the next. For more instruction about using Amazing Clear Cast Resin, check out this video.


Painting Godzilla

When painting on resin, acrylic paint goes down streaky at first, so you have to plan for it. For the resin background, I painted the entire sheet with Ultramarine Blue.


When the first layer of blue dried, I added a second.

The next color I used was Zinc White for the beginning of the clouds. You may have noticed that I listed two whites in my supplies section. Zinc White is more transparent than Titanium White. I wanted lots of blue showing through my clouds. For highlights and foamy water, I used the more opaque Titanium White.


I continued adding layers of Ultramarine Blue and Zinc White. I used Shading Gray and Indigo for the bridge and building shadows, and Hansa Yellow Medium and Naphtol Red for the burning buildings.


Then I switched to the second resin sheet, and started blocking in my Godzilla figure, using Micaceous Iron Oxide. This paint has mica in the pigment and is very rough and has shiny sparkles. Most of it was covered over, but it provided a nice, scaly effect for a base.


After laying down three layers of the Micaceous Iron Oxide, I used Titanium White to pick out the highlights, and the splash of water. That's newspaper you see underneath. Possibly an idea for another project!


I continued painting Godzilla using Teal, Green Gold, and Shading Grey for his scales. I used Teal, Phthalo Blue and Ultramarine Blue for the water. I did a lot of blending of colors on the canvas, as well as dabbing and dotting.

Several times, I laid the Godzilla sheet over the background sheet so I could see how well they went together. I ended up adding more white and yellow to the buildings and darkening the bridge. That alone justified my decision to have two sheets of resin, rather than to pour a layer over the background painting.


When I was happy with Godzilla, I propped up the two sheets, playing with the distance between them and moving them around. I tested them free-standing, and then tried them in the box.


I haven't decided yet whether I'll glue down my resin sheets into the box, or mold a stand and set them up as they are in the first photo of this post.

Either way, I think my hubby will love his painting, and I hope you do as well!

For more of my work in Amazing Mold Putty, zentangle-inspired art, and daily links to tangles, tutorials, and giveaways please visit my "Life Imitates Doodles" blog. ~ Sandra Strait

 • • • • • • • • • • • • • •

Does the idea of playing with AMAZING Crafting Products
get you in the mood to try some new things!? 

Amazing Crafting Products and the Alumilite company are looking for Creative Team Members!! You can check out the details of our call HERE!


 • • • • • • • • • • • • • •

Don't forget to subscribe to our blog on the right side bar:
Twitter at AmazingCrafting | Facebook at AmazingMoldPutty | YouTube at AmazingMoldPutty
Related Posts Plugin for WordPress, Blogger...