Showing posts with label altered book. Show all posts

Friday, September 22

Make a #Cre8time Statement... Make it Artsy Episode 212

Hello Amazing Crafters!! How do you add your Cre8time mark to your creations?! Get ready to be inspired with the latest episode of Make It Artsythe TV show for makers and crafters – featuring tips, techniques and projects for makers, crafters and artists! 

Ready for a new episode of Make It Artsy?!


CLICK HERE to view this week's episode

Pump up your personal style statement. Host Julie Fei-Fan Balzer draws and cuts custom screens for silkscreen printing. Painter Mystele Kirkeeng uses supplies at hand to paint a charming folk art house. Studio artist Andrew Thornton gives fabric a work out and creates and artful book. Jane Dunnewold joins Julie with another artsy idea.
Bookmark or PIN the Make It Artsy Website
http://makeitartsy.com

Make It Artsy launched September 29, 2016 on Public Television stations across the country! Look for it on your local PBS channel – all new episodes from series 200 are now airing. If you can't find it on your local programming, you can view this episode online by clicking this link: Series 200, Episode 212 - Personal Style.


Make It Artsy is a show dedicated to the crafter, maker and artist! A series celebrates that maker spirit and enthusiasm that extends to every part of life. It’s more than crafting, more than art or scrapbooking; this is an all-encompassing show for any one that loves to make “things”. From mixed-media to metalsmithing, using tools from saws to sewing machines, and materials from paper to wood; today’s most creative “makers” join host Julie Fei Fan Balzer and unleash a new look for crafting with a touch of industrial style.


Amazing Casting Products by Alumilite Corp. is proud to be one of these fabulous group of companies partnering with Make it Artsy. Stay tuned for upcoming Series 200 episodes with projects featuring some our amazing friends using Alumilite's AMAZING products! Don't worry... we'll be sharing each new episode right here as they become available so you can tune in.

• • • • • • • • • • • • • • • • •

Don't forget to subscribe to our blog on the right side bar:
Twitter at AmazingCasting | Facebook at AmazingMoldPutty | YouTube at AmazingMoldPutty

Tuesday, September 5

Wear Your ART... Make it Artsy - Episode 210

Hello Amazing Crafters!! Get ready to be inspired with the latest episode of Make It Artsythe TV show for makers and crafters – featuring tips, techniques and projects for makers, crafters and artists! 

Ready for a new episode of Make It Artsy?!


CLICK HERE to view this week's episode

Wear your art and express your maker's spirit wherever you go. Embellishment artist Candie Cooper makes bag charms with leather and beads. Resin artist Susan Lenart Kazmer casts found objects to wear as jewelry or embellishments. Fine artist Andrew Thornton turns a book into a necklace. Back with more art tips is Jane Dunnewold.
Bookmark or PIN the Make It Artsy Website
http://makeitartsy.com

Make It Artsy launched September 29, 2016 on Public Television stations across the country! Look for it on your local PBS channel – all new episodes from series 200 are now airing. If you can't find it on your local programming, you can view this episode online by clicking this link: Series 200, Episode 210 - Wear Your Art.


Make It Artsy is a show dedicated to the crafter, maker and artist! A series celebrates that maker spirit and enthusiasm that extends to every part of life. It’s more than crafting, more than art or scrapbooking; this is an all-encompassing show for any one that loves to make “things”. From mixed-media to metalsmithing, using tools from saws to sewing machines, and materials from paper to wood; today’s most creative “makers” join host Julie Fei Fan Balzer and unleash a new look for crafting with a touch of industrial style.


Amazing Casting Products by Alumilite Corp. is proud to be one of these fabulous group of companies partnering with Make it Artsy. Stay tuned for upcoming Series 200 episodes with projects featuring some our amazing friends using Alumilite's AMAZING products! Don't worry... we'll be sharing each new episode right here as they become available so you can tune in.

• • • • • • • • • • • • • • • • •

Don't forget to subscribe to our blog on the right side bar:
Twitter at AmazingCasting | Facebook at AmazingMoldPutty | YouTube at AmazingMoldPutty

Thursday, October 6

Make it Artsy... get your #Cre8time on with Episode 101 - BOOKS!!

Hello Amazing Crafters!! Have you heard about Make It Artsy?? It's a brand new TV show for makers and crafters – featuring tips, techniques and projects for makers, crafters and artists.


Make It Artsy is a new series that celebrates that maker spirit in everyone. From mixed-media to metalsmithing, using tools from saws to sewing machines, today's most creative "makers" join host Julie Fei Fan Balzer to unleash a new look for crafting with a touch of industrial style.


Amazing Casting Products by Alumilite Corp. is proud to be one of these fabulous group of companies partnering with Make it Artsy. Stay tuned for episodes with projects featuring some of our AMAZING products! Don't worry... we'll be posting here when each new episode is available so you can tune in.

Make It Artsy launched on September 29th on Public Television stations across the country! If it's not on your local programming you can view Series 100, Episode 101 – Books online from September 30 - October 17.

CLICK HERE to view this week's episode
Series 100, Episode 101 - Books


Books are not just for reading! Tool expert Joe Rotella cuts a niche in a book to create a planter. Craft metal book hinges with designer Mary Hettmansperger and Mou Saha makes vintage books into colorful art journals. Host Julie Fei Fan Balzer has a tip for creating a charming little book necklace.
Bookmark or PIN the Make It Artsy Website
http://makeitartsy.com

• • • • • • • • • • • • • • • • •

Don't forget to subscribe to our blog on the right side bar:
Twitter at AmazingCasting | Facebook at AmazingMoldPutty | YouTube at AmazingMoldPutty

Thursday, September 29

How do you #Cre8time to "Make it Artsy"??!

Hello Amazing Crafters!! Have you heard about Make It Artsy?? Today is the day!! We have a brand new TV show for makers and crafters – featuring tips, techniques and projects for makers, crafters and artists.


Make It Artsy is a new series that celebrates that maker spirit in everyone. From mixed-media to metalsmithing, using tools from saws to sewing machines, today's most creative "makers" join host Julie Fei Fan Balzer to unleash a new look for crafting with a touch of industrial style.


Amazing Casting Products by Alumilite Corp. is proud to be one of these fabulous group of companies partnering with Make it Artsy. Stay tuned for episodes with projects featuring some of our AMAZING products!

Make It Artsy goes live today... September 29th on Public Television stations across the country! If it's not on your local programming you can view it online for one week only – from September 30 - October 7 {AN UPDATE 10/6/2016... this episode will now be available until Oct 17th}.

CLICK HERE to view this week's episode
Series 100, Episode 101 - Books


Books are not just for reading! Tool expert Joe Rotella cuts a niche in a book to create a planter. Craft metal book hinges with designer Mary Hettmansperger and Mou Saha makes vintage books into colorful art journals. Host Julie Fei Fan Balzer has a tip for creating a charming little book necklace.
Bookmark or PIN the Make It Artsy Website
http://makeitartsy.com

• • • • • • • • • • • • • • • • •

Don't forget to subscribe to our blog on the right side bar:
Twitter at AmazingCasting | Facebook at AmazingMoldPutty | YouTube at AmazingMoldPutty

Monday, July 27

#Cre8time Adventures in Moldmaking... and Fabulous FAUX Old World Tiles!


Greetings Amazing Crafters! Susan here to share a project that combines my love of moldmaking and casting with altered books... and I've transformed a plain jane kraft journal into something with old world Italian charm.

Cool2Cast is a product created by Tiffany Windsor of Cool2Craft – a fiber plaster medium which sets up really fast unlike paper maché casting or paper based air dry clays. This media brings a whole different feel, texture and effect to my stash of molds - and totally expands their use!

For my book I started with a plain blank spiral bound journal book. This particular one has a window already cut out of it and that's what I plan to house the casting in. I've also selected a texture plate from my stash made from Amazing Mold Rubber {CLICK HERE to view details}.


Since the cover made of craft paper, it's already primed and ready to go. I grabbed my three metallic colors of Ranger Distress paint and which have a dauber top, and I quickly painted the cover and around the edges, on the inside of the window and around the edges on the inside of the cover. When I am all done, I can go back and line inside cover with a pretty paper.


In just a few minutes the paint is dry and I'm ready to move
on to filling the window with a special casting.

I grabbed my Amazing Mold Rubber texture plate that I made from molding a vintage glass tile. I place the cover over it to decide what section of the design I want to have featured in my window. On the inside of the cover, I applied some removable blue painters tape to protect it from the liquid Cool2Cast from sticking. When it hardens, I plan to gently pull the cover off and place the casting back into the window after sanding/painting.

In hindsight - I really needed to protect the front of the cover and do this process from the backside {in reverse} so that I don't bend the casting in handling. Then I could have just mounted a piece of cardstock directly to the back of the inside cover to secure in place after it was hardened. Not a problem though, I got the results I was looking for... and the cracks that I created in my clumsiness actually added to the old world charm of my finished book.


I used some bags of glass beads to way down my cover so when I pour the Cool2Cast mixture it would not seep under the edges of the book cover.


In a Ziploc baggie I prepared a small batch of the Cool2Cast following the easy instructions - which is a 2 to 1 ratio of the casting medium to water, mixed to a pancake batter consistency. When ready, I snipped off the corner the baggie and squished onto my mold.


I used a small rubber spatula to spread the mixture around evenly,
and then I let it sit to harden for about an hour.


This created thin casting since I matched the thickness of the cover - next time I would go over and add second layer of Cool2Cast to reinforce it as I remove it from the flexible mold. I was so excited to see the result I really wasn't being as gentle as I should have been. It's all good though!


After sanding the edges slightly to square it up to fit back in the cover, I mounted a piece of chipboard {painted to match} as a backer and glued in place. I brushed on the same colors of the Distress Paint to give my Cool2Cast mod texture a nice matching patina.


I applied some coordinating metallic trim to line the edges and metallic bronze photo corners to finish it off add a little extra bling and interest.


Now I have a beautiful book ready to go that I can customize for a gift or I can use this as one of my many art journals in rotation. I really love the option of using the Cool2Cast because it gives a more earthen and distressed result when used in my Amazing Casting Products molds as opposed to the using resins that give you such a perfect and pristine casting.

The Cool2Cast insert really looks like it's a piece of old antique weathered ceramic tile. I think the next time I'm working with Amazing Clear Cast Resin, I will paint on a layer to add a protective seal to the chipboard and make the faux ceramic insert really POP.


I really love the finish on this and I'm happy how it turned out as I have a few more of these books in my stash! I look forward to trying Cool2Cast in my collection of Amazing Mold Putty and Amazing Mold Rubber molds to make castings with an old world plaster feel.

How will you alter books art

Please leave a comment below to share! If you would like to see more of my creations, please visit my blog sbartist : painting in the dark by clicking here. ~ Susan
. . . . . . . . . . . . . .

Want to Socialize with Amazing Crafting Products?
Twitter at @AmazingCrafting | Facebook at AmazingMoldPutty | YouTube at AmazingMoldPutty

Thursday, June 11

The Lady was AMAZINGLY Altered...
by Melissa Johnson


Hello everyone! I have a serious passion for books. I love to read them. I love to make them. And I LOVE to alter them! Today I am sharing an altered mixed media book featuring lots of texture and beautiful color. 


My awesome sister in law works for a nearby school district, and when she found out they were withdrawing hundreds of old books from their library she started hoarding books for me that she knew I would love to use in my art. So when The Edwardian Lady fell into my hands it was love at first sight. The book was the perfect size, texture, and had so many good pictures inside that were going to be perfect to alter!


First I went to work on creating some items to mold with the Amazing Mold Putty. Once the molds were set, I poured in the Amazing Casting Resin.


While the resin cured, I started to add some texture to the book by using a palette knife and Golden modeling paste with various stencils. I also added some drywall tape and Golden glass bead gel. I let all of that dry completely.


By this time my items were ready to remove from the molds. I popped them out, and using Golden Heavy Gel medium, I began to attach them to the book cover. I also added various trinkets from my stash such as beads, flowers, and metal findings.


Once everything was set, I covered it all in Liquitex white gesso.


Now for the fun part! I mixed up some Alumidust with Golden acrylic glazing fluid, and using a small paintbrush I began to work the color into the book cover, alternating different colors and blending them gently as I worked.


From this point, I just continued to add layers of color
with various spray inks until I was happy with the colors. 


Some details...


And a sneak peek at what's inside :)


What do you alter with

Make something that makes you happy :) ~ Melissa Johnson
Please visit my BLOG, to see more of my mixed media creations.

 • • • • • • • • • • • • • •

Don't forget to subscribe to our blog on the right side bar:
Twitter at AmazingCrafting | Facebook at AmazingMoldPutty | YouTube at AmazingMoldPutty

Thursday, February 5

#Cre8time for Your Own Upcycled Art Journal... AMAZING Inspiration by Melissa Johnson

Hi everyone! Melissa here with my first Inspiration post for Amazing Casting Products. I am excited and grateful to be working with such a talented group of artists and these truly AMAZING products! 

One of my favorite things to do is play in my art journals. I have several different types that I like to work in. When I checked the mail at my office the other day, I found one of those huge ULine catalogs. They are pretty thick and sturdy. After looking at it, I thought it might make a cool journal. 


I started out by gluing several pages together to make them thicker, and then ripping a lot of the pages out. I didn't want the book to be too big. These will make great journal pages later, due to the slightly rippled texture created by gluing so many pages together. 

The cover is always the fun part! I gesso'd it, to give it some "tooth" to accept my paint and heavy body gesso. Lots of paint layers and inks follow, along with a few collage bits. I finished it off with a thick coat of Amazing Clear Cast Resin with a little dusting of the Alumilite Metallic Powder in gold. 


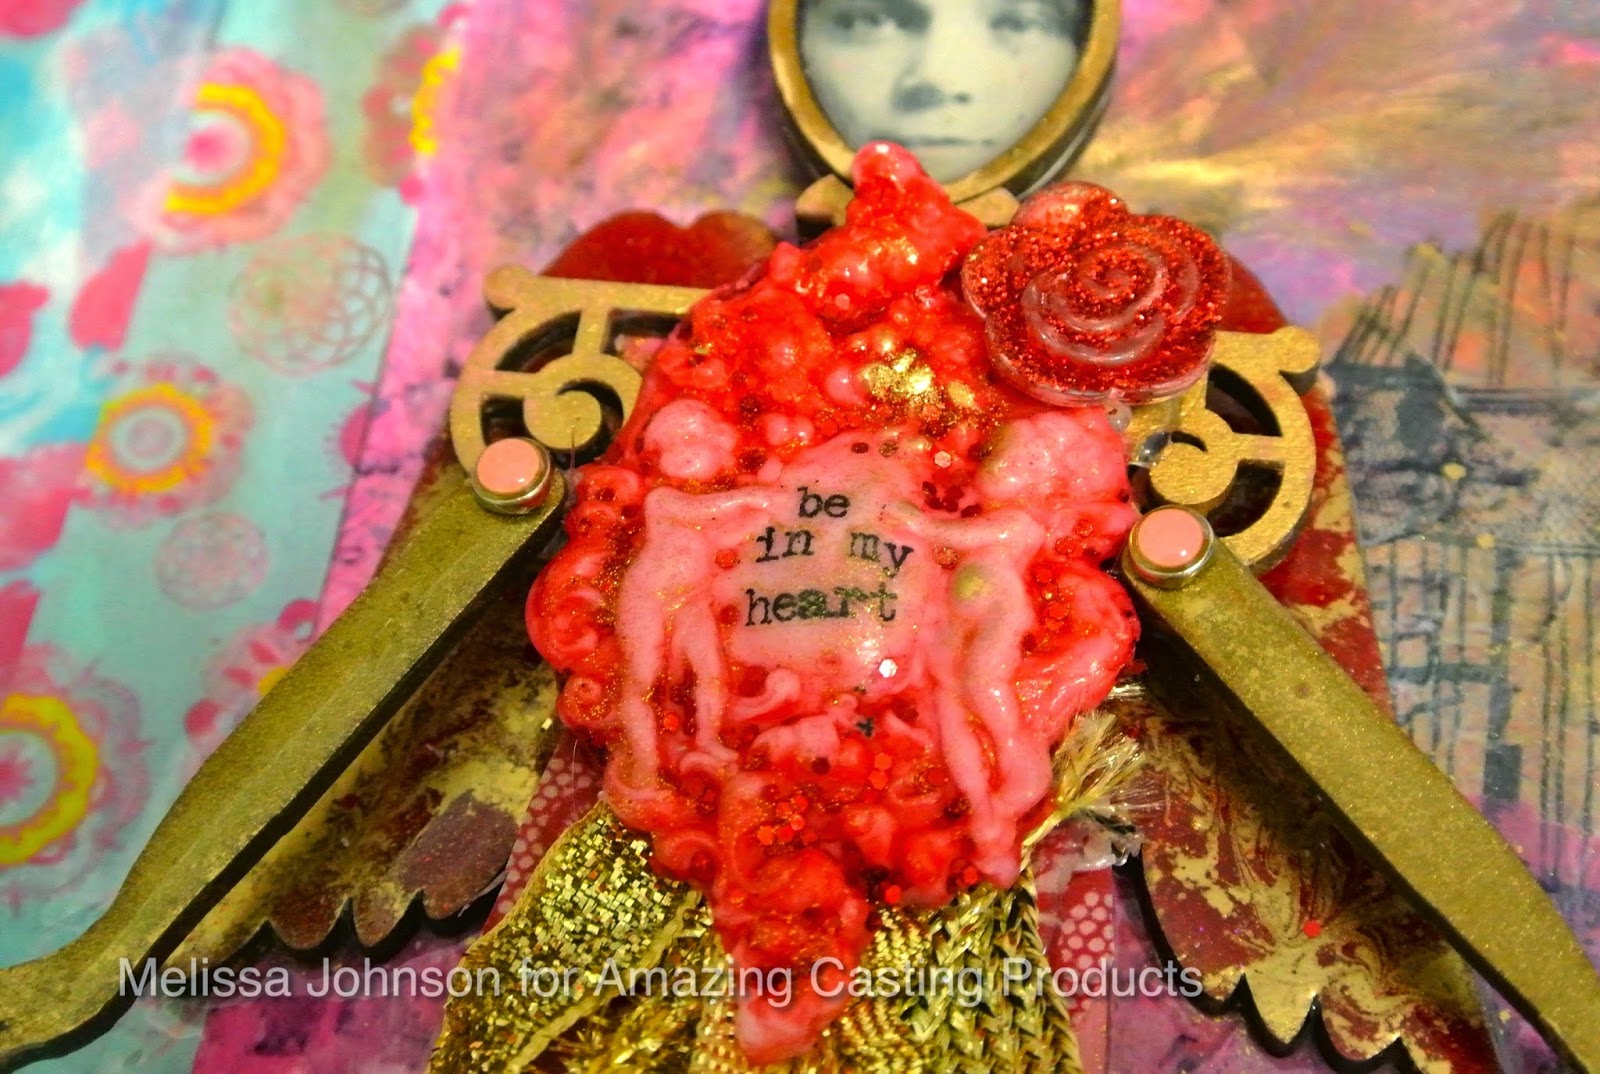
In my stash I had a neat little chipboard art doll that I altered using several different products. I cast an antique brass piece that has some little cupids on it with the Amazing Mold Putty and Amazing Casting Resin. Then I whipped up a batch of the Amazing Clear Cast Resin (one of my personal favorite products for my mixed media projects), mixed with a drop or two of the Alumilite Red Dye and covered her wings using a stir stick.

Then I swirled in a tiny bit of the Alumilite Gold Metallic Powder with the tip of a pin to give it a marbled look. I also cast a cabochon and covered it with red dye mixed with acrylic glazing liquid. I like trying out mixing different mediums with the dye to see how they react! 


And here is the finished product with a few close ups! 


You can visit my blog, to see more pics of my pages inside the journal.

How would you collage and embellish
your upcycled art journal? 

Make something that makes you happy :) ~ Melissa Johnson

 • • • • • • • • • • • • • •

Don't forget to subscribe to our blog on the right side bar:
Twitter at AmazingCrafting | Facebook at AmazingMoldPutty | YouTube at AmazingMoldPutty

Monday, October 20

Pick your #Cre8time POISON... or PASSION
by Isabel Villarreal


Hello Amazing Crafters. Welcome to Mold Rubber MondayIsabel here today to share a tutorial with you on how I created my new Gothic Poison Case using Amazing Mold Rubber.


A couple years ago I found this great hollow book safe made from wood and since then it's been sitting on my bookshelf blending so well that I sort of forgot about it until I decided to do some cleaning. Once I rediscovered this book I didn't want to let it go so I figured I would turn it into something I've wanted for a very long time. I came across an illustration of a Victorian poison case while doing an internet search and the image stuck in my memory, so it's time to get it out of my head and make it a reality, using this hollow book safe to keep some not so savory things inside.


I started with hand sculpted skulls and cast resin skeleton pieces I made in a previous post and some branch and twig impressions, also from a previous post. I'll be using these in a whole new way for this project. These will be used to help me make some more complex parts for the box interior and also to decorate the inside cover. Larger pieces were molded using Amazing Mold Putty and the smaller, more detailed pieces were molded with Amazing Mold Rubber. I used Amazing Casting Resin for the skeleton parts and the shrubbery since I'll be painting these.


I used recycled advertising flyers to build 3 sides and a front for some small drawers I would be using inside the poison case. A coat of Mod Podge® was added all around each piece so I would have an easier time removing them from the molds once they were cast. The small skulls were then glued onto the drawer fronts to be used as drawer pulls. Next was mixing some Amazing Mold Rubber to create my flexible molds so I could easily cast as many of these parts as I would need {CLICK HERE to view mixing/preparation}. You can see here that my molds cured nicely and now it's time to start having fun with casting them in resin.


To create the drawers that would go inside my poison case I mixed up Amazing Clear Cast Resin and added some Alumilite Yellow, Brown and Red Dyes to create a tortoise shell look for the pieces. I made the drawer fronts a slightly darker shade by adding a little more Red dye.


You can see the two shades of tortoise shell I mixed for the drawers and the fronts. At the same time, I cast a couple of extra details that would go into decorating my poison case.


Here are the results. The drawer fronts will now have to be glued to the boxes in order to make a complete drawer. Since my rubber molds could only hold the works for 2 drawers I would have to cast a few sets of each. I made a few of these and had pretty good luck mixing up the colors so they all looked about the same. I'm not sure if you can see the finer details, but the finished pieces have a realistic swirling pattern that actually looks like real tortoise shell coloring. Because of the Mod Podge®, the drawer fronts also have a bit of fine surface texture giving each piece a hand cut feel instead of looking like a modern casting. To assemble the drawers I used a thin line of E6000® around the sides and bottom edge of the drawer front then pressed it onto the three sided box.


I did a little more molding with Amazing Mold Rubber and resin casting to create some handy poison vials and a cylinder for mixing deadly concoctions. The original vial is glass and used to hold body glitter. Each vial was cast using a different color Alumilite Dye with Amazing Clear Cast Resin for the body. I added a touch of Alumilite Gunmetal Metallic Powder to the top of each lid in order to give them an aged look.


While I was waiting for all my poured resin to cure I got to work on the inside and outside cover of the newly re-purposed hollow book. I used burlap and silk to line the inside spaces and a nice leather weave for the outside cover. Several measurements and tracings later I had the fabric pieces ready to line my poison case. Since the inside already had a layer of velveteen I just used a brush to lay an even layer of fabric glue on the entire inside surface area and pressed the pre-cut fabric into place. The leather cover is held in place with E6000® around all edges.


This design called for some sort of framework for the drawers and vials I was casting. This is where my multi-talented boyfriend stepped in and rocked my world by saving me time and making a frame from balsa wood. It's my firm belief that it's okay to have your handy significant other help you craft whenever possible. And it guarantees I won't be using the contents of this case on him ;)


I used the various cast skeleton and shrubbery pieces to create an eerie scene for the inside cover as a dark introduction to the deadly contents. 


The wood frame fit amazingly well and all details are now put together to create my very own Gothic Poison Case – complete with poison vials and working drawers to store dark secrets. Amazing Mold Rubber and Amazing Crafting Products have helped me create my very own custom handmade poison case. I'll be displaying it year round, but I love that it's done just in time to use it as decor for Halloween.

What custom Halloween decor
will you be making

I'd love to see what you create! Please upload and share your creations to the

• • • • • • • • • • • • • •

Don't forget to subscribe to our blog on the right side bar:
Twitter at AmazingCrafting | Facebook at AmazingMoldPutty | YouTube at AmazingMoldPutty
Related Posts Plugin for WordPress, Blogger...