Showing posts with label skeleton keys. Show all posts

Monday, November 27

A Key to #Cre8time... DIY Key Holder by Brenda Burfeind


Good day all! Brenda here from Creativity is a State of Mind and today I'm hoping to inspire you to make your own skeleton key holder.

My inspiration comes from a key holder our son made when he was in middle school many, many years ago... and we've used it ever since. While this has worked for us for many years – it never hung straight depending on how many keys we had. I honestly don't even know what all these keys are for. Maybe I'll make something with all the extras – LOL! 


Last week my hubby said, "we should get a new one and give the old key holder to our son since he owns his own home now. I'll put a new hanger on the back before I give it to him (or maybe not)". But that's when inspiration started to form in my creative head!


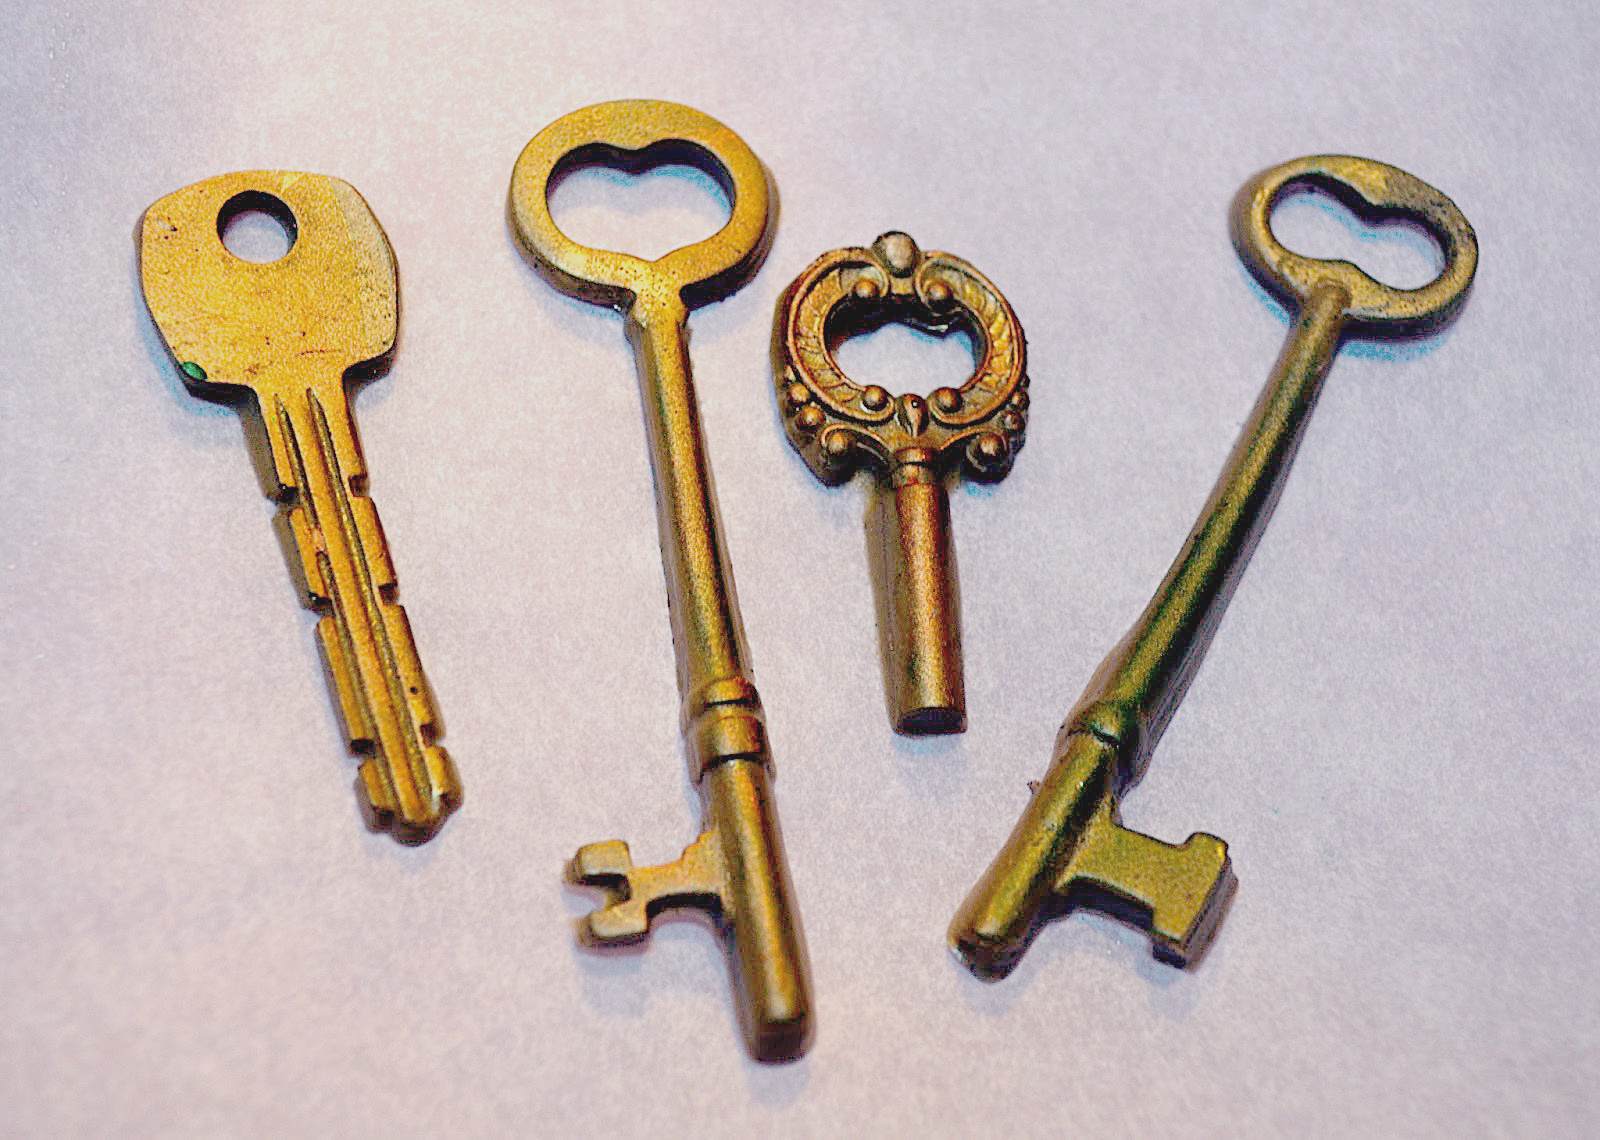
At the time, I was actually in the middle of pouring some molds for another project. Whenever I am pouring molds, I usually mix more resin than I need, so I'll pull out some extra molds out to use up any remaining resin (you can see mixing instructions here). I started with these molds made from some vintage skeleton keys I own. You can view a YouTube video HERE to see how to create your own molds using Amazing Mold Putty

This batch of keys cast with Amazing Casting Resin and Alumilite Dyes are not exactly skeleton key colors, but...


with acrylic paint anything can be transformed!


I also used a little bit of the copper Alumidust just by simply putting my finger in the jar and rubbing it all over the keys. Voila!


I used E6000® to glue the faux resin skeleton keys in the shape of a "K" onto a reclaimed wood board painted with black acrylic paint. I used picture hangers as the hooks for the real keys and distressed them with some of the black acrylic paint mixed with a little bit of copper Alumidust


I sprayed a couple of coats of clear acrylic over the entire board to seal it and give the resin skeleton keys a little shine. This also helps the acrylic paint stay on the hooks. 


After that was dried my Silhouette Cameo came in handy to cut out the "eys" in a copper colored vinyl, then transferred them to the "K" made with my resin skeleton keys.


Now we have a new key holder and my son
can now enjoy the one he made in middle school.


I hope I've inspired you to make something useful
for your home and I hope to see you again soon!

Until next time, Happy Crafting! ~ Brenda

I invite you to stop over to my blog,
to see all that I've been making. 

• • • • • • • • • • • • • • • • •

Don't forget to subscribe to our blog on the right side bar:
Twitter at AmazingCasting | Facebook at AmazingMoldPutty | YouTube at AmazingMoldPutty

Tuesday, September 8

#Cre8time Christmas Magic... by Brenda Burfeind


Hello Amazing friends! Brenda here from Creativity is a State of Mind and I am already thinking of Christmas. I know it way too early, but as a crafter it's about the right time. I have some of my crafty things in a store in a neighboring town and they are calling for Christmas crafties already. So what better time but the "present" to prepare!

I got my inspiration from Pinterest for these fabulous Santa Keys. If you don't know what I am talking about just search Santa Key and you will find tutorial after tutorial. I found the cutest printable for the Santa Keys here at ByStephanieLynn.


I created my Santa Keys from some skeleton keys I had molded eons ago with the Amazing Mold Putty – and also some old keys I found in a thrift store when I was in Florida visiting our fearless leader, Susan.


I cast the keys using Amazing Casting Resin with some Alumilite Gold Metallic Powder mixed in. I rubbed a bit of copper and green colored Rub 'n Buff just to give it a bit of an aged patina look. I then printed out the saying and attached it to some pretty Christmas paper. I can't wait to make a whole bunch of these and take them to my store!


I hope I've inspired you to go through your junk drawer or grandpa's coffee cans and find some skeleton keys to mold and hang on the door for Santa when he comes to visit!


What kind of special holiday decor do you create??

Thanks for visiting today and I look forward to your comments! Until next time, remember, it's never too early to start your Christmas crafting! ~ Brenda

Until next time, Brenda sending some Hope your way!
Visit my blog, Creativity is a State of Mind to see some more of my creations.

• • • • • • • • • • • • • •

Don't forget to subscribe to our blog on the right side bar:
Twitter at AmazingCasting | Facebook at AmazingMoldPutty | YouTube at AmazingMoldPutty

Tuesday, October 7

Here Kitty...Kitty! #Cre8time Halloween Inspired Decor by Aimée Wheaton

Hi all! Aimée here with some cute Halloween decor ideas. You'll never know when inspiration hits, this hit me while browsing the Dollar Tree for an event I was doing and I saw this cute little pumpkin ice cube tray, I thought perfect for resin and not ice! That got me thinking for a few days at first I thought I'd do earrings or pumpkin inspired jewelry but felt I'd take it a bit further but wasn't sure what yet. I had to go to Michael's for something and looked in the dollar bins as well and was further inspired. Well before I blah blah anymore let's get to it!

I made a cute swag decor for my home. My girls are little and get freaked out by anything not so cute for Halloween. This is a great craft on a budget, total cost for the trinkets was $8. :)


All items hung on the ribbon I molded with Amazing Mold Putty and used Alumilite Metallic Powders on each. I then embellished with a gold, white and black Sharpie. When the Amazing Casting Resin was curing I added in an eye pin to all but the keys to make it easy to hang on the ribbon. The keys were hung with copper wire.


Pumpkin ice tray painted with Alumilite Copper Metallic Powder.


I really LOVE how the key's turned out!!!


Embellished with Sharpies!


I really like how it turned out!! If you already have lots of Halloween trinkets this would be easy for you to make. Put your own spin on it.

Let's see what you can create
with your variety of items,

Feel free to stop by my FB page to see the latest with me. 

To see more of my work please visit my blog "Creative Flutters"
and also at the Aimée Wheaton Art and Design website.

Till next time! Xoxo Aimée

 • • • • • • • • • • • • • •

Don't forget to subscribe to our blog on the right side bar:
Twitter at AmazingCrafting | Facebook at AmazingMoldPutty | YouTube at AmazingMoldPutty
Related Posts Plugin for WordPress, Blogger...