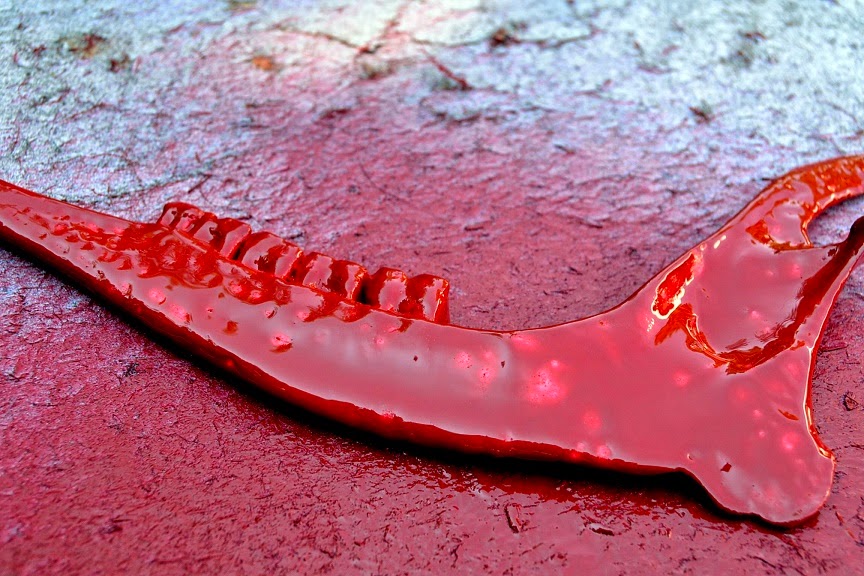
Hello, AMAZING peeps!! It's Rachel Whetzel... this month, I get the pleasure of sharing a project I made using Amazing Mold Rubber!! I have an art project that I'm working on for Gauche Alchemy, and I needed something especially unique and interesting. Naturally, I wanted my piece to be *Jaw Dropping* (heh heh) so I turned to Amazing Crafting Products, and got busy making something I'm pretty sure most people haven't thought of.
That's right! I created a jawbone!! A long time ago, I found a jaw bone left over from a deer that had been hit by a car on one of the country roads near my house. Being the morbid human that I am, I decided to pick it up and bring it home, because I thought it might look cool in a piece of art work. Bones are popular in art, and I have used them a few times myself.
Here's what you'll need to make
a jaw or bone replica of your own:
- A found jaw or other bone that is dry and clean.
- Amazing Mold Rubber
- Amazing Casting Resin
- Paints
- Toothpick
Here is my original jaw bone that I found on my walk.
I cut a box and used it's sides to make a smaller compartment to hold the jawbone, and keep Amazing Mold Rubber waste down.
Then, to keep the jawbone in place while the Amazing Mold Rubber was curing,
I used duct tape rolled and cut to hold the piece in place.
The sides of my mold were a little flimsy once the Amazing Mold Rubber was in, so to keep things where I wanted them, I used a bit of ribbon to keep my sides in place during cure time.
When I poured my Amazing Casting Resin, I wanted to make my piece red, but when I used my Alumilite Red Dye, I didn't use enough, and my piece turned out pink. I'm still getting the hang of dyes in the Amazing Clear Cast Resin. It wasn't too big of an issue though. I just used paint to make the piece the color I wanted.
Here's a view of the backside of the piece,
with the duct tape spots and my seams untrimmed.
with the duct tape spots and my seams untrimmed.

CLICK HERE for directions on mixing Amazing Casting Resin.
Once I pulled my piece, I cut off the excess from the pour,
and sanded edges, etc. to clean up the piece.


To get the Jawbone the color I REALLY wanted it, I used some spray paint I had on hand, and got busy layering it on.

Then the spray paint was dry, I painted the teeth a different color, and then used stain to fill in the crevices of the piece and make it look aged.

Last but not least, I used a toothpick to make flowers and dotted swirls all over the Jaw. I finished off the flowers with more stain when they were dry.
Be sure to hop over to Gauche Alchemy in August to see this Jawbone on it's final art piece! I can't wait to share with you!
Thank you for reading! Want to see more of what I'm up to?
Visit me on PINTEREST and INSTAGRAM, or like MY PAGE on Facebook!
Thanks for stopping by! ~ rachel
• • • • • • • • • • • • • •
Don't forget to subscribe to our blog on the right side bar:
Twitter at AmazingCrafting | Facebook at AmazingMoldPutty | YouTube at AmazingMoldPutty


Great job. Ohhhh you are not morbid. I have boxes of bones to create with. I also really like Amazing products.
ReplyDeleteNicole/Beadwright
Thanks, Nicole! I don't feel morbid, but bones in my art creep out a lot of my friends. Lol
ReplyDeleteThat's awesome, love how you decorated it!
ReplyDeleteRachel - absolutely STUNNING!! This piece is so gorgeous and I can't wait to see the final creation. From the girl molding frog, chicken bones and other oddities... Right ON!!!
ReplyDeleteThanks for the detailed instructions. I have these products but haven't tried to use them yet. Your post has helped me understand how to make a mold.
ReplyDeletethis is a beautiful piece.
This piece is truly beautiful! I play with bones and mummified beasties in my art so can really appreciate this - LOVE IT!!!
ReplyDeleteI'm so happy you found that information helpful, Marylouh!
ReplyDeletejust got to sit down, sip a tea and read about this amazing project! This was such a unique and awesome project!! loved the end product Rachel!
ReplyDelete