

Hi there, this is Maria and today I want to share a post about framing. I have a lot of sketchbooks. I've been painting a lot lately and was wondering what to do with all these works. My son is going to sell his art for the first time at an art show next month and asked me to share the table with him. He suggested I sell the art pieces I've been working on for the last couple of months.
I decided to share the table with him and was wondering how I would frame the smaller pieces. After a lot of thinking it came to me... I would make my own frames using the Amazing Mold Putty and the Amazing Casting Resin.
I went to the dollar store to get some house cleaning supplies and found a few frames to use for the small art pieces. I thought I would first try and make a frame using Amazing Mold Putty – and maybe use the putty to add some designs to the frame to make it different that the one I purchased.

Here is one of the frames I purchased.

Amazing Mold Putty is so easy to use! You need to take same amounts of part "A" & part "B", mix them well until the white and yellow become a solid yellow color. Since the putty sets fast, you need to make sure your item to mold is ready. For this mold I spread out the putty on a plastic container, and then placed the front of the frame over and pressed into the putty. I waited a few minutes and turned the frame over and folder over the excess putty to wrap it around the frame as you can see in the photos below.

Mixing the Amazing Mold Putty to start making the mold of the frame.
CLICK HERE to view mixing/preparation.

The front and sides of the frame are covered with the mold putty – just waiting a few minutes for the Amazing Mold Putty to fully cure.

Once the mold putty was set, I removed the frame and decided to mix up another batch of mold putty to add some type of design to the frame. I didn't want it to be a solid frame, and I figure it would be fun to make designs. The Amazing Mold Putty will fuse to itself if a mold release agent is not used – so you can build up a large mold, use like clay to make your own shape, or add shapes/layers to create a custom design.
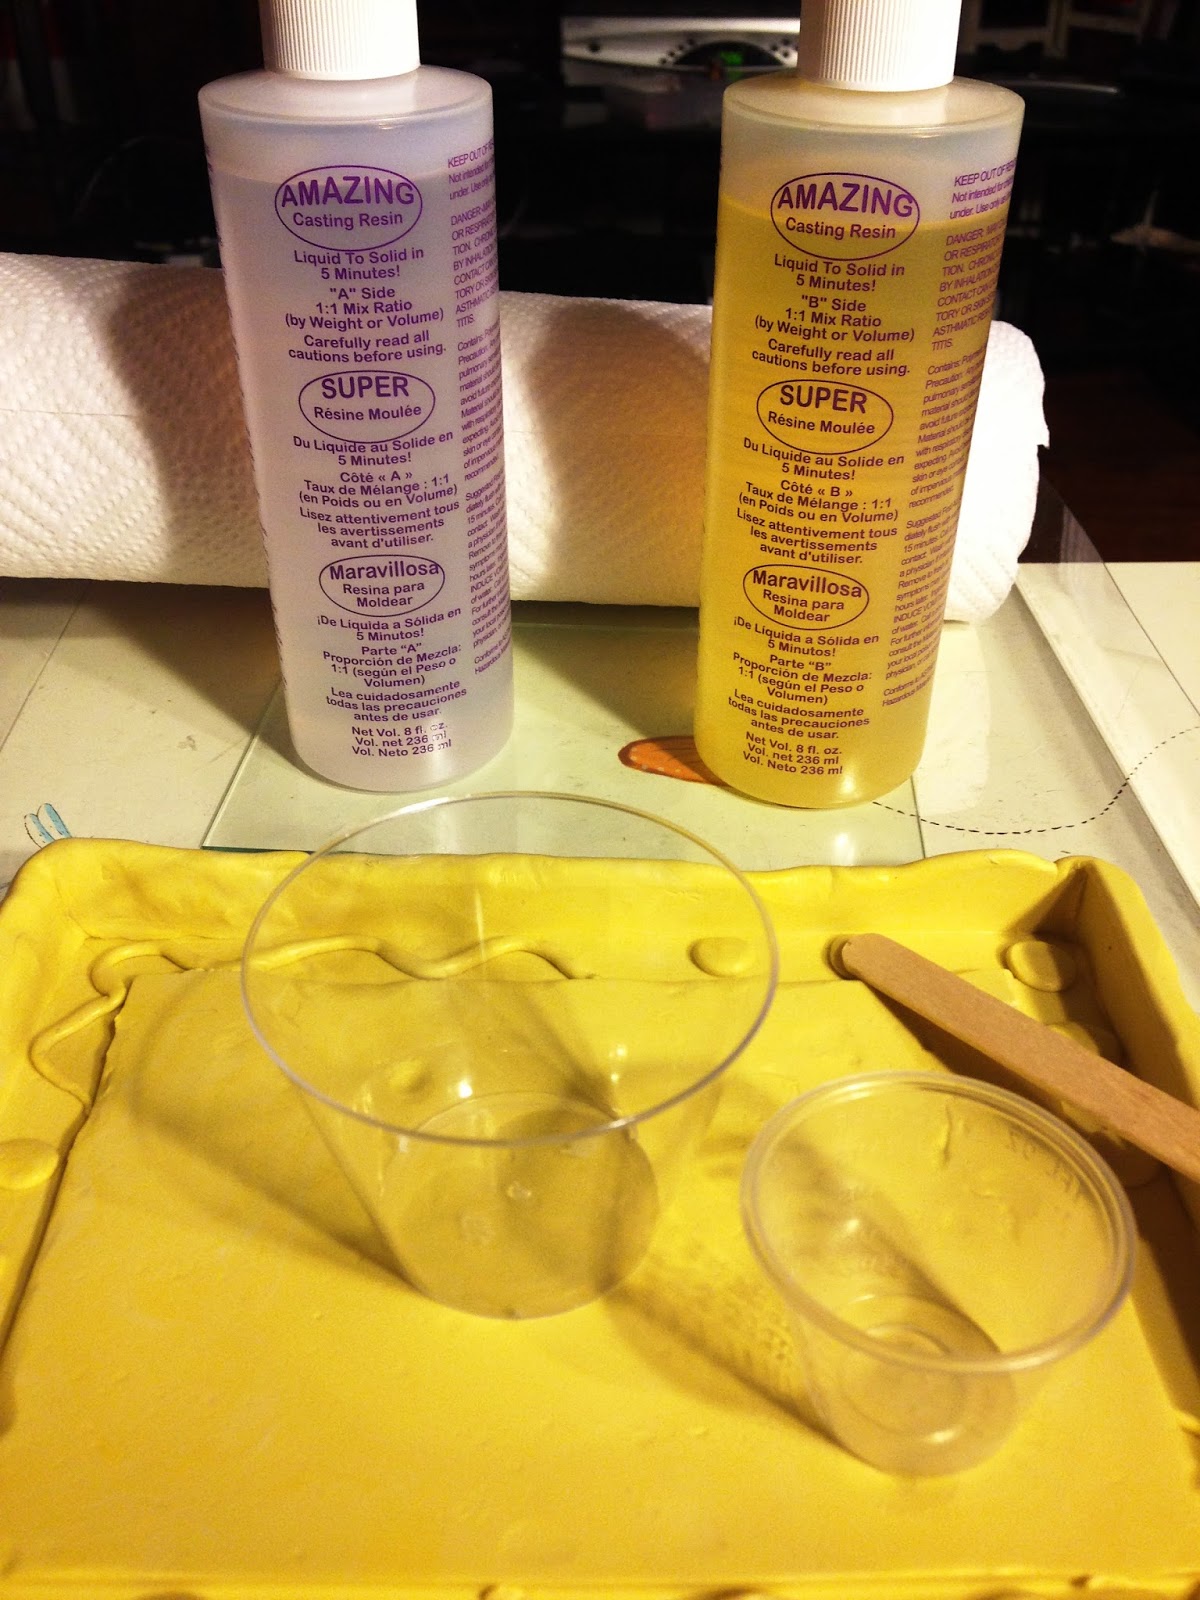
I have my new mold, resin, measuring cup, mixing cup and mixing stick ready – now it's time to add the resin. I used the Amazing Casting Resin to make the first frame casting. No color was added to the resin. I used 2 full measuring cups each of part "A" and part "B"; using equal amounts of each part, otherwise your resin will not cure properly. This resin cures really fast so once you are done mixing, pour it over your mold as soon as it begins to feel warm. The photos below show the process.

Part "A" & Part "B" are mixed and ready to pour into the mold.
CLICK HERE to view mixing/preparation.

Here you can see how the Amazing Casting Resin starts out clear – then as the resin is starting to set it turns solid white. When fully cured it's pretty flexible for a few minutes. The heat of your environment affects how long it will take for the resin to become solid {so it could be faster or a few minutes longer}. It's pretty cool here in Indiana this week, and it took about 10 minutes for my resin frame to cure.

Here is the Amazing Casting Resin frame – just removed from the mold and is still very soft and flexible. At this time you can carve, cut or make holes for hanging.

I made two tiny holes on the top of the frame and added string for hanging, you can use wire too. Next step is painting the frame, I used a mixture of acrylic paints, first in gold and silver, then added a bit of blue for contrast. the center of the frame didn't need to be colored but I added color anyway.

I squirt out a mixture of paints to be applied to the entire frame. I love painting my molded items cast in Amazing Casting Resin.

I added blue paint to the outside of the frame. I will use Ranger Glossy Accents to glue my painting directly into the center of the frame.

The completed frame with my art piece glued on...
now it's time to add a bit more interest to the piece.
The frame itself is a work of art!
The frame itself is a work of art!

I used Glossy Accents to glue a few tiny shells on the bottom corner of the painting. This frame is done, and I can't wait to make more frames! I have quite a few more small paintings that need to be framed.
I hope that I have inspired you to find ways to customize your molds, using ready made frames and adding fun texture or designs helped me make my own frame.
How would you embellish your custom frames?
I hope to have inspired you to look around and see what items you can recycle into something new, something fun with Amazing Casting Products.
Thanks for visiting! I invite you to stop over to my blog, "What is Creativity" at http://chuy-creativity.blogspot.com to see more of my creations. ~ Maria Soto
Thanks for visiting! I invite you to stop over to my blog, "What is Creativity" at http://chuy-creativity.blogspot.com to see more of my creations. ~ Maria Soto
• • • • • • • • • • • • • • • • •
Don't forget to subscribe to our blog on the right side bar:
Twitter at AmazingCrafting | Facebook at AmazingMoldPutty | YouTube at AmazingMoldPutty

No comments:
Post a Comment