Showing posts with label shadow box. Show all posts

Monday, April 30

A #Cre8time Angel in Disguise... AMAZING Inspiration by Michele Kosciolek

Hello friends! Michele back again with another way I've used casts of my butterfly – but this time just the wings...


For the project I am sharing today, I poured Amazing Casting Resin into just in the wings so they would be two separate pieces.


Here is a little reminder of the original mold.
CLICK HERE in case you missed it.


The wings bring my angel to life combined with some Tim Holtz Ideology bits, an Um Wow Studio chipboard word, Art Alchemy wax and Dina Wakley paint. The Art Alchemy wax and Distress glitter on the wings show the detail of the resin cast wings so well!


A little cheese cloth and thread make my angel in disguise pop! There are so many ways to use your molds, just a little thinking outside the box and viola!

What are you molding/casting
for use in mixed media?

Thanks for coming back to see what I have been up too!!
Until next time... Michele

For more projects and inspiration please visit my blog "Stuff by Belle"
or follow on Facebook: https://www.facebook.com/michele.kosciolek

• • • • • • • • • • • • 

Don't forget to subscribe to our blog on the right side bar:
Twitter at AmazingCasting | Facebook at AmazingMoldPutty | YouTube at AmazingMoldPutty

Wednesday, December 30

Memories of #Cre8time School Days... Mixed Media Shadowbox by Aimée Wheaton


Lots of trinkets, papers, doo-dads that I've collected for years made their way into this little shadow box. It reminded me of a little old-fashioned school house. That was the inspiration for this little project. Basic collage techniques were used as the base for this project, I didn't get photos of each step because I got so into the project and forgot to take photos along the way.


You can see it was just a basic white box, and I wasted no time collaging elements in it using Golden Gel Medium paste. I trimmed out my vintage photo of a boy with a book and papers and pasted and sealed it all down on the base of the box. While the glue was still wet, I threw in some micro beads and glitter.


Another view. I let it dry for a few hours and
worked on other elements for the design.


I used this gesso on this old Monopoly game hotel and distressed it a bit. I cut out letters from my vintage book page talking about school and cut up a few sentences.


I glued down the words to the house with Golden Gel Medium.


I had a small glass bottle that I filled with small beads, glitter and the sentences I cut up for some interest. I wasn't sure if it all would be used – the hardest part was finding places for all the little trinkets I wanted to use and how to use them.


Trinkets...


I then took my red StazOn ink and distressed the box,
thinking "little red school house".


Did the same on the back and front.


I added some little stamp details along the edge of the box too. I then collaged some gorgeous rice paper into the top of the box as well as the bottom.


I found a cast off heart and distressed it with the same ink and glued it to the top.


I wasn't sure how well the box was sealed so I went around the seams with the thick gesso all over the box just to make sure it was resin-ready.


While the gesso was wet, I etched roof tiles in with a sharp tool.


It's resin ready!!!


For this project I'm using Amazing Clear Cast Resin. I mixed it all up and poured it into the base. Just mix equal amounts of Part "A" and Part "B" and you're good to go!


Pour slowly and let the resin flow around and fill in areas naturally.


With a half a drop of Alumilite blue dye I swirled it into certain areas of the wet resin for more interest. It worked out well!! Look how cool it looks!!


The blue added a lot!


I glued on the glasses to the top and added a bit
of the blue resin using the same popsicle stick.


Just an extra detail.


I added a bit of purple PearlX powder to the heart and grabbed some blue resin again and coated the top of the heart with the same stick as well.

Here are some detail shots...


I did end up using this little bottle. :)


I really enjoyed making the project
and hope you like how it turned out!


Ta-Da!!

Do you have a box of goodies
you can make into something else?

Feel free to stop by my FB page to see the latest with me.
To see more of my work please visit my new blog "Life Glitter Makeup"
and also at the Aimée Wheaton Art and Design website.

Till next time! Xoxo Aimée

• • • • • • • • • • • • • •

Don't forget to subscribe to our blog on the right side bar:
Twitter at AmazingCasting | Facebook at AmazingMoldPutty | YouTube at AmazingMoldPutty

Wednesday, May 27

#Cre8time Preservation with Amazing Clear Cast Resin... by Lynne Suprock


Lynne here with a fun tutorial using Amazing Clear Cast Resin. Two generations ago she blushed and said "I Do" to the man of her dreams. Barely a woman herself, she became a most loved and cherished mother, having 4 children, each the apple of her eye. This was my Gramma Rose.

I loved hearing the stories about my Rose's life. Her determination, love of family, savvy, and in later years, her strength and constitution, utterly amazed me. Yes, I love the stories because I was such a little girl when she died. I never really knew her, so I cherish and preserve what I do know and have learned about her.

Fast forward to a vintage picture. It is Rose's wedding day. I decided to use it in my project. Every time I put a piece of jewelry in, or take one out, I will see her picture and it will make me smile.


Here are the steps for making the picture:
  • Select a favorite vintage picture and size or crop to fit niche in wood.
  • Make a laser printer, toner, transparency
  • Decorative trim cut, if desired. (Mine is straight edged)
Here are the steps for the box:
  • Reclaim an old wooden jewelry box with some type of depression or mirror. (Apologies for not getting a "before" picture)
  • Remove the mirror carefully (if still in place)
  • Clean wood with soapy water.
  • Slightly sand wood.
  • Use Annie Sloan chalk paint in choice of color. My color is French Linen. (I use the Annie Sloan brand because coverage is better than other paints and it adheres without priming)
  • Once this solid coat of paint is dry, choose another color of paint thinned with water, to create a wash. (I used 3 parts water to 1 part paint in Old Violet).
  • Quickly brush on and pat dry with cheesecloth.
  • When dry, use a bit of clear Elmer's glue to the back edges of the picture transparency.
  • Smooth picture onto wood
  • Outline the picture in the clear glue to seal any cracks around the inner edge of the wood, where resin could seep out.
  • Allow 24 hours to dry.
  • Measure and mix equal parts of "A" and "B" of Amazing Clear Cast Resin. CLICK HERE to view mixing/preparation.
  • Pour the resin carefully over the picture in the niche.
  • Allow resin to cure for 24 hours.
  • Adding decorative knobs is optional.

I liked how this yard sale box was the perfect stage for these vintage photos of my grandmother. With a little chalk paint and Amazing Clear Cast Resin, a memory is preserved.

What memories will you preserve

I would love if you would leave a comment below to let us know how this technique works for you! Please share what you make with Amazing Casting Products on our website in the User Gallery.

Please visit my blog "Simply Pretty Stuff" to see more of my creations
and to view my upcoming workshop schedule.  ~ Lynne
. . . . . . . . . . . . . . . .

Don't forget to subscribe to our blog on the right side bar:
Twitter at AmazingCrafting | Facebook at AmazingMoldPutty | YouTube at AmazingMoldPutty

Friday, November 14

Take a Peek into an AMAZING Steampunk Menagerie with Featured Artist Heather Kindt


Greetings Amazing Crafters! Today we continue our "Featured Artist" series here at the Amazing Crafting Products blog. Each month we feature one artist who will share a special project and some inspiration using Amazing Crafting Products. Today, our Featured Artist for November, Heather Kindt joins us with a project of EPIC proportions... a mixed-media Steampunk Collage Box, full of nooks, characters and inspiration galore! Heather's use of Amazing Crafting Products with an artist's touch is remarkable and she shares a variety of resin techniques along the way. CLICK HERE to see more of Heather's art adventures on her Facebook page, Heather Marie Kindt.

• • • • • • • • • • • • 

Steampunk Shadow Box Art


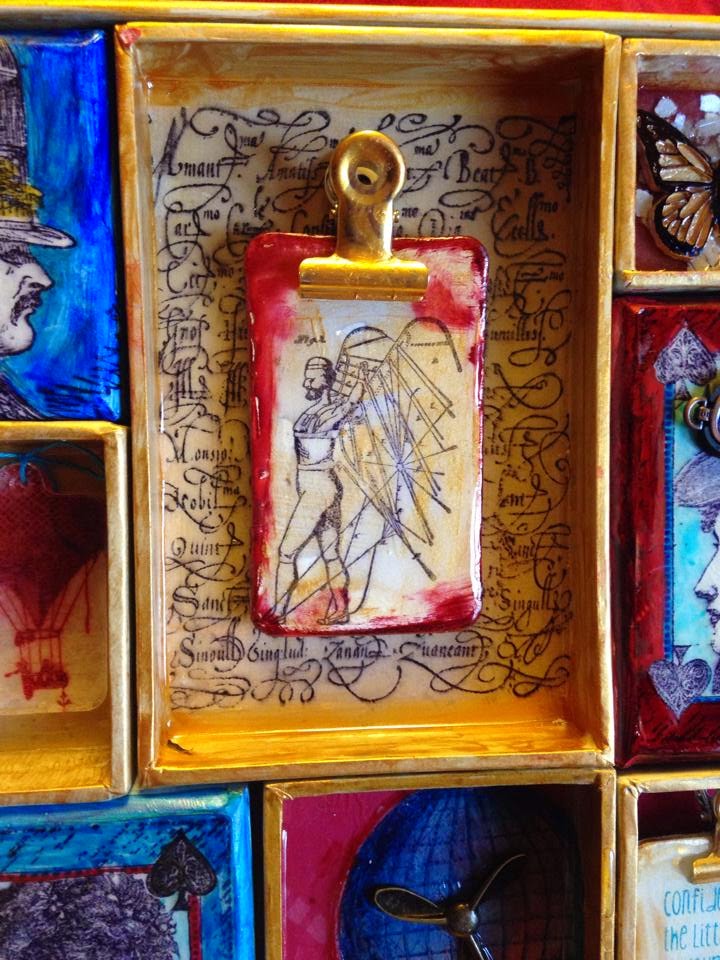
Today I'm sharing a Steampunk inspired project... I don't always go Steampunk, and this project can certainly be in any theme! This shadowbox blank with cover has loads of curio niches which I tie together with paint, collage, stamping and use of Amazing Crafting Products.


This began with this Configuration Book from the Tim Holtz Idea-ology Collection - which has been totally transformed. I made the face, gears and butterflies embellishments with Amazing Casting Resin. The cover is coated with a layer of Amazing Clear Cast Resin and collaging/layering images and objects in the shadow boxes.


Since this one has a cover, I cut up some tissue and covered it with Glossy Accents {a clear adhesive}. Using gold pigment ink, I painted what would be pages if it were an actual book; and used blue Staz-On ink on the covers edges. I like this disguise! When completely dry, I sealed the cover with a layer of Amazing Clear Cast Resin. What is difficult to show in the pictures, is the coating of resin I gave on the cover. But the cover was shingling and there is more resin to come!


Before we get into it I want to show the technique I used for the stamping. I stamped all my images on deli paper. I used the colors and black so I would have choices. 


You could also stamp on gift tissue paper. I prepped all my images and surfaces then prepared some Amazing Clear Cast Resin. Please CLICK HERE to view mixing and preparation. I recommend covering your large flat surfaces first if you have any when the resin is fluid. That way when it gets a bit thicker, it is just fine for embedding items in enclosed areas like the boxes or in jewelry bezels. 


Here is everything drying! The resin has soaked into the paper which makes it more transparent. That is how my stamps became darker in the inked areas and the images became sharper.


You can sprinkle mica flakes onto the wet resin for shimmer that will never fall off. Putting it under resin is fine too. On one of the fragments I adhered the quote (using glossy accents or diamond glaze) then when completely dry, added resin, then mica fragments. 

Many of my accent pieces were cast in Amazing Casting Resin and painted. 

A little resin primer... One thing I have done to this point is coating and sealing with resin – but another resin ability is that we can cast with it! Casting is pouring a material into a open form that will later solidify. I worked in a jewelry store's customer service area after college, and in the shop the jewelers would cast in gold and white gold every week. I have used the Amazing Clear Cast above, which is the clear resin. Amazing Crafting Products also makes Amazing Casting Resin – an opaque white casting resin that cures in about 10 minutes {CLICK HERE to view mixing/preparation}. Have you seen Prima or Melissa Francis's frames, butterflies, and other white embellishments? They are resin, probably a white resin. 

There is one other piece you need to start casting... a mold. Amazing Crafting Products makes several types of mold making products – I've used Amazing Mold Putty and Amazing Mold Rubber. The Amazing Mold Putty is very easy, clean and quick giving you a mold in about 15 minutes. Mix it together and use a small object to create an imprint, and when it is no longer squishy, you have a mold {CLICK HERE to view mixing/preparation}. The Amazing Mold Rubber creates a silicone mold and needs a container you can pour it into to setup in several hours {CLICK HERE to view mixing/preparation}. However the cured mold is really flexible and surprised me with its ability to mold intricate forms. Don't forget there are also finished molds you can pick up in your craft store if you would like.

I have combined a variety of molds to create my embellishments for my shadow box. The casts come out clear or white, depending on resin used. I painted mine with Viva's Precious Metals Effects paint because it is fast drying.


These items created using the molds I made using Amazing Mold Rubber and Amazing Mold Putty; then cast in Amazing Casting Resin dusted with Alumilite Metallic Powders {all objects shown are the cast pieces not the originals}. 


I created butterflies using this Martha Stewart mold dusted with


These castings are created from a mold set by Mod Podge that I dusted with Alumilite Metallic Powders prior to pouring Amazing Casting Resin.


I even poured Amazing Casting Resin into this polymer clay texture mat by Lisa Pavelka... these thin little gears even held up!

Here is the final shadow box book...
Enjoy the close ups! 


I used Big Pitt Pens for some color, and Staz-on ink pads on the edges.


Defy shadow boxes shadows by flipping over some of the boxes! My ladies and gents would be hard to see if they were inside the boxes.


Hello birdie!


He is painted black, coated in Amazing Clear Cast Resin and golden edged. 


• • • • • • • • • • • • 


Thanks so much for dropping by! We hope you have enjoyed Heather's Steampunk Shadowbox and sharing so many ideas and techniques. Drop by for a visit next Friday for more from our Featured Artist Heather Kindt... you don't want to miss it! CLICK HERE to head on over to Heather's Facebook Page, or HERE to visit her blog Color Me Heather to see more of her fabulous work.

Related Posts Plugin for WordPress, Blogger...