Showing posts with label Michele Kosciolek. Show all posts

Monday, April 30

A #Cre8time Angel in Disguise... AMAZING Inspiration by Michele Kosciolek

Hello friends! Michele back again with another way I've used casts of my butterfly – but this time just the wings...


For the project I am sharing today, I poured Amazing Casting Resin into just in the wings so they would be two separate pieces.


Here is a little reminder of the original mold.
CLICK HERE in case you missed it.


The wings bring my angel to life combined with some Tim Holtz Ideology bits, an Um Wow Studio chipboard word, Art Alchemy wax and Dina Wakley paint. The Art Alchemy wax and Distress glitter on the wings show the detail of the resin cast wings so well!


A little cheese cloth and thread make my angel in disguise pop! There are so many ways to use your molds, just a little thinking outside the box and viola!

What are you molding/casting
for use in mixed media?

Thanks for coming back to see what I have been up too!!
Until next time... Michele

For more projects and inspiration please visit my blog "Stuff by Belle"
or follow on Facebook: https://www.facebook.com/michele.kosciolek

• • • • • • • • • • • • 

Don't forget to subscribe to our blog on the right side bar:
Twitter at AmazingCasting | Facebook at AmazingMoldPutty | YouTube at AmazingMoldPutty

Tuesday, April 24

#Cre8time Explorations... DIY Butterflies with Michele Kosciolek

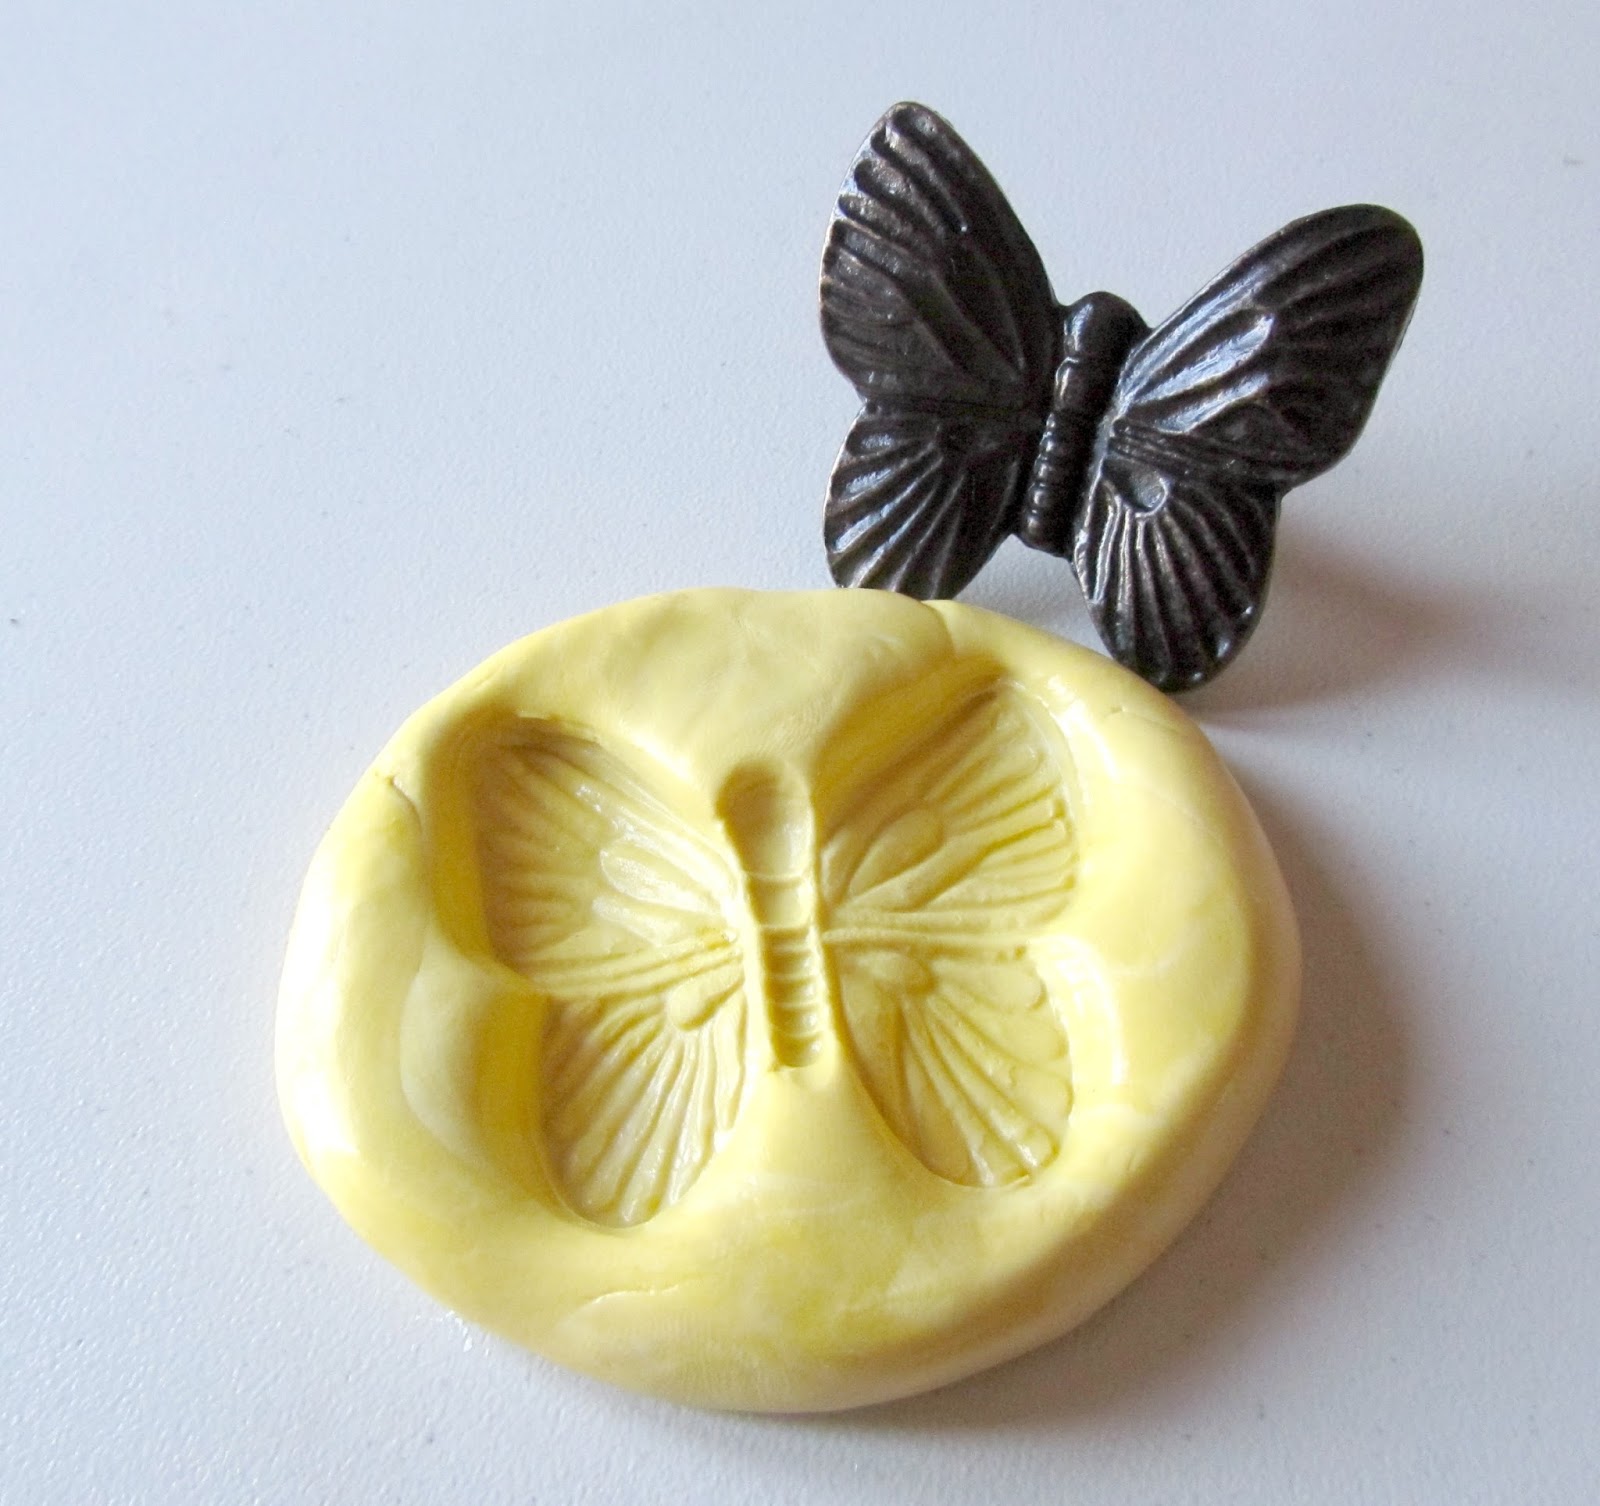
Hello friends! Michele here... I am in spring cleaning mode in my craft room and came across a butterfly knob that I stashed away to mold on a rainy day. Well since I found it and it happened to be raining, I got busy molding and casting.


I used Amazing Mold Putty to mold the knob.


I sized my mold putty just a tad smaller than the knob.


Because when you push item into
the Amazing Mold Putty it will spread.


Just look at all the detail! This mold can be used a couple of ways, to mold the entire butterfly or just the wings.


Next I cast with Amazing Clear Cast Resin, but first I painted some Alumilite Pearlescent Powder in the mold.


First the pearlescent on the wings, and then
a little bronze metallic powder on the body.


I mixed the Amazing Clear Cast Resin and poured into the mold – right over the powder.


I had a bit of the resin left so I grabbed a dictionary page that I want to use as a page in a book I will be making at a workshop this month... never waste leftovers!!


For the next casting, I used Amazing Casting Resin mixed with brown Alumilite DyeI wanted it to look like Bronze so first I used the Bronze Metallic Powder in the mold.


These two casts from the same mold turned out so different!!


The Amazing Clear Cast Resin with powder...


and the Amazing Casting Resin with the metallic powder and dye.


I am really looking forward to seeing how using
 just the wings works out too. What a versatile mold!


Be on the look out for these on future projects!!

What found objects would
you mold for Cre8time play?

Thanks for sharing part of you day with us!!!
Until next time... Michele

For more projects and inspiration please visit my blog "Stuff by Belle"
or follow on Facebook: https://www.facebook.com/michele.kosciolek

• • • • • • • • • • • • 

Don't forget to subscribe to our blog on the right side bar:
Twitter at AmazingCasting | Facebook at AmazingMoldPutty | YouTube at AmazingMoldPutty

Thursday, March 22

#MixedMedia Easter EGG-spiration... by Michele Kosciolek

Hello fellow creatives! Michele here – with Easter right around the corner I have a little EGG-spiration for you today!!

I've decoupaged some craft eggs with tissue paper stamped with Viva Las VegaStamps!, then sprayed with Distress Sprays. Now, I have had these eggs for quite some time and have wanted to decorate them for Easter for just as long... I am so glad I finally did and took things one AWESOME step further!

I gave these eggs a coating of Amazing Clear Cast Resin – OMG – that was just what it needed to make these eggs POP!

Here they are!!


I decided to turn these into hanging eggs.


This one is hanging on May Arts silk ribbon
with a couple of hand blown glass beads.


This one is hanging on copper wire with
a couple of handmade Tibetan glass beads.


I love how these eggs shine and already have
them hanging with my Easter decorations!

How are you decorating for Easter??

Thanks for sharing part of you day with us!!!
Until next time... get creating!! Michele

For more projects and inspiration please visit my blog "Stuff by Belle"
or follow on Facebook: https://www.facebook.com/michele.kosciolek

• • • • • • • • • • • • 


Don't forget to subscribe to our blog on the right side bar:
Twitter at AmazingCasting | Facebook at AmazingMoldPutty | YouTube at AmazingMoldPutty

Tuesday, February 13

A Slice of #Cre8time Love... by Michele Kosciolek

Michele here with a quickie in honor of "LOVE"... a small wall hanging and showing love isn't only for Valentines Day.

I found a perfect little slice of wood, it spoke to me and I had to create with it!!


I stamped with some Viva Las VegaStamps! images and colored directly onto my slice of wood. I also hand stamped the word love and rubbed a bit of Archival Ink in the impression.


I used Amazing Clear Cast Resin to create a protective layer over my stamping and to make it seem like it was a painting under a piece of glass.


The Amazing Clear Cast Resin brought out the beautiful details of the wood – look at that heathering in the bark... WOW!

What seasonal decor
are you making
in the name of LOVE?

Thanks for sharing part of you day with us!!!
Until next time... get creating!! Michele

For more projects and inspiration please visit my blog "Stuff by Belle"
or follow on Facebook: https://www.facebook.com/michele.kosciolek

• • • • • • • • • • • • 

Don't forget to subscribe to our blog on the right side bar:
Twitter at AmazingCasting | Facebook at AmazingMoldPutty | YouTube at AmazingMoldPutty

Sunday, December 24

Frosty in a #Cre8time Winter Wonderland... by Michele Kosciolek


Holiday crafting is my FAVORITE! And in Michigan winter is a holiday! Michele here today to share some wintery molding fun!


I used Amazing Mold Rubber and Amazing Casting Resin for the snowman in this festive lantern. I started with a ceramic ornament and molded it in Amazing Mold Rubber. First, I need to build a moldbox...


I hot glued him to the lid of the rubber container.


Next, I used some cardboard from a box I received some crafty goodness in to create my mold box. I created a cylinder shape and secured with tape – leaving at least 1/4" around all sides of the snowman original.


Make sure you seal completely around the bottom. 
I used hot glue to seal the box to the lid.


Mix container of Amazing Mold Rubber according to the directions {CLICK HERE to view mixing/preparation}.


And pour until whatever you are casting is completely covered. Set aside to cure.


After the rubber is cured, gently peel away the mold box.


Pull item from mold. If needed, carefully slit down the side of the mold with a blade so you can remove what you molded.


To prepare mold for resin casting, I used rubber bands
around the mold to make sure I had a good seal.


Then filled with Amazing Casting Resin
{CLICK HERE to view mixing/preparation}.


In about 15 minutes the snowman is cured and ready to remove from mold! Can you see all that texture??!


I used my Copic markers to do some coloring.


Add a little snow and a tree with lights...
and a cute little deer to complete the scene.


And viola! A cute wintery scene!


A perfect little place for Frosty to spend the winter!!!

How do you decorate for the holidays?

Thanks for joining us today. Until next time... 
Happy Holidays!! ~ Michele

For more projects and inspiration please visit my blog "Stuff by Belle"
or follow on Facebook: https://www.facebook.com/michele.kosciolek

• • • • • • • • • • • • 

Don't forget to subscribe to our blog on the right side bar:
Twitter at AmazingCasting | Facebook at AmazingMoldPutty | YouTube at AmazingMoldPutty
Thursday, December 7

Trimming the #Cre8time Tree... by Michele Kosciolek


Hello fellow creatives! Michele here today and I am super exciting to be sharing with you today, my very first project as an Amazing Casting Products Creative Team member!!! Today I am sharing a quick Christmas ornament I made to use as a gift topper.


I started by creating a shape to mold using some various wood pieces.


Then I used Amazing Mold Putty to mold my wood piece. I sprayed a tiny bit of Mold Release Spray just to be sure the wood wouldn't stick. Follow the package directions for the amount of time to let the putty cure {CLICK HERE to view mixing/preparation}.


Look how great that piece molded!!!


Next I brushed bronze Alumilite Metallic Powder in the numbers and antlers.


I mixed some Amazing Clear Cast Resin according to the package directions and poured in the mold {CLICK HERE to view mixing/preparation}. It is always a good idea to have other molds handy in case you have any resin let so it doesn't go to waste!!!


A bit more package directions to follow for cure time and viola!!! Look how great it looks popped right out of the mold.


I used my Crop-o-Dile to punch a hole for a bit of sparkly ribbon to hang the ornament from... easy peasy!!


Oh my I just love holiday creating and boy oh boy these Amazing Casting Products make it so easy!!!


This will be perfect from package to tree.


And that metallic bronze is gorgeous!


Thanks so much for taking a peak at my first post!
I look forward to sharing so much more inspiration with you!!!

What kind of handmade
ornaments are you making?

Until next time... ~ Michele

For more projects and inspiration please visit my blog "Stuff by Belle"
or follow on Facebook: https://www.facebook.com/michele.kosciolek

• • • • • • • • • • • • 

Don't forget to subscribe to our blog on the right side bar:
Twitter at AmazingCasting | Facebook at AmazingMoldPutty | YouTube at AmazingMoldPutty
Related Posts Plugin for WordPress, Blogger...