Showing posts with label butterfly. Show all posts

Tuesday, April 24

#Cre8time Explorations... DIY Butterflies with Michele Kosciolek

Hello friends! Michele here... I am in spring cleaning mode in my craft room and came across a butterfly knob that I stashed away to mold on a rainy day. Well since I found it and it happened to be raining, I got busy molding and casting.


I used Amazing Mold Putty to mold the knob.


I sized my mold putty just a tad smaller than the knob.


Because when you push item into
the Amazing Mold Putty it will spread.
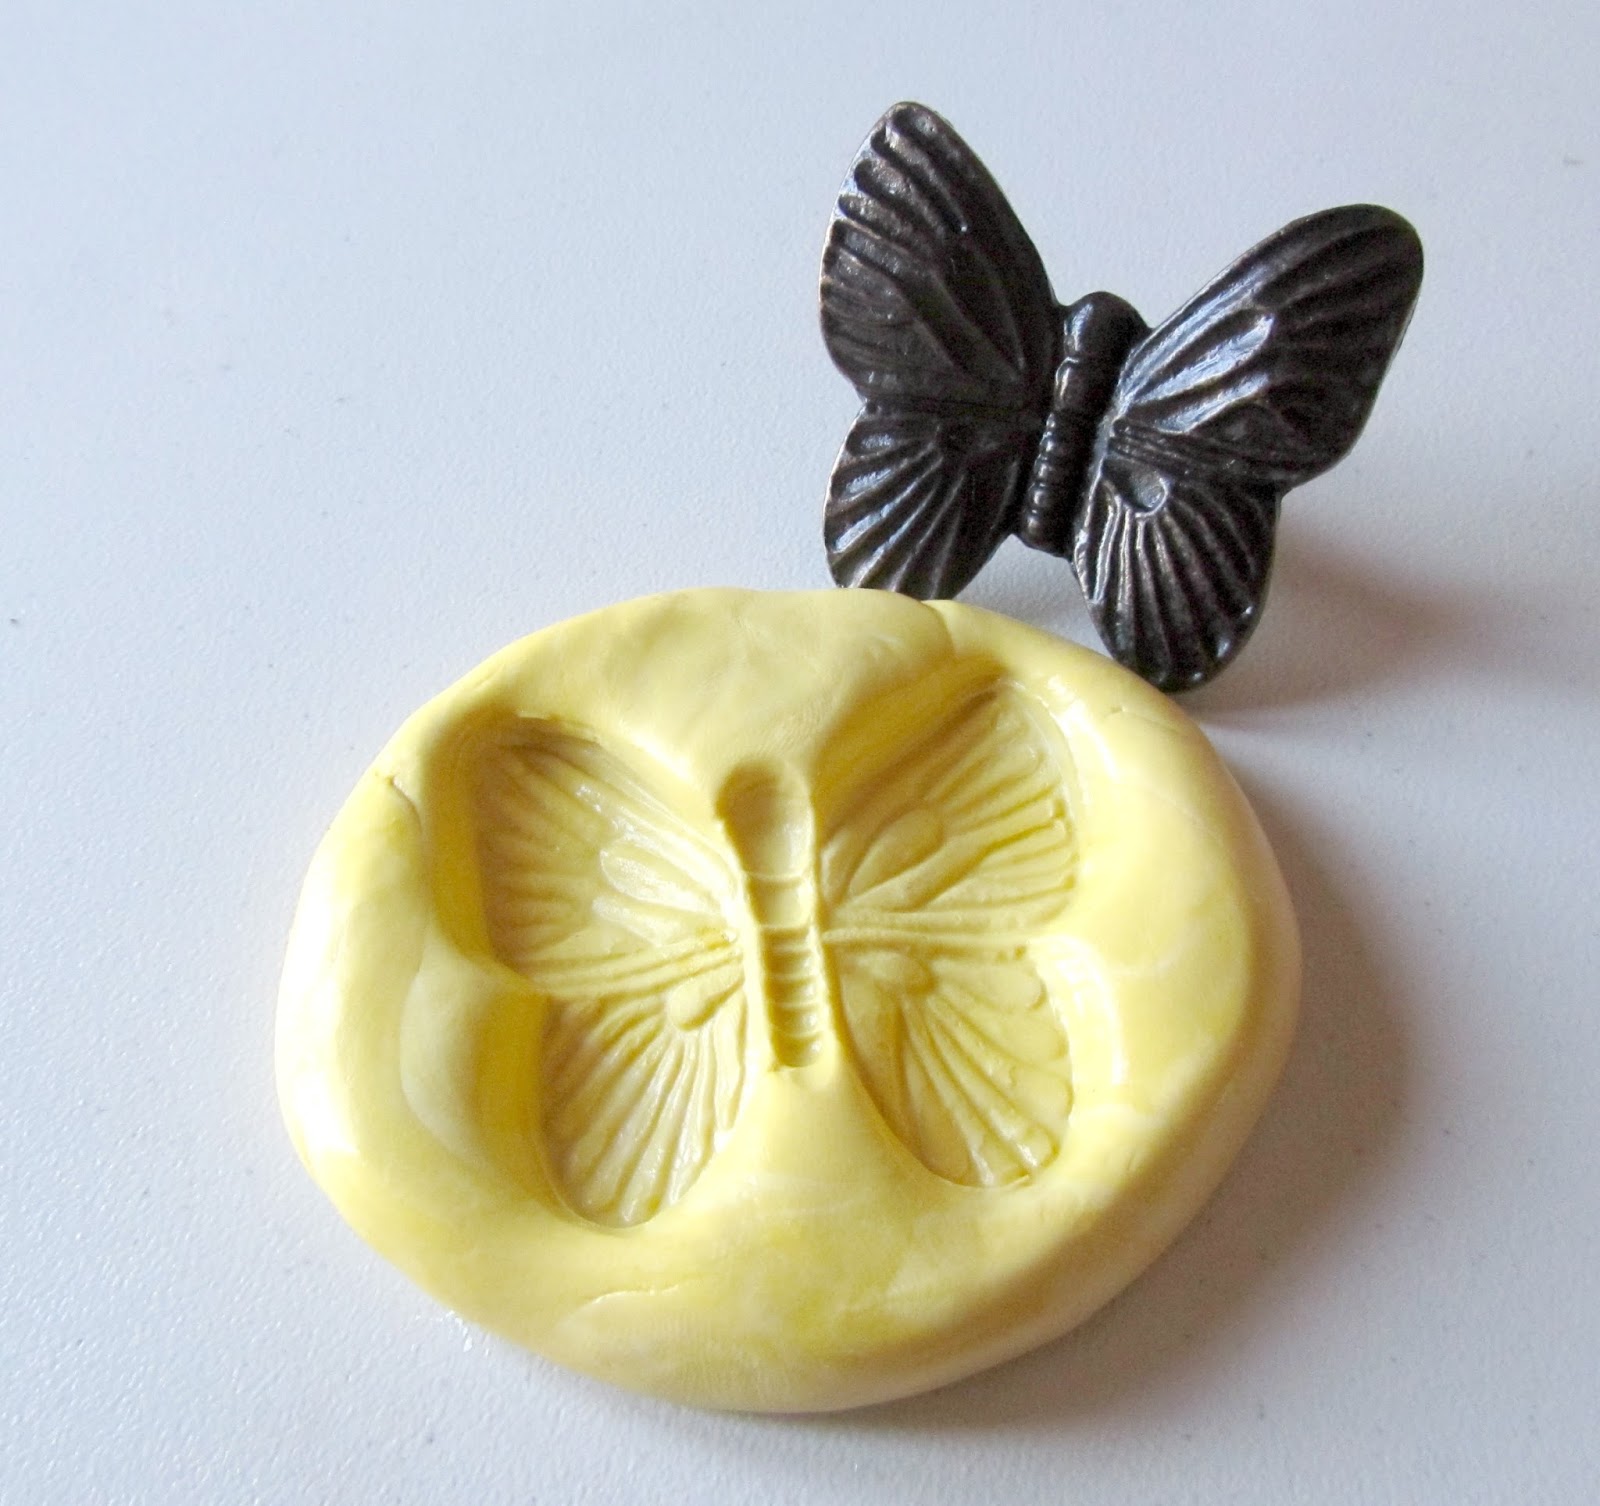

Just look at all the detail! This mold can be used a couple of ways, to mold the entire butterfly or just the wings.


Next I cast with Amazing Clear Cast Resin, but first I painted some Alumilite Pearlescent Powder in the mold.


First the pearlescent on the wings, and then
a little bronze metallic powder on the body.


I mixed the Amazing Clear Cast Resin and poured into the mold – right over the powder.


I had a bit of the resin left so I grabbed a dictionary page that I want to use as a page in a book I will be making at a workshop this month... never waste leftovers!!


For the next casting, I used Amazing Casting Resin mixed with brown Alumilite DyeI wanted it to look like Bronze so first I used the Bronze Metallic Powder in the mold.


These two casts from the same mold turned out so different!!


The Amazing Clear Cast Resin with powder...


and the Amazing Casting Resin with the metallic powder and dye.


I am really looking forward to seeing how using
 just the wings works out too. What a versatile mold!


Be on the look out for these on future projects!!

What found objects would
you mold for Cre8time play?

Thanks for sharing part of you day with us!!!
Until next time... Michele

For more projects and inspiration please visit my blog "Stuff by Belle"
or follow on Facebook: https://www.facebook.com/michele.kosciolek

• • • • • • • • • • • • 

Don't forget to subscribe to our blog on the right side bar:
Twitter at AmazingCasting | Facebook at AmazingMoldPutty | YouTube at AmazingMoldPutty

Wednesday, May 25

#Cre8time Happy Accidents... DIY Butterfly Hairclip by Brenda Burfeind

Good day! Brenda here from Creativity is a State of Mind with a tutorial how to use your resin paper to create a butterfly hairclip. The paper I am going to use today was created by accident, literally!

My box of resin paper.

So what happened... I was going to pour a mold using Amazing Casting Resin and the Violet Alumilite Dye that I had mixed up. While picking up my measuring cup, I knocked it over instead and my resin spilled everywhere. Thank goodness I keep paper towels within arms reach when pouring molds. 

I quickly wiped it up and was about to throw the paper towel away when I realized it may come in handy. I laid it out on my teflon sheet (if you don't have one you can also use a white plastic garbage bag) as flat as possible and within 10 minutes it had set up nicely. I tried to make sure that there weren't too many thick areas so that it would still be somewhat pliable and easy to cut.


Then I wondered if my new Stampin' Up butterfly die would work on it?


I located an area of the paper towel with most of the purple, cut around the butterfly and ran it through the Cuttlebug! Perfection!!!


Now the paper towel is pliable and the die cut it out AMAZINGLY! Do you see the awesome texture the paper towel gave the butterfly?


I had just enough of the purple resin area
so that I was able to cut the butterfly twice!


I glued the edges and pinched it together to create a 3D effect. 
Kind of like a cage.


I also used a Sharpie to draw in the butterfly body and my E6000® 
was the perfect way to attach the butterfly to the hair clip.

I love happy crafty accidents! 

:)


My granddaughter has the perfect hair for this awesome butterfly clip.

What would you create
with resin paper?

Thank you for stopping by today and I would love to hear from you. Leave me a comment and tell me what you would create using your Amazing Resin paper!

Until next time, ~ Brenda 

Visit my blog, Creativity is a State of Mind to see some more of my creations.

• • • • • • • • • • • • • • • • •

Don't forget to subscribe to our blog on the right side bar:
Twitter at AmazingCasting | Facebook at AmazingMoldPutty | YouTube at AmazingMoldPutty

Monday, July 15

Pick an Amazing Butterfly! AMAZING Inspiration from Marilyn Weyman Kegg


Hi, Marilyn here for Amazing Crafting Products, with a little bit of inspiration for you today.

Here's an idea for an AMAZING little project that will make a potted flowering plant a little more personal. Make a customized pick! It's a great idea to take with you when you visit someone in the hospital or as a hostess gift, or even as a surprise present for no reason. 

Choose an item that is personal to the recipient or that will appeal to them, such as the butterfly I've used here. You can find lots and lots of rubber stamps to use as the basis of your mold, or an item you find around the house. In this case, I chose a butterfly rubber stamp.

Get your craft on.

All you need is your chosen item or rubber stamp, a few Amazing Crafting Products: Amazing Mold Putty, Amazing Casting Resin. I also used a bamboo skewer (the kind that you'd use to make shish kabobs, get them in the grocery store or the dollar store), some glitter glue, a few glue dots, and acrylic paints, in this case metallic paints. The gold paint didn't have enough sparkle, so I added the gold glitter glue to the center of each dot. Then I outlined the whole butterfly with some jet black glitter glue. Finally, I added a final coat of Amazing Clear Cast Resin to give it some gloss.


This makes an ordinary potted plant a lot more personal, and is a quick and easy gift that is a lot less expensive than sending a plant or flowers!


Happy Crafting!


~ Marilyn Weyman Kegg for Amazing Crafting Products
.................................

Don't forget to subscribe to our blog on the right side bar:
Twitter at @AmazingCrafting | Facebook at AmazingMoldPutty | YouTube at AmazingMoldPutty

Wednesday, May 16

Butterfly Pendant Necklace


Hi everyone! I hope you are enjoying your early summer weather! Here on the Amazing Mold Putty Blog, I thought tit would be fun to make this pretty Butterfly Pendant Necklace!


I started with a clean butterfly rubber stamp. Then I took equal amounts of yellow and white Amazing Mold Putty and mixed them together.


I kneaded the putty with my fingers until there was no trace of white.


Then, instead of pushing the stamp into the putty, I formed the Amazing Mold Putty into a square shape and placed it onto the stamp, pushing in with my fingers until I was certain I had filled in the butterfly stamp. I pulled the extra bits of the putty down onto the sides of the rubber stamp to create a sort of cavity when the mold would be released.


Once the putty had set, about 15 minutes or so, I popped out the stamp.


Next I applied with a dry brush, Silver Alumilite Metalic Powder to the inside of the mold. 


Then with the Amazing Casting Resin, I poured 2 oz of each "A" and "B", using the supplied measuring cups and mixed it into a paper dixie cup. 


I stirred the mixture until it became clear then poured it from the paper cup into the butterfly mold. Warmer days, and your resin will set faster, 10 minutes or less. When I made this, it was still chilly in the morning, and working with my studio window open, made the set time almost 20 minutes.


Once the resin cured, I popped out the butterfly. Working quickly while it was not yet permanently hard, I used precision scissors to trim off any excess Amazing Casting Resin I did not want in the finished piece.


For the back of the butterfly, you don't always need fancy bails. Here I used metal photo corner mounts from my scrapbooking stash and applied them with E-6000 glue.


I measured a piece of silver chain, long enough to fit over my head and attached the ends to the photo corner mounts with jump rings. I accented the butterfly detail with fine silver glitter, coated it with a sealer and attached a piece of vintage rhinestone trim with more of the E-6000.


I hope I have inspired you to make something like this. It's really easy and beautiful to show off.

Thanks for coming by, see you next month!

Related Posts Plugin for WordPress, Blogger...