Showing posts with label Spring. Show all posts

Friday, March 30

There are no "BAD" Eggs... Amazing Inspiration by Tracy Krueger


I'm baaaack! It's Tracy here and I'm going to share a couple of "bad" eggs... ideas that were in my mind, though didn't necessarily come to fruition. Believe me when I say, I will keep on trying these until they work out just how I want them – LOL!


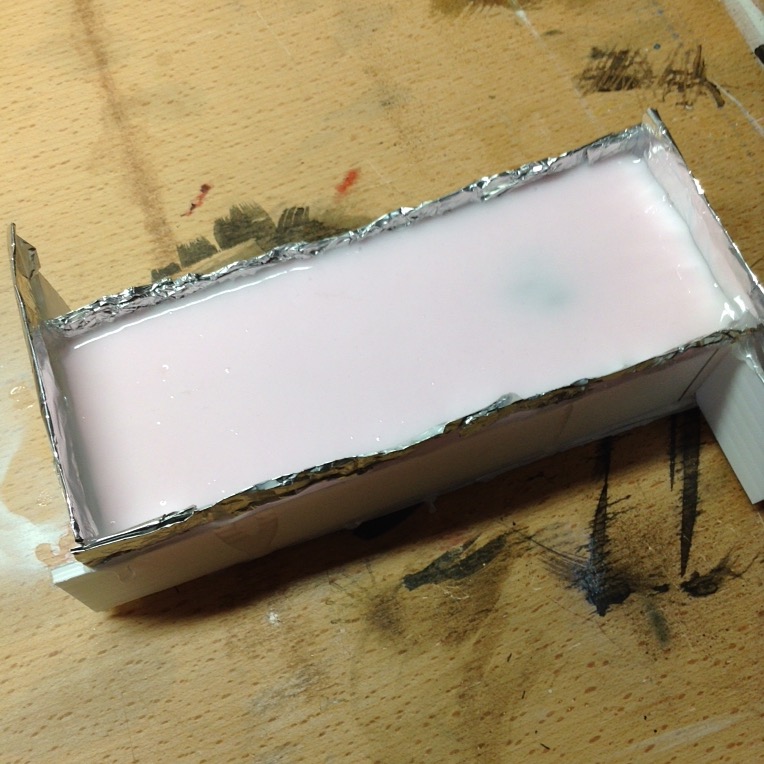
My first egg was trying to get Amazing Casting Resin to look like a cracked egg. First I used Amazing Mold Rubber to mold a plastic egg. Then I mixed up equal parts of Amazing Casting Resin and gently poured it into the mold. As it was curing, I "rolled" the mold back and forth to get it to coat just the sides and bottom.


Even though it didn't quite turn out like I imagined – I wanted to decorate it somehow.  So I mixed up a couple of small batches of Amazing Clear Cast Resin colored them with blue and violet Alumilite Dye. I turned the faux cracked egg upside down and drizzled the resin over the egg.


After everything cured, it created an interesting piece.


My second and third try was to create a clear egg with swirls of color. I used the same egg mold that I created, mixed equal parts of Amazing Clear Cast Resin and poured it into the mold. I then mixed up a couple of smaller batches of Amazing Clear Cast again and colored them with blue and violet Alumilite Dye.

In one of the tries: I poured a little of the colored resin on the top and took a popsicle stick and gently swirled the color around (trying not to "mix" it up).


Since this didn't give me the effect I was going for... I gave it another try – this time I mixed up Amazing Clear Cast Resin, and only filled the mold 1/2 way. Then I added and swirled in the colored resin, then filled it up with more clear resin. It still didn't give me what I was looking for, but it is pretty.

I'll keep trying! Where there is a will, there is a way....

What kind of resin projects
are you working on?

Have fun creating! ~ Tracy

You can find more of my work on my Blog:
http://tracykrueger-nine.blogspot.com/2017/

• • • • • • • • • • • • • • • • •


Don't forget to subscribe to our blog on the right side bar:
Twitter at AmazingCasting | Facebook at AmazingMoldPutty | YouTube at AmazingMoldPutty

Monday, March 26

#Cre8time Egg Decorating... AMAZING Easter Ornaments by Tracy Krueger

Hello, it's Tracy here! Being that Easter is right around the corner, I was trying to think of a quick and fun Egg decorating project. My kids are grown so we don't decorate real eggs anymore.


Then the simplest idea came to me! I have a mold that I had made out of a cut piece of brass (to make a Christmas ornament) and it has an Egg shape. I first mixed two equal parts of Amazing Casting Resin and poured it into my mold to give it a "egg base". I just love watching the Casting Resin cure... don't you :-)


After this base egg cured (I gave it about 15 minutes), I gathered three of my Alumilite Dyes that would be good for Easter – Blue, Purple and Yellow. I poured out very small equal portions of Amazing Casting Resin and squeezed out a tiny drop of each color into part "A" of the resin, then stirred color completely before adding part "B". CLICK HERE to view mixing/preparation.


The first color I mixed up was the yellow, and poured
random lines on top of my white cured resin.


As the yellow was curing, I was thinking "there has to be a better way to have more control over the colored resin". Awhile back I bought a bunch of disposable pipettes, so after the yellow cured, I mixed up the blue dyed resin and used the pipette to draw where I wanted my colored resin to go. It worked beautifully! I just love how I got some green where the blue was over the yellow.


Now I just had purple left. I mixed it up and used another pipette to squeeze the purple where I wanted. As always I kept a spare mold around to pour the extra resin in.


Once I was done applying the three resin colors, I let the whole thing cure for a couple of hours to make sure everything was set totally.


I took it out of the mold and trimmed the back a little, then drilled a hole in the top. I grabbed my sari ribbons and cut a small piece of a greenish/blue colored one.


I really like how this turned out.
It has kind of a watercolor look about it.


Isn't it fun that you can mix up your Holidays and make decorations for both?! I had quite a few more ideas, but have had a hard time getting them to come to fruition. I'll be back soon to share a few of my bad EGGS. 

How are you decorating for Easter?

Have fun! ~ Tracy

You can find more of my work on my Blog:
http://tracykrueger-nine.blogspot.com/2017/

• • • • • • • • • • • • • • • • •


Don't forget to subscribe to our blog on the right side bar:
Twitter at AmazingCasting | Facebook at AmazingMoldPutty | YouTube at AmazingMoldPutty

Thursday, March 22

#MixedMedia Easter EGG-spiration... by Michele Kosciolek

Hello fellow creatives! Michele here – with Easter right around the corner I have a little EGG-spiration for you today!!

I've decoupaged some craft eggs with tissue paper stamped with Viva Las VegaStamps!, then sprayed with Distress Sprays. Now, I have had these eggs for quite some time and have wanted to decorate them for Easter for just as long... I am so glad I finally did and took things one AWESOME step further!

I gave these eggs a coating of Amazing Clear Cast Resin – OMG – that was just what it needed to make these eggs POP!

Here they are!!


I decided to turn these into hanging eggs.


This one is hanging on May Arts silk ribbon
with a couple of hand blown glass beads.


This one is hanging on copper wire with
a couple of handmade Tibetan glass beads.


I love how these eggs shine and already have
them hanging with my Easter decorations!

How are you decorating for Easter??

Thanks for sharing part of you day with us!!!
Until next time... get creating!! Michele

For more projects and inspiration please visit my blog "Stuff by Belle"
or follow on Facebook: https://www.facebook.com/michele.kosciolek

• • • • • • • • • • • • 


Don't forget to subscribe to our blog on the right side bar:
Twitter at AmazingCasting | Facebook at AmazingMoldPutty | YouTube at AmazingMoldPutty

Monday, March 19

#Cre8time Transformations... Mixed-Media Easter Eggs with Lyn Gill


Hi everyone! Lyn here again this time with some Amazing Inspiration... Patina and Rust Easter Eggs!


These altered eggs were so fun and easy – created with some foil duct tape, texture paste and acrylic paints over plastic Easter Eggs with some Amazing Casting Resin embellishments.


What will you create using
and some plastic Easter Eggs?

Well that all for this now on the Amazing Casting Products blog – CLICK HERE to see more springtime inspiration.
Till Next Time! Lyn

You can find more of my work on my blog LynzCraftz
or on YouTube LynzCraftz, or my Facebook page LynzCraftz.


• • • • • • • • • • • • • • • • •

Don't forget to subscribe to our blog on the right side bar:
Twitter at AmazingCasting | Facebook at AmazingMoldPutty | YouTube at AmazingMoldPutty

Tuesday, March 6

How does your #Cre8time Garden Grow... Amazing Inspiration from Susan M. Brown {sbartist}


Hello Everyone... Susan here sharing some amazing inspiration... an upcycled mixed media project full of sunshine using Amazing Casting Products!

This project is a compilation of bits of this and that on my craft room table inspired by some castings of a house created from an embroidery kit frame molded using Amazing Mold Putty. I had one of these in a baggy with some scraps of papers, embellishments and ribbon – seems like a perfect time to do some Cre8time SPRING cleaning!


I monoprinted a pattern onto a leftover section of muslin fabric using my Amazing No-Gelatin Rubber Plate impressed with large bubble wrap into the white paint to make a nice muted sky background. To this I add some stamped foilage and stencil sprayed sunrays, then begin layering my assortment of ephemera, trim, gems and dimensional items.

I cut a section of painted patterned paper to fit behind my cast resin house. Inside a cast resin domino with sticky back gems for window {molded in Amazing Mold Rubber cast in Amazing Casting Resin}, a mini metal bicycle charm, green burlap trim, and pen doodling make this house a home... topped off with a green gingham bow! With the addition of a pearled flower as a "sun"... this sunny garden scene is complete!


I hope you enjoyed this mixed-media garden I've created
from an assortment of leftovers in my Cre8time stash. 

What kind of garden would you create? 

Thanks for visiting. If you would like to see more of my creations,
please visit my blog sbartist : painting in the dark by clicking here. ~ Susan


• • • • • • • • • • • • • • • • •

Don't forget to subscribe to our blog on the right side bar:
Twitter at AmazingCasting | Facebook at AmazingMoldPutty | YouTube at AmazingMoldPutty

Wednesday, May 3

How does your Amazing #Cre8time Garden Grow?!!

Hello Amazing Crafters! Welcome to May! Hopefully Spring has arrived where you are and that your Cre8time garden is in full bloom {Happy Fall to our friends in Australia and the Southern Hemisphere}.

It's National Scrapbooking Month and Mother's Day is just a week away... if you search our blog archives at the top left using keyword "FLOWER" you can find an amazing variety of floral projects using Amazing Casting Products.


What blooms have you found to mold?

Make your own embellishments or CAKE DECOR by pressing Amazing Mold Putty onto vintage jewelry, furniture hardware, buttons, bottlecaps, magnets, candle holders, cupcake toppers, or by stacking your own funky flowers. Go rummage through that junque drawer... the world is your garden!

• • • • • • • • • • • • • •

Don't forget to subscribe to our blog on the right side bar:
Twitter at AmazingCasting | Facebook at AmazingMoldPutty | YouTube at AmazingMoldPutty

Friday, January 27

#Cre8time Fashion Forward... #DIY Floral Hat Pin by Aimée Wheaton


Create these painterly flowers to add flair to your hats or scarves.

Hello, creatives! Aimée here today sharing a new project that was a test for me. I wanted to see if I could create a larger mold out of smaller molded objects glued together and I'm happy to say that my Amazing Casting Products didn't fail the test!!

I really had a lot of fun with this project – it is so versatile. My original thought was to drill holes on both sides and create a cuff necklace. I may still experiment with that. I've never combined molded/cast items to create a larger molded piece so I was really excited when it worked for me.

So here we go!


The first thing I did was to create a mold of this metal leaf I had cut off of a home decor piece. I mixed two equal parts of Part "A" and Part "B" of Amazing Mold Putty and formed it around the leaf. CLICK HERE to view mixing/preparation.


You can see the impression here. :) It's a reusable mold now.


Next, I mixed equal parts of Amazing Casting Resin and poured into the different flowers molds I had (from previous projects) to create different flowers. CLICK HERE to view mixing/preparation.


I love molding flowers apparently! When the resin cured I arranged them in a resin bouquet and hot glued them together to arrange one solid piece. I could have stopped here – but I wanted to take it one step further...


So I used Amazing Mold Putty again to create a larger mold of these united all together as one piece. You can see the glued piece, the solid piece, and the mold together here!


I filled this new mold with Amazing Casting Resin.


This results in a beautiful opaque white resin piece... a blank canvas for embellishing! I painted the solid piece with acrylic paint and added some blingy glitter. I sealed it with a varnish and then glued on a pin back so it can be used on a hat.

Here it is!!


I like how Frida Kahlo-esque it looks!


What do you think?

Let's see what you can
create by combining molds!

Feel free to stop by my FB page to see the latest with me.

To see more of my work please visit my new blog "Life Glitter Makeup"
and also at the Aimée Wheaton Art and Design website.

Till next time! Xoxo Aimée

• • • • • • • • • • • • • • • • •

Don't forget to subscribe to our blog on the right side bar:
Twitter at AmazingCasting | Facebook at AmazingMoldPutty | YouTube at AmazingMoldPutty

Monday, May 9

#Cre8time Critters in the Flower Garden... by Lara Hjorthoy #FlowerPower


Hello Fellow Creatives! Lara here and I'm so thrilled to start my time here at Amazing Casting Products, as part of their Creative Team!

Today, I'm going to share a little flower inspired Monster today, FLORA! After all April showers bring May Flowers! And on Monsters no less!!! Watch those hands while gardening my friends, she's sure to give you a tickle!


I first created Flora using Super Sculpey and cooked
her in the oven as per instructions.


Then created a mold box using corroplast {plastic foam core} and hot glue. I find this makes for a really strong box. You'll notice the tin foil flashing around the top of this box. I realized after adding Flora to the box, that she was a bit too tall for the box, so adding the flashing, makes sure I can pour the Amazing Mold Rubber completely over the top of her head.

Before I added the Mold Rubber, I chopped up an older mold that I wasn't using anymore and added the bits as a filler to portions of the box. This allows me to use less of the Mold Rubber in the end – a neat trick I learned on one of the many available videos on YouTube!


Then I prepared a batch of Amazing Mold Rubber, then filled up her mold and waited the 2-4 hours for it to set up. I live in a humid environment and it sets pretty quickly here! CLICK HERE to view mixing and preparation.

I love that I can wait such a short period of time, and then begin the casting process! It's a one day job and I can wind up with an army of creatures! When the mold has cured and I've removed it from the box, I snipped a tiny bit along the bottom edge, where her head is (the mold locked her into place and she was very hard to remove, I clamped the sides down with some foamcore and clamp tape, to keep it strong). 


I then mixed and poured the resin. I love this stuff. Amazing Casting Resin sets up in an incredibly short time! You can watch it even as it starts to cure! CLICK HERE to view mixing and preparation.


Within 10-20 minutes, I have a Flora! All ready to go to be painted up!!!


And then... in no time, an entire army of Flora's!
My cat went insane!


For the painting process, I always have a reference, and let me tell you, the world has some beautiful lizards out there! There is sooooo much inspiration for colors it's hard to choose!

I decided this time, to keep her in spring mode, and chose this little guy as her paint scheme.


Airbrush, brushes, toothbrushes and more are used to get the texture's she needs, but in no time! She's completed!!! Welcome to Spring little monster Friend! I hope you enjoyed the process of FLORA! And that she inspired your own Monster Creations!

See you soon, Lara!

Check out my website at www.larahjorthoy.com and YourToyCreation.etsy.com. You can follow my day to day creations at Facebook and Instagram, look for YourToy Creations!

• • • • • • • • • • • • • •

Don't forget to subscribe to our blog on the right side bar:
Twitter at AmazingCasting | Facebook at AmazingMoldPutty | YouTube at AmazingMoldPutty
Related Posts Plugin for WordPress, Blogger...